This article was published as part of the Data Science Blogathon.
Introduction
In Data Visualization, Dashboard is the great graphical user interface that helps you display information in a highly interactive and informative way. Helps visualize key indicators and data trends.

The various graphics, like bars, cakes, line charts, etc., help explore the data set and provide us with useful information. Dashboards are really useful for displaying key performance indicators effectively. But nevertheless, creating dashboards is always a tedious task for developers.

There are some libraries like Plotly, Bokeh in Python that allow you to create a dashboard. But I didn't find these to be easy to create a perfect board. Finally, I found some easy ways to create a dashboard that allows you to create quite an effective and informative dashboard.
Streamlit
Streamlit is gaining popularity in machine learning and data science. It is a very easy library to create a perfect board by spending a little time. It also comes with the built-in web server and allows you to deploy to docker container.
Streamlit Settings
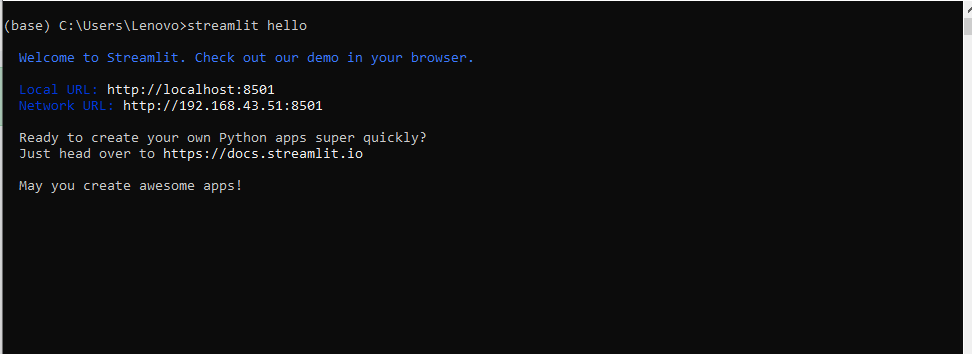
Let's first install Streamlit on our system and run the hello command to check its working condition. We can exit the running application using Ctrl + c.
$ pip install streamlit
$ streamlit hello
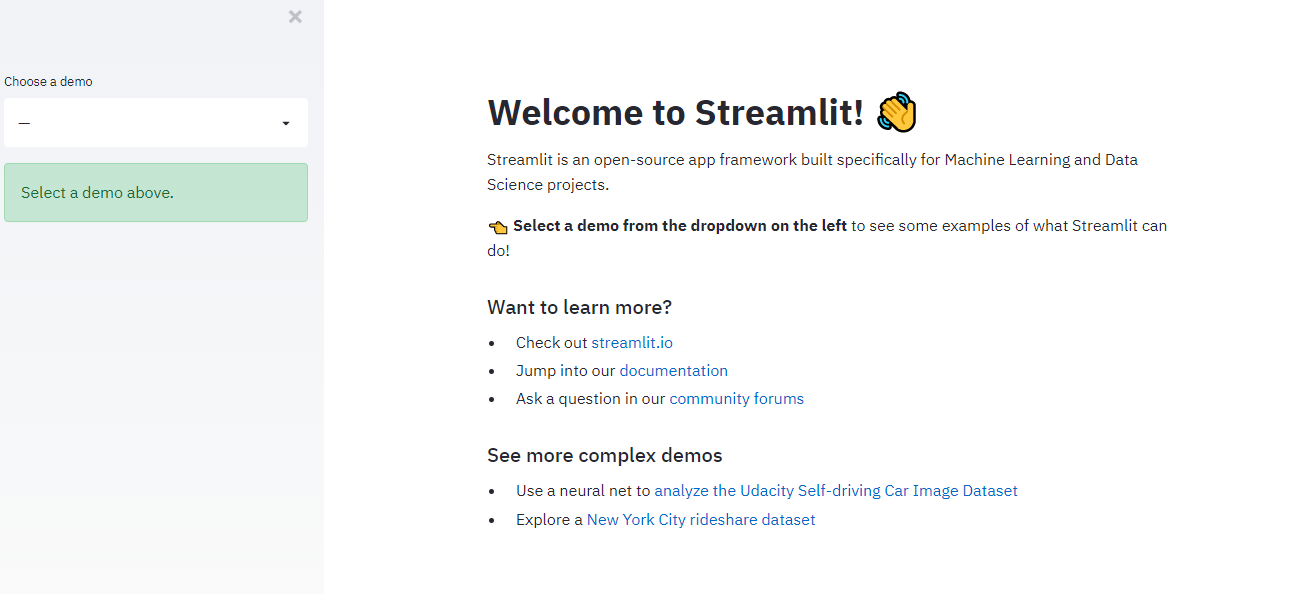
Below is the command prompt, you can see that the application is running perfectly.
When I run the application, the localhost server will open in your browser automatically. This is the homepage of the Streamlit app open source framework.
Import libraries
We are going to import the necessary libraries to plot and display information.
import streamlit as st
import pandas as pd
import numpy as np
import plotly.express as px
from plotly.subplots import make_subplots
import plotly.graph_objects as go
import matplotlib.pyplot as plt
We can display the text in different ways. Streamlit allows you to write the title, the header and also supports various functions.
- st.title () – to set the title
- st.text () to write the description of the particular graph
- st.markdown () to display the text as a discount
- st.latex () to display mathematical expressions on the board.
- st.write () helps show everything, as graphic, data frame, functions, model, etc.
- st.sidebar () is used to display data in the sidebar.
- st.dataframe () to display the data frame
- st.map () to display the map in a single line code, etc.
Set title and sidebar caption for Streamlit dashboard
- st.title (“Covid-19 Panel for India”)
- st.markdown (‘The panel will visualize the situation of Covid-19 in India’)
- st.markdown ('The coronavirus disease (COVID-19) is an infectious disease caused by a newly discovered coronavirus. Most people infected with the COVID-19 virus will experience mild to moderate respiratory illness and recover without requiring special treatment.’ This application provides you with real-time impact analysis of confirmed cases, deceased, active and recovered from COVID-19)
- st.sidebar.title (“Display selector”)
- st.sidebar.markdown (“Select graphics / graphics accordingly:”)
Load the dataset
Here we are going to use the COVID-19 dataset for the dashboard visualization.
DATA_URL=('E:Data science ProjectsNIELIT projectcovid_19_world.csv')
@ st.cache(persist=True)( If you have a different use case where the data does not change so very often, you can simply use this)

def load_data():
    data=pd.read_csv(DATA_URL)
    return data

covid_data=load_data()
Visualization of data by cases
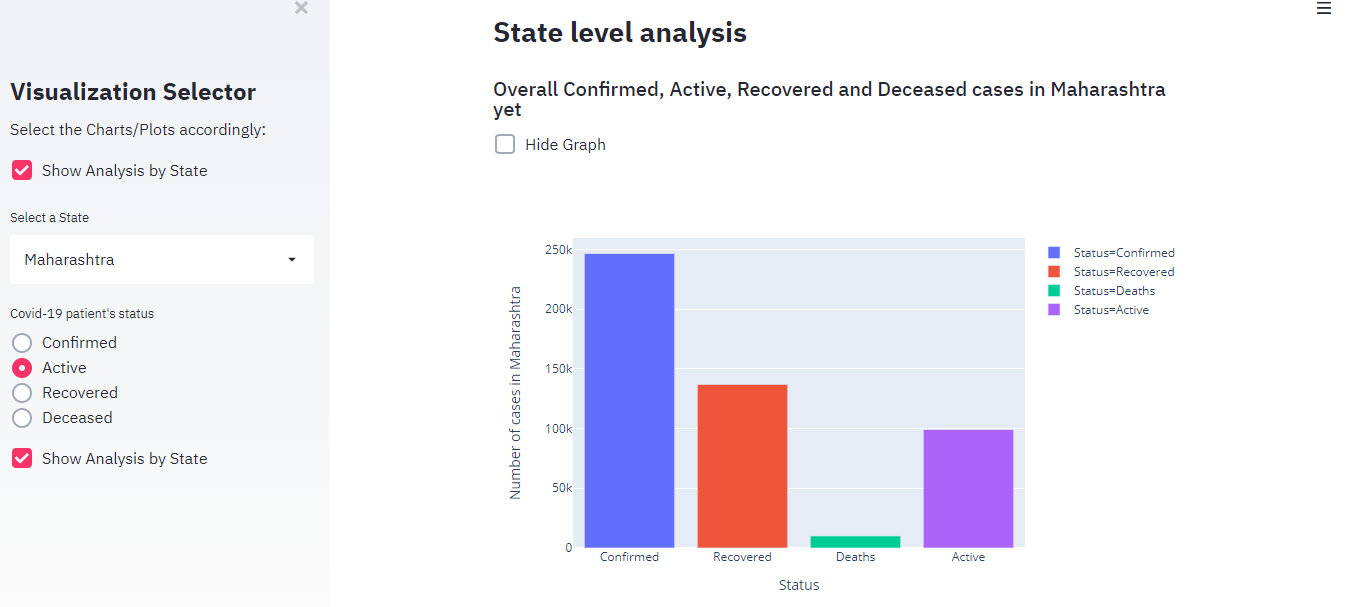
st.sidebar.checkbox("Show Analysis by State", True, key=1)
select = st.sidebar.selectbox('Select a State',df['state'])

#get the state selected in the selectbox
state_data = df[df['state'] == select]
select_status = st.sidebar.radio("Covid-19 patient's status", ('Confirmed',
'Active', 'Recovered', 'Deceased'))
We have used the checkbox to choose the analysis by states. Selectbox will show the list of states affected by COVID-19. The radio button to choose Active cases, Confirmed, Death or Recovered.
Plot the graph
def get_total_dataframe(dataset):
    total_dataframe = pd.DataFrame({
    'Status':['Confirmed', 'Recovered', 'Deaths','Active'],
    'Number of cases':(dataset.iloc[0]['confirmed'],
    dataset.iloc[0]['recovered'],
    dataset.iloc[0]['deaths'],dataset.iloc[0]['active'])})
    return total_dataframe

state_total = get_total_dataframe(state_data)

if st.sidebar.checkbox("Show Analysis by State", True, key=2):
    st.markdown("## **State level analysis**")
    st.markdown("### Overall Confirmed, Active, Recovered and " +
    "Deceased cases in %s yet" % (select))
    if not st.checkbox('Hide Graph', False, key=1):
        state_total_graph = px.bar(
        state_total,
        x='Status',
        y='Number of cases',
        labels={'Number of cases':'Number of cases in %s' % (select)},
        color="Status")
        st.plotly_chart(state_total_graph)
After executing this code we can select the cases according to the required state. The get_total_dataframe method is used to get the dataset to plot the graph for the selected state.
To plot the graph, we have used the library method plotly.express. And finally, display the chart using st.plotly_chart ().
The chart showing the cases of Maharashtra.
Show a data frame or table
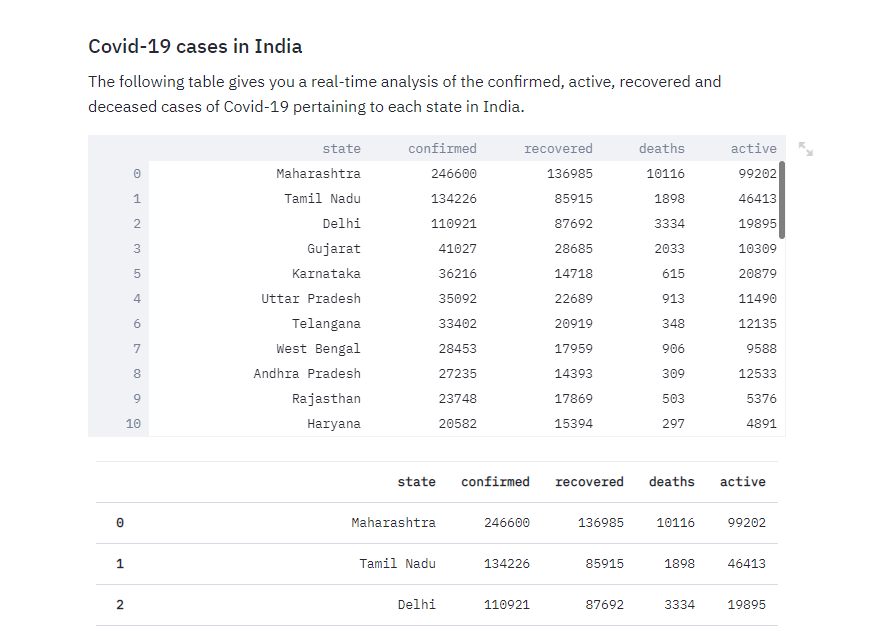
We can also see the data frame in table view using st.dataframe () y st.table ().
def get_table():
    datatable = df[['state', 'confirmed', 'recovered', 'deaths','active']].sort_values(by=['confirmed'], ascending=False)
    datatable = datatable[datatable['state'] != 'State Unassigned']
    return datatable

datatable = get_table()
st.markdown("### Covid-19 cases in India")
st.markdown("The following table gives you a real-time analysis of the confirmed, active, recovered and deceased cases of Covid-19 pertaining to each state in India.")
st.dataframe(datatable) # will display the dataframe
st.table(datatable)# will display the table
Conclution
Streamlit is considered the fastest growing machine learning and data science dashboard creation platform. It is considered one of the best panel libraries. You can experiment with different data sets to create interactive dashboards.


