Before starting to get into the development of a workflow, it is useful to know what SharePoint managed metadata is, since it will be fundamental for the configuration of the examples that we will give in this post. Managed metadata is a tool that allows us to classify and expand the information about the files stored in SharePoint, thanks to this we can have a series of organizational capabilities such as the possibility of creating filters and views that help the user to navigate through the content. faster and more efficient.
For more information on creating metadata in SharePoint, you can check the following page.
Workflows in SharePoint Designer add logic to a site or app application without having to write custom code. With the workflow designer, we can create rules that associate conditions and actions with Microsoft SharePoint list and library items so that changes to list or library items trigger actions in the workflow.
To create a workflow, we must have the SharePoint Designer application installed and connected to the site on our computer, this tool can be obtained for free in the following Link.
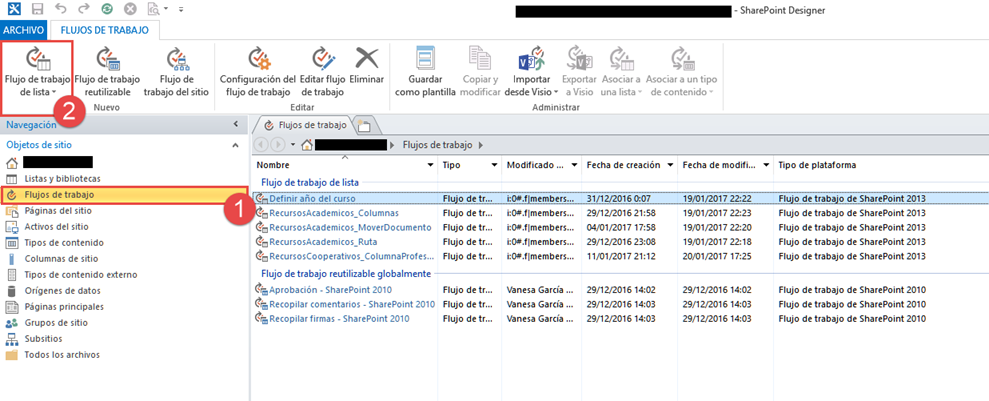
We open Sharepoint Designer and click on “Work flows” in the menu on the left side of the window. On the menu “Work flows” we show “Workflow list”.
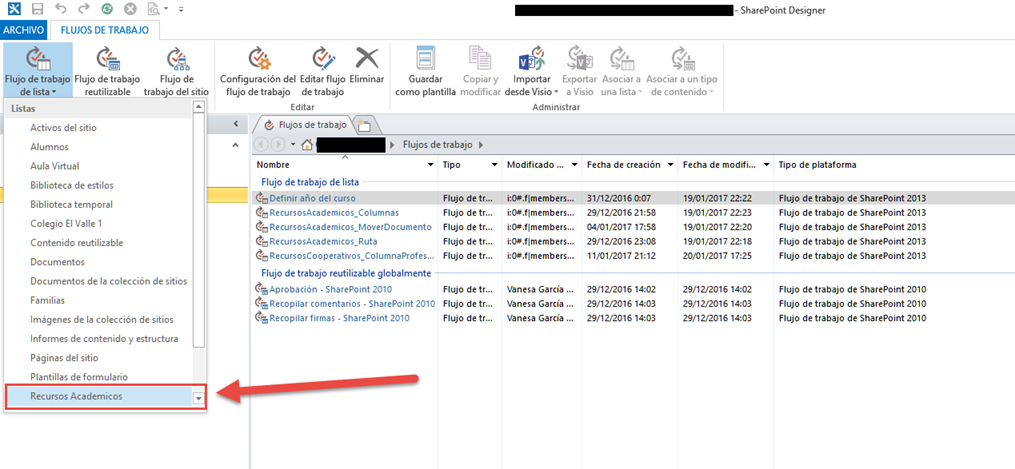
We select the list or library from which we want to create the workflow.
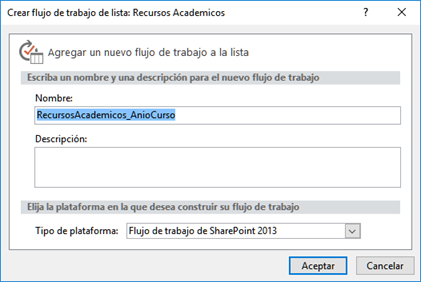
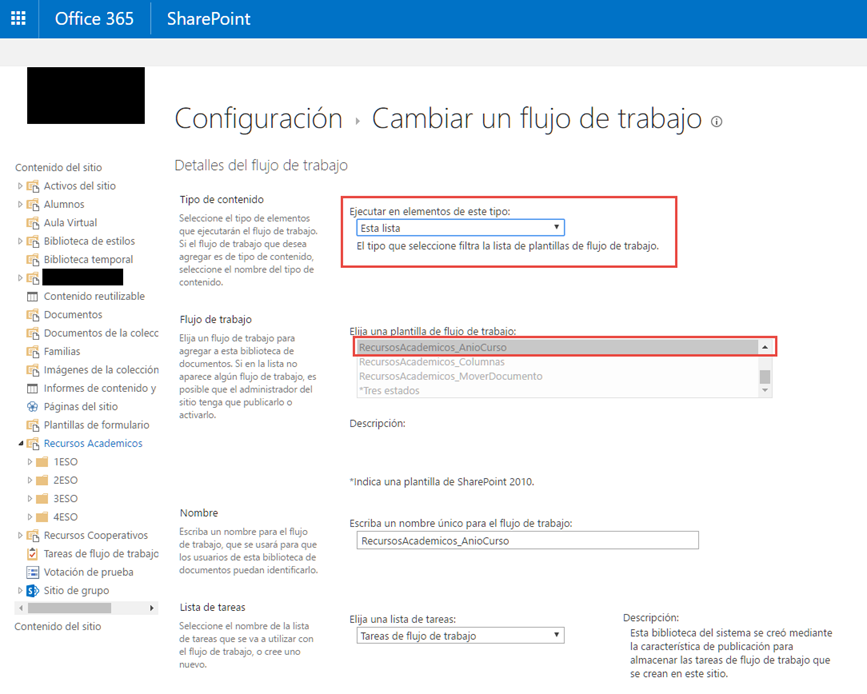
We enter the name, description and platform type of the workflow we are creating. And click “To accept”.
Then, we define small actions that we can add to our flow.
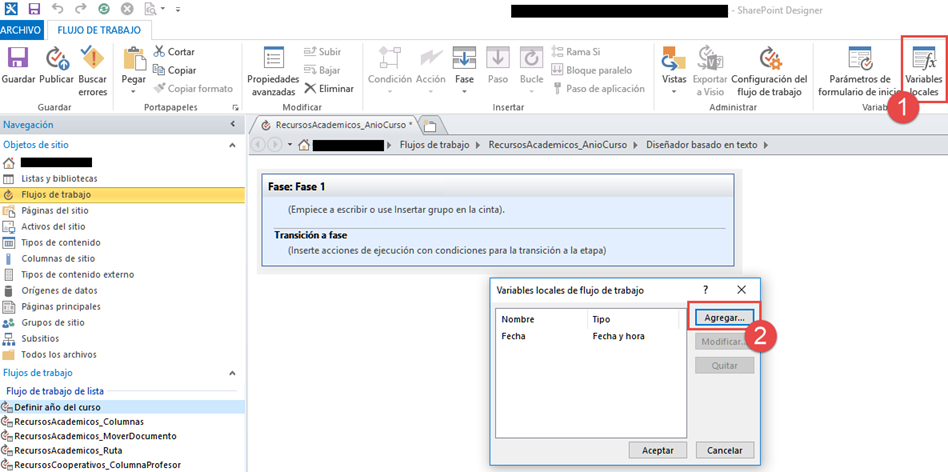
To create local variables, click on “Local variables” from the menu located at the top right. A window is launched in which we can add local variables to the workflow.
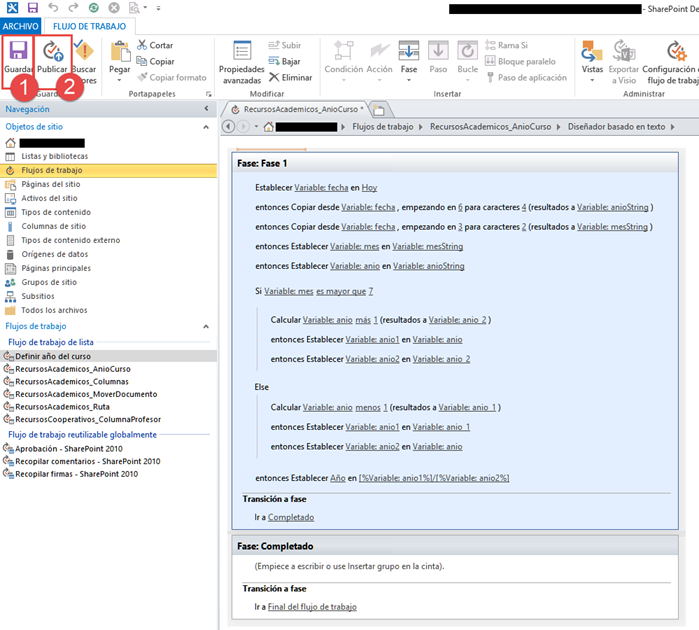
With the button “Phase” may add phases to flow. “Action” It allows assign values to variables, calculate, subtract strings, etc. “Condition” It allows add conditions to work flow. With these tools, you can create a workflow like the following. Which defines the year of the course of a metadata, based on the workflow execution date.

In the following code example, we have set the local variables “date”, “my”, “year”. To the variable “date” the current date has been assigned with the system variable “Today”. In “my” Y “year” the corresponding part has been copied based on the variable “date”. Namely, from the date variable, the month and year have been extracted and the values corresponding to the variables have been added “my” Y “year”.
So we have the following condition, if the value of the month variable is greater than 7 then we execute the code that adds the calculation of the year + 1 to the variable “year_2”. The value of the variable “year” is added to the local variable “year 1”. And to the local variable “year2” the value of the variable is assigned “year_2”.
If the condition is not met, add year calculation – 1 to the variable “year 1”, the value of the variable “year 1” is added to the local variable “year 1”. And to the local variable “year2” the value of the variable is assigned “year”. And finally, the following string is added to the metadata year [variable_anio1] + / + [variable_anio2]. An example of is “2016/2017”. Once the workflow is created, is saved and then published.
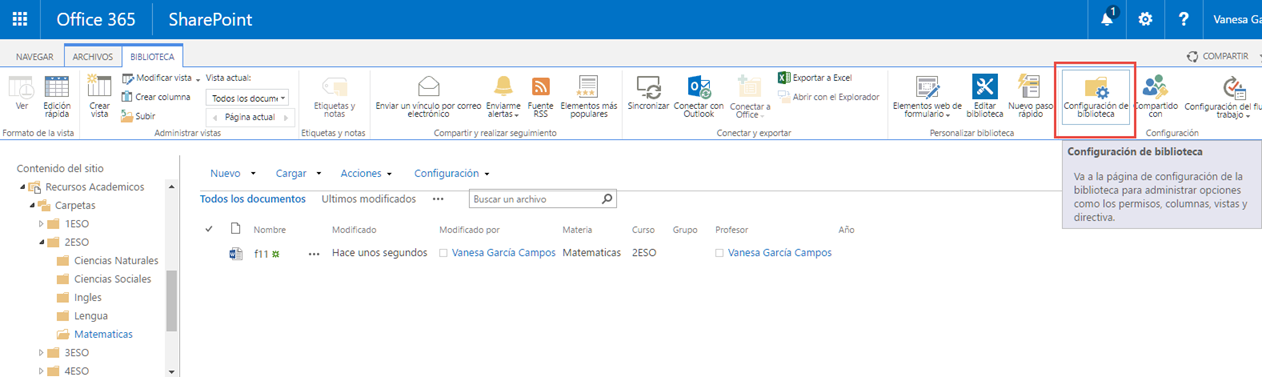
To watch the “Workflow” added to library, we access the library and click on “Library Settings”.
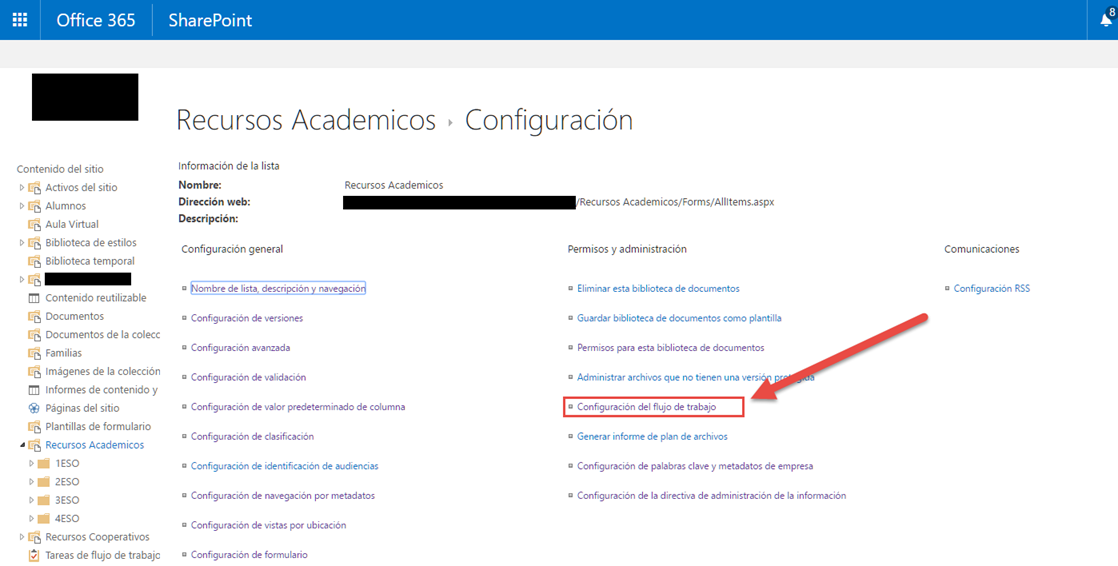
On the new page, we click on “Workflow configuration”.
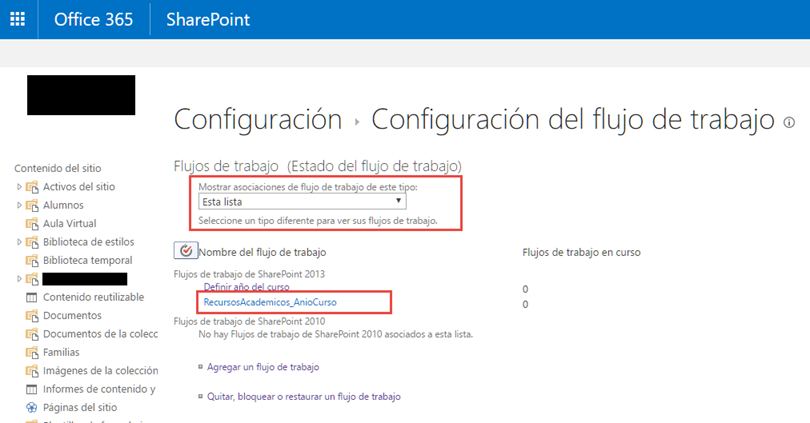
On the next page, we see that by default the workflow has been added as type “She is ready”.
If we click on the name of the resource, an edit form opens with the characteristics of the selected resource. In it we can configure the automatic execution of the workflow. As we can see, the workflow has also been added as a template.
Note: this means that when we create a workflow, actually a template is created which is then added as a flow on the SharePoint page with default settings. And if we delete a workflow on the SharePoint page, what we are really eliminating is the availability and automatic execution of it. Because what is called “Work flow” en SharePoint Designer, reflected on the page as a template.
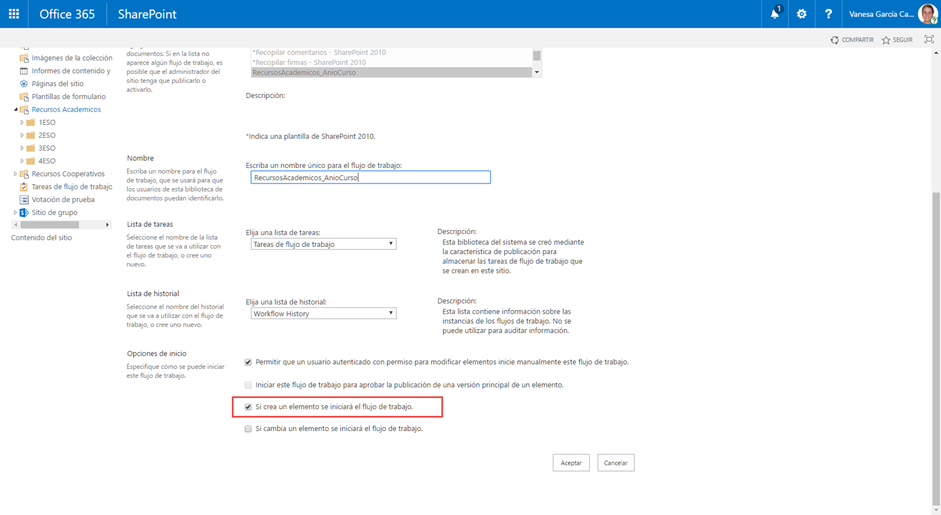
In this part we have the option to modify the workflow so that it runs automatically, when a document is loaded. For it, we select the box “An element is created, the workflow will start”, and we click on “To accept”.
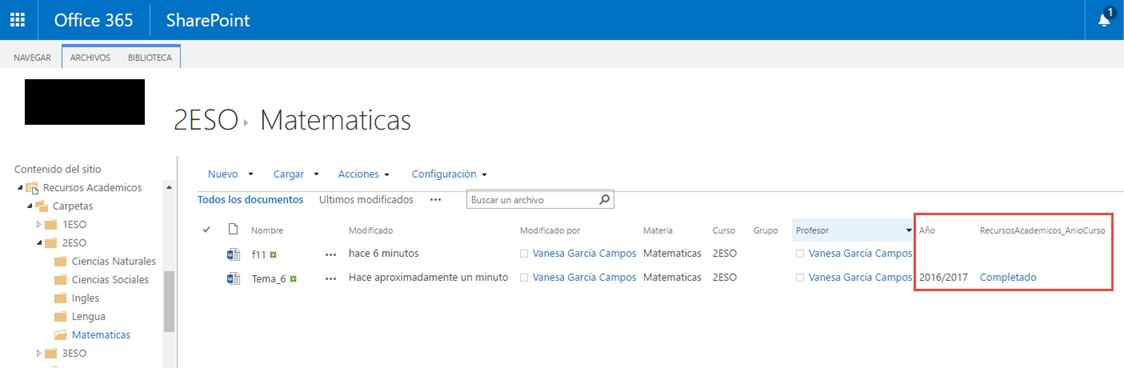
Finally we test that the workflow works, dragging a file to the library and checking that the column with the name of the workflow contains the name of the last phase of the flow. If it does not appear at the moment, we must update the page to view the changes.
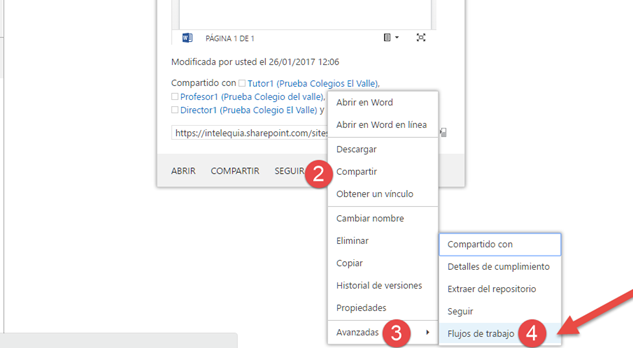
If we have configured the “Workflow”, to run manually. And we want to run a “Workflow” manually, we click on the three points of the file in which it is going to be executed, we access the three points, “Advanced” Y “Workflows”.
Then, workflows that have been configured to start manually will be displayed. To start one, click the name of the workflow.

Finally, on the next page we can see that it has been executed correctly.


