When we have to manage our Azure web portals Normally we go to the web portal that allows us to manage everything visually and quite intuitively. But we must not forget that we can also manage it through Windows PowerShell that will allow us to make changes in a more technical and precise way, being able to make changes to all our websites with a single line of code.
To start our journey with Azure PowerShell, we will briefly and concisely explain what we call “PowerShell”, this is nothing more than a command console much more complete and advanced than “MS-DOS” O “CMD”, that will allow us to fully manage our computers with Windows operating system. The distinctive feature of PowerShell is that it is an object-oriented shell. The input and output information at each stage of the process is a set of object instances, unlike what happens with traditional command interpreters, that only return and receive text.

What is Azure PowerShell?
It is a module that offers cmdlet (“Commands”) to manage our Azure subscriptions through PowerShell. We can configure, create and manage the solutions and services that Azure offers us. Everything we can do through the Azure portals can also be configured through the cmdlet that this module provides us.
Instalar Azure PowerShell
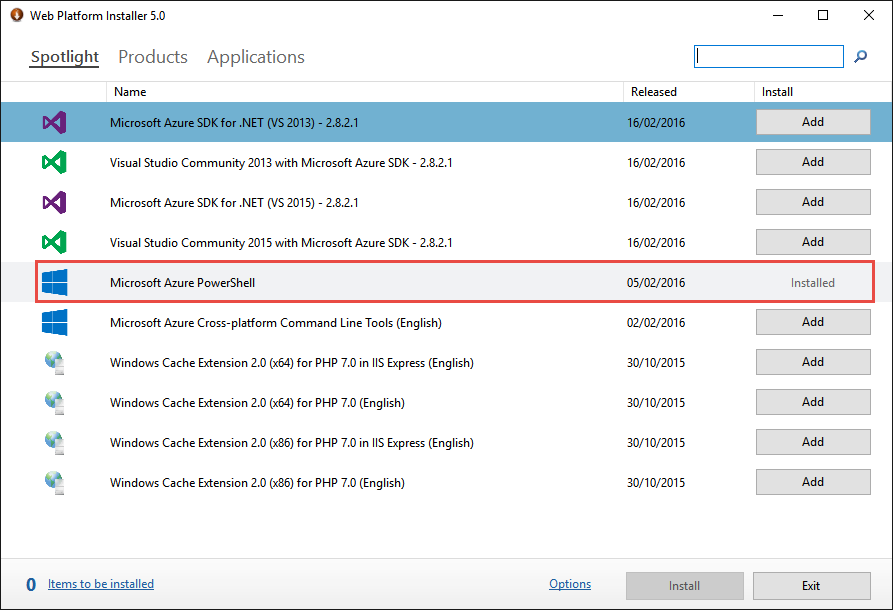
To start using Azure PowerShell, the easiest and fastest way is to download the following installation file “Azure PowerShell http://aka.ms/webpi-azpsWhich will show us a list of applications that, in our case, we will install "Microsoft Azure PowerShell"That will add the necessary cmdlets to be able to connect to Azure from a PowerShell console.
First steps
We open PowerShell and before connecting to Azure we must verify that our module “Azure PowerShell” has been successfully installed on our machine.
# We show the list of modules that we have installed
Get-Module –ListAvailable
# If it doesn't show us the Azure PowerShell module, we must import it
Azure import module
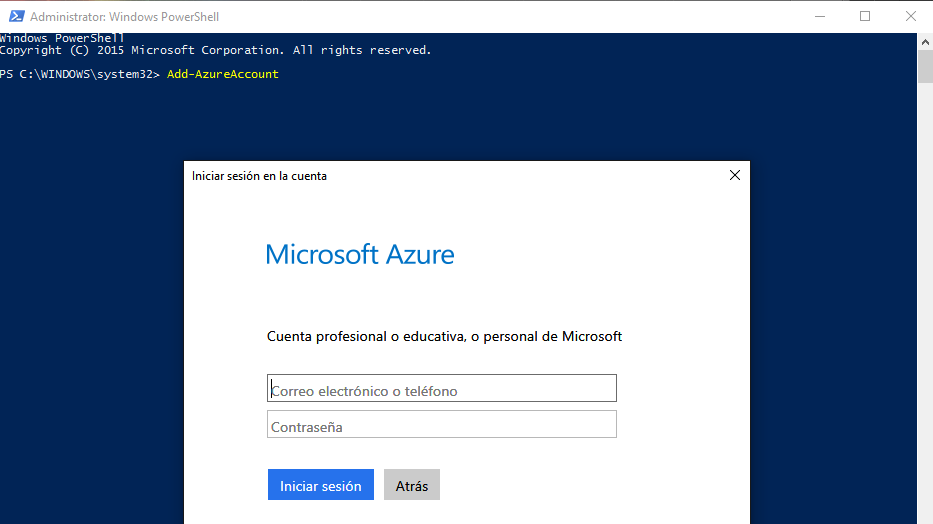
Then, we are going to connect with our credentials:
#Initiate we can apply transformations once for the whole cluster and not for different partitions separatelyThe "Session" It is a key concept in the field of psychology and therapy. Refers to a scheduled meeting between a therapist and a client, where thoughts are explored, Emotions and behaviors. These sessions can vary in length and frequency, and its main purpose is to facilitate personal growth and problem-solving. The effectiveness of the sessions depends on the relationship between the therapist and the therapist.. in Azure
Add-AzureAccount

Manage Azure websites
To select the subscription that we are interested in managing, We will see the list of subscriptions that we have available with our credentials and we will select the one in which the portals that we are going to manage are hosted.
# See the list of subscriptions we have associated with our credentials.
Get-AzureSubscription

# We select the subscription.
Select-AzureSubscription “Subscription name”
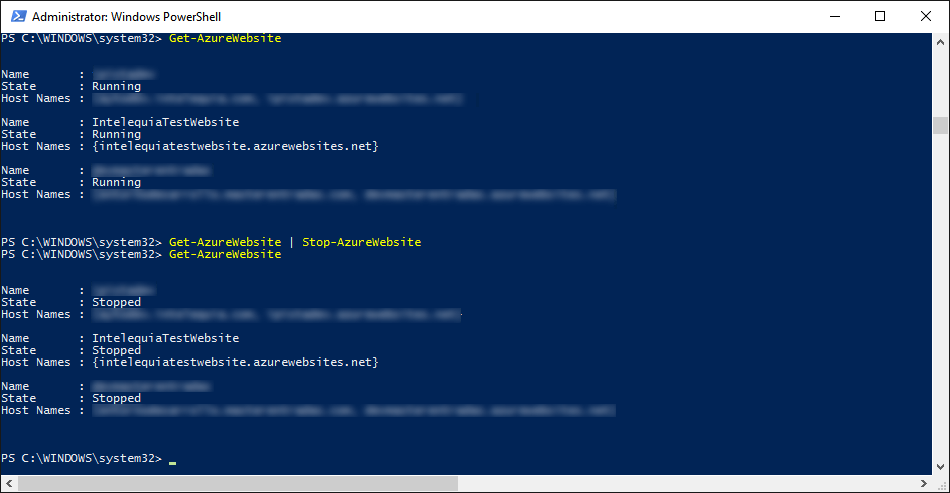
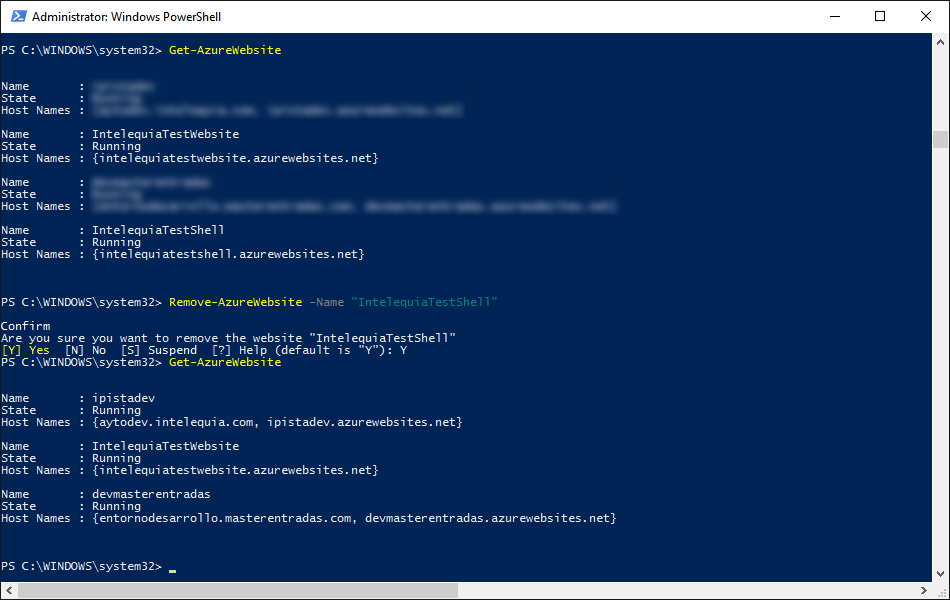
# List of Azure websites for the selected subscription.
Get-AzureWebsite

# Shows detailed information of a website.
Get-AzureWebsite –Name “Website name”
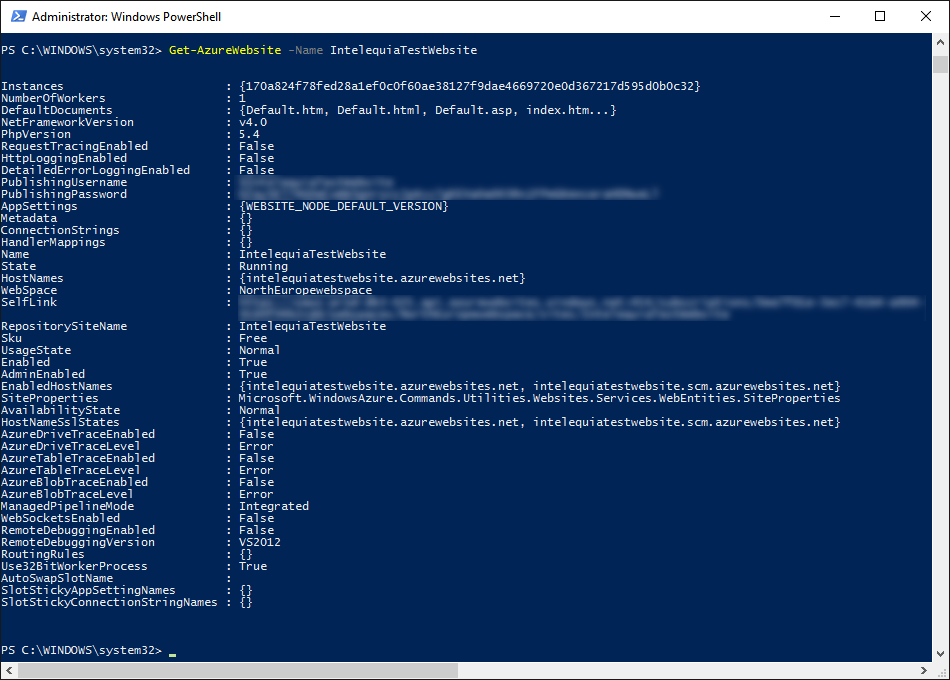
All this information that it does not display can be stored in a variable that, using the tab, we can go through all its properties.
# We store the website data in a variable.
$ variable = Get-AzureWebsite –Name “Website name”
# We configure the portal with the data that we have modified in the object.
Set-AzureWebsite –Name “Name of the website” –SiteWithConfig $ variable

The easiest way to modify several properties of a website is by changing the object we have saved in a variableIn statistics and mathematics, a "variable" is a symbol that represents a value that can change or vary. There are different types of variables, and qualitative, that describe non-numerical characteristics, and quantitative, representing numerical quantities. Variables are fundamental in experiments and studies, since they allow the analysis of relationships and patterns between different elements, facilitating the understanding of complex phenomena.... and using it as a parameter in the command “Set-AzureWebsite”. We can perform more administration tasks with the different parameters of “Set-AzureWebsite”.
We can use tubes “|” to perform an action for all the websites of our subscription.
#For all the portals of our subscription.
Get-AzureWebsite | Stop-AzureWebsite
Create an Azure website
We can create in an instant a website with the name and location that we want by following the following lines:
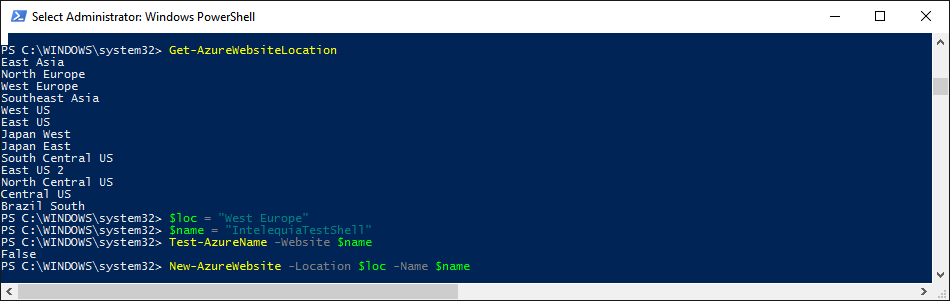
# List of locations available for our website.
Get-Azure website location
#Check if the name we have chosen for our portal is busy. If it is false, the name is available.
Test-AzureName – Website “Website name”
#Create our Azure website with the data we have provided by parametersThe "parameters" are variables or criteria that are used to define, measure or evaluate a phenomenon or system. In various fields such as statistics, Computer Science and Scientific Research, Parameters are critical to establishing norms and standards that guide data analysis and interpretation. Their proper selection and handling are crucial to obtain accurate and relevant results in any study or project.....
New-AzureWebsite – Location “Location name” – Name “Website name”
Delete a website from Azure
There is nothing easier than deleting a website from Azure using commands, to do it you just have to execute the following:
# List of locations available for our website.
Remove-AzureWebsite –Name "Website name".
And if we want to remove all Azure websites from our subscription we will use the following method:
# List of locations available for our website.
Get-AzureWebsite | Remove-AzureWebsite.
In summary, Azure PowerShell is one of the most powerful tools that Microsoft offers us to administer and manage your environment in the cloud. In future publications we will discover commands and scripts that will help us to optimize our services in Microsoft Azure.