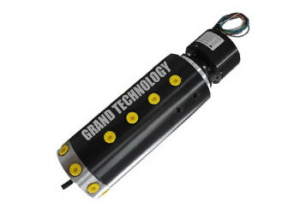
An endoscope is a useful tool that enables you to penetrate and inspect hard-to-reach places when necessary.. And even though said device was originally created for medical purposes, can now easily be purchased for later use with a PC or smartphone. We will describe the second connection option later in the post.
Connect the endoscope on Android
The procedure for connecting the endoscope to the phone can be divided into two steps, which boils down to plugging in a cable and using one of the special programs. There are no specific requirements for the Android device and the version of the installed operating system for a successful connection..
Paso 1: hardware connection
Today, There are two types of external camera connection, which are divided into wired connection and wireless connection. We are going to study both options.
Option 1: USB endoscope
To connect the USB device to your phone, use the included cable and, if required, an adapter “USB a micro-USB”. Most of the time, the endoscope is initially equipped with a micro-USB connector, which must be connected to the respective port of the phone.
It should be noted that not all smartphones are compatible with USB endoscopes, since some models are more demanding with respect to consumption and, therefore, cannot be connected to the phone port due to lack of power to operate the camera and light. background simultaneously. There is no way around these limitations, so it should be taken into account in advance when selecting a model.
Option 2: Wi-Fi endoscope
- Some more expensive endoscope models allow connection via the supplied Wi-Fi module, which is compatible with both phones and computers. First, turn on Wi-Fi by pressing the button marked in the screenshot.
Connect the device's micro-USB cable to the port highlighted by the green indicator and the Wi-Fi icon. This will make the camera ready to transmit a signal over a wireless network..
Note: The second port is used only for charging, since unlike the wired endoscope, this device works with its built-in battery.
- On your phone, and a “Settings”.go to section “Wifi”. and use the slider to activate the wireless network. This will automatically start searching for available devices.
- From the list that appears, select the desired device whose name must match the endoscope model name. To continue, in the window with the network name, click on “Connect”..
- To determine a successful connection, you must also specify the default PIN code established by the manufacturer. In the same way as the network name, it is convenient to find it in the device's instruction manual, since the combinations can be different in the different devices.
To activate it, sometimes you will have to confirm the connection through a special window on the phone screen. This will have to open the standard application. “Camera”. or one of the special programs we discuss below. Some actions will be different depending on the smartphone model.
Paso 2: Endoscope Applications
Some endoscope models can use standard camera apps when connected to your phone, so special software is not always required. Despite this, these variants are rather exceptions, While the vast majority of devices will work stably only if you have one of the special applications available for download in the Google Play Market search engine..
Vista OTG
The best Android app for capturing images and controlling a separately connected camera can be safely called OTG View. This application is compatible with most USB endoscopes and can work well with devices connected via Wi-Fi.
Download OTG View from Google Play Market
- After following the steps in the first section of the instructions, open OTG view. Due, the photo or image from the external camera will appear on the screen. You can use the icon in the upper left corner of the screen to update the connection.
- With the app, video or photo recordings can be created, what, combined with the features of many endoscopes, ensures high quality. At the same time, the image can be mirrored or rotated using the auxiliary menu.
- It should be noted the configuration in the application, limited to some options, such as video mode and watermark display. Depending on the version of the operating system, the application can change for better or for worse.
Since this solution is originally designed to work with an endoscope and is the best, try using OTG view first. Also note that software compatibility may be mentioned on the package or in the device manual.
AN98
The AN98, in the same way as the variant previously discussed, is designed exclusively for endoscope operation, so it will probably have to be installed separately. Not much different from OTG View and offers almost identical functions. At the same time, most device models also work through the AN98.
Descargue AN98 de Google Play Market
- To access the camera image, open the app and wait for the download to complete. If a black screen later appears, check the connection of the external camera with the smartphone and update the connection with the button in the upper left corner.
- Here, as in the previous case, you can rotate or mirror the image, create photos and videos saved in the application working folder. Despite this, camera control is only enabled when creating a photo.
- Unlike OTG View, the settings here are very limited and it doesn't even have its own menu. The only thing that can be changed is the capture area when using photo and video capture.
The software is a great option to work with the camera, especially if for some reason the first app doesn't work. The software can be used on any smartphone, regardless of the operating system version.
CameraFi
The application is very different from the previous variants, since it is not originally designed for an endoscope, but for any external camera. This enables a much larger number of functions, but compatibility with many devices cannot be guaranteed.
Download CameraFi from Google Play Market
- Connect the endoscope to your phone and launch the application. Throughout the first power-up, you will be asked to confirm additional permissions in the respective window.
- If the image does not appear on the screen in automatic mode, Check or reconnect the external camera and press the connect button on the panelA panel is a group of experts that meets to discuss and analyze a specific topic. These forums are common at conferences, seminars and public debates, where participants share their knowledge and perspectives. Panels can address a variety of areas, from science to politics, and its objective is to encourage the exchange of ideas and critical reflection among the attendees.... inferior. This should update the image.
- As we already mentioned previously, due to software features, here are several additional features. As an example, it is feasible to control not only the position of the frame, but also the brightness and contrast before creating the image.
- Options also offers a much more extensive range of sections. You will have to explore the alternatives yourself, since the only element that affects the performance of the endoscope is “Camera selection”.. This is where you can specify an external device if, for some reason, the software uses the phone's built-in cameras.
The main problem of the application is the presence of ads on all pages, including configuration section. You can deactivate the ads through the integrated store by selecting the respective payment service.
Wi-Fi view
The last most suitable software for the endoscope will be Wi-Fi View, primarily intended for devices with wireless connectivity. The app should only be used in conjunction with the Wi-Fi variant of the device.
Descarga Wi-Fi View de Google Play Market
- Make the Wi-Fi connection of the endoscope via “Settings”. before the signature appears. “Connected”.. Then, open the previously downloaded app and wait for the image to appear.
- The application offers all the basic functions, either to create a photo or video using an external camera with WiFi. To access the library, furthermore a separate page with two tabs is provided.
- You can change your name or password in the settings, but it will not be available for the endoscope. The only important setting is the ability to change the resolutionThe "resolution" refers to the ability to make firm decisions and meet set goals. In personal and professional contexts, It involves defining clear goals and developing an action plan to achieve them. Resolution is critical to personal growth and success in various areas of life, as it allows you to overcome obstacles and keep your focus on what really matters.....
As you see, in most cases it is sufficient that the application can access the camera image or at least determine if the endoscope is incompatible with the software.
The instructions presented for connecting the hardware and the subsequent use of the endoscope are sufficient to properly connect the external camera to the phone.. To avoid possible problems, follow the procedure by first connecting the camera and only later testing the applications.
We are glad we were able to help you with your problem..
Describe what didn't work for you.
Our specialists will try to respond as soon as possible.


