This article was published as part of the Data Science Blogathon
Introduction
I will guide you through the process of Implement a machine learning model as an API using FastAPI and Heroku. Things covered in this article:
- A quick introduction to the dataset and model
- FastAPI basics
- How to structure your code to use the ML model
- How to test and recover this API?
- Implementation in Heroku
- Bono: Generation of documents

The data set and the model
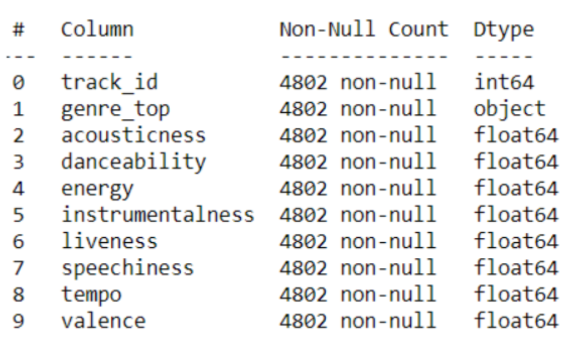
The problem statement I have chosen for this series of articles is Music Genre Classification. The data set has been compiled by a research group called The Echo Nest. Contains various technical details about the music. These include Acoustics, danceability, Energy, instrumentality, vivacity, speaks, tempo and valencia. The objective variable of these data is whether the song belongs to the Rock or Hip-Hop genre.. Then, some details about the dataset are shown:
The identification of the track was not useful for our analysis and, Thus, it was deleted. Genre_top is our target variable and contains “Rock” O “Hip-Hop”. I trained a decision tree classifier for this dataset and got a good precision score. (I did not try other ensemble models like Random Forest, but you can try it).
Once you have finished fitting the model and testing it with random data, it's time to select the model. Stripping is the process of converting a Python object to a byte stream. Save the model as a file so that it can be accessed / load later. Here is the code for the same if you are not familiar:
pkl_filename="model.pkl"
with open(pkl_filename, 'wb') as f:
    pickle.dump(model, f)
Introduction to FastAPI
It is a web framework that accelerates the backend development of a website using Python. This frame is brand new, adaptable and easy to learn. Allows users to quickly configure the API, generates automatic documents for all endpoints, offers authentication, data validation, allows asynchronous code and much more. It is built on Starlette, what is a frame / lightweight ASGI toolkit and provides production-ready code.
Secondly, Flask is older than FastAPI but still used for many projects. Its minimalist approach is promising and creating APIs with flask is not that difficult either. Both frameworks have their pros and cons.
Check out this article for a detailed FastAPI comparison: Is the suitable replacement for flasks?
To implement our machine learning model, we will use the FastAPI approach. Before diving into the code to create the model API, let's understand some basics of FastAPI that will help to better understand the code base.
FastAPI basics
The structure of the FastAPI code is very similar to the structure of the Flask application. You need to create endpoints where our customer service can make requests and get the required data. See the basic code implementation below:
import uvicorn

from fastapi import FastAPI

app = FastAPI()

@app.get('/')

def index():

    return {'message': "This is the home page of this API. Go to /apiv1/ or /apiv2/?name="}

@app.get('/ apiv1 /{name}')

def api1(name: str):

    return {'message': f'Hello! @{name}'}

@app.get('/ apiv2 /')

def api2(name: str):

    return {'message': f'Hello! @{name}'}

if __name__ == '__main__':

    uvicorn.run(app, host="127.0.0.1", port=4000, debug=True)
- The first two lines import FastAPI and uvicorn. The Uvicorn is used to implement the server and handle all calls in Python.
- Then, an instance of the FastAPI application is created.
- To add routes / endpoints to this application instance, a function is created and a route decorator is added. This decorator registers the function for the defined route so that when that particular route is requested, the function is called and its result is returned to the client. Generally, we return a JSON object so it can be parsed in any language.
- The best part of FastAPI is that you can define these routes directly for HTTP methods. In the flask, you have to manually add them to a method list (updated on the flask 2.0).
- To get customer inputs, you can use path parameters, query parameters or request bodies. The path “/ apiv1 / {Name}”Implements a route-based approach where parameters are passed as routes. The route “/ apiv2 /” implements a query-based approach where the parameters are passed by adding the “?” at the end of the URL and using “&” to add multiple parameters.
See these routes in action:

Request body focus
With this approach, customer data can be passed to our API. And FastAPI, to simplify things, we use Pydantic models to define the data structure for the receiving data. Pydantic performs all type checking of the parameters and returns explainable errors if the wrong parameter type is received. Let's add a data class to our existing code and create a path for the request body:
.

.

# After other imports
from pydantic import BaseModel
class Details(BaseModel):
    f_name: str
    l_name: str
    phone_number: int
app = FastAPI()

.
.
.

# After old routes
@app.post('/ apiv3 /')
def api3(data: Details):
    return {'message': data}
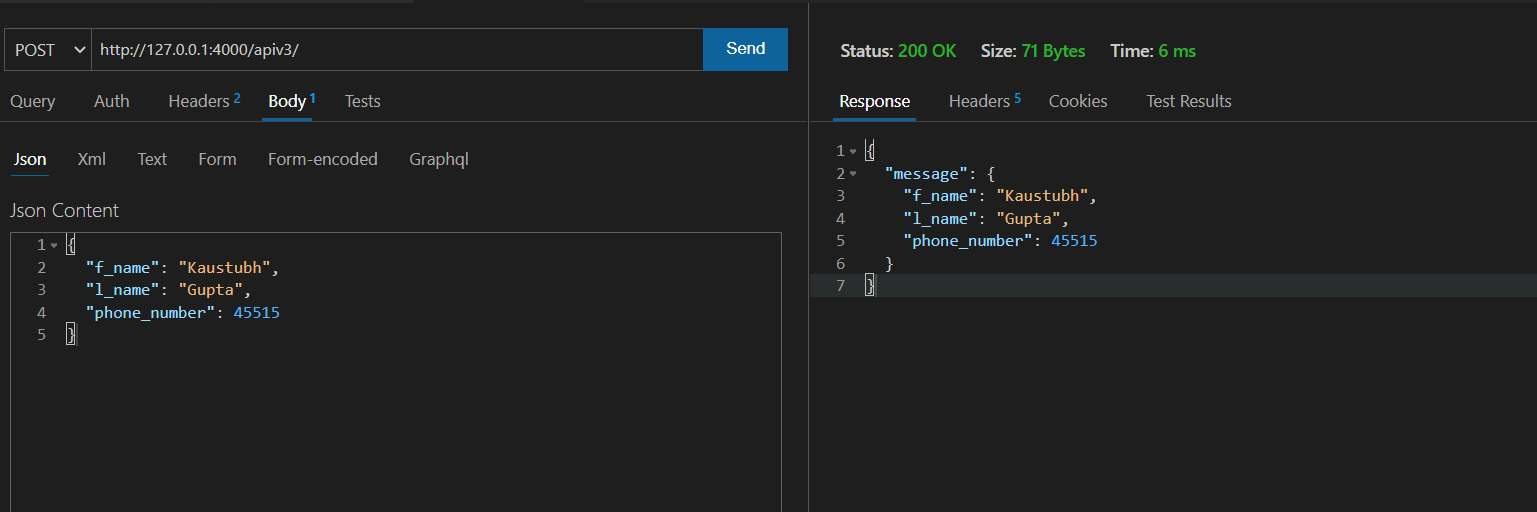
The path function declares a parameter “data” of the type “Details” defined above. This model of “Details” inherits from Pydantic's base model and offers data validation. To test this route, I am using the Thunder client VS code extension to make a post request to our API path “/ apiv3 /”:
Wrapping the model
Now that we have removed the concepts from FastAPI, it's time to integrate the model into the FastAPI code structure to make prediction requests. We will create a route “/ prediction” which will take the data sent by the body of the client request and our API will return the response as a JSON object containing the result. Let's look at the code first and then I'll explain the mechanics:
import uvicorn

import pickle

from fastapi import FastAPI

from pydantic import BaseModel

class Music(BaseModel):

    acousticness: float

    danceability: float

    energy: float

    instrumentalness: float

    liveness: float

    speechiness: float

    tempo: float

    valence: float

app = FastAPI()


with open("./FastAPI Files/model.pkl", "rb") as f:

    model = pickle.load(f)

@app.get('/')

def index():

    return {'message': 'This is the homepage of the API '}

@app.post('/prediction')

def get_music_category(data: Music):

    received = data.dict()

    acousticness = received['acousticness']

    danceability = received['danceability']

    energy = received['energy']

    instrumentalness = received['instrumentalness']

    liveness = received['liveness']

    speechiness = received['speechiness']

    tempo = received['weather']

    valence = received['valence']

    pred_name = model.predict([[acousticness, danceability, energy,

                                instrumentalness, liveness, speechiness, weather, valence]]).tolist()[0]

    return {'prediction': pred_name}

if __name__ == '__main__':

    uvicorn.run(app, host="127.0.0.1", port=4000, debug=True)
- We have created a Music Model class that defines all the parameters of our ML model. All values are of type float.
- Then, we load the model by detaching it and saving the model as “model”. This model object will be used to obtain the predictions.
- The path function “/ prediction” declare a parameter called “data” of the type of model “Song”. This parameter can be accessed as a dictionary. The dictionary object will allow us to access the parameter values as key-value pairs.
- Now, we are saving all the parameter values sent by the client. These values are now fed into the model's prediction function and we have our prediction for the provided data.
All the codes discussed in this article are available at my GitHub repository.
Model API test
Now is the time to test the API. You can test the API through two methods:
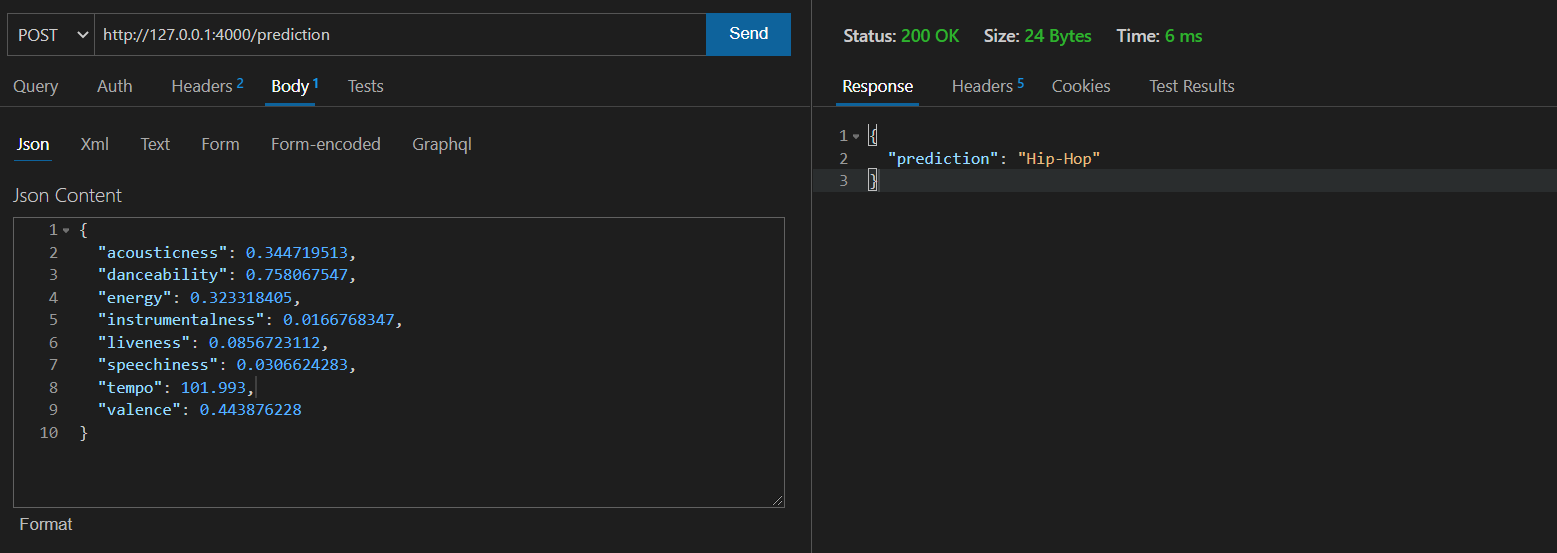
Thunder Client / Mailman
We are using the thunder client to send a post request to the path “/ prediction” with a request body. The request body contains the key-value pairs of the parameters and we should expect a JSON response with the classified music genre.
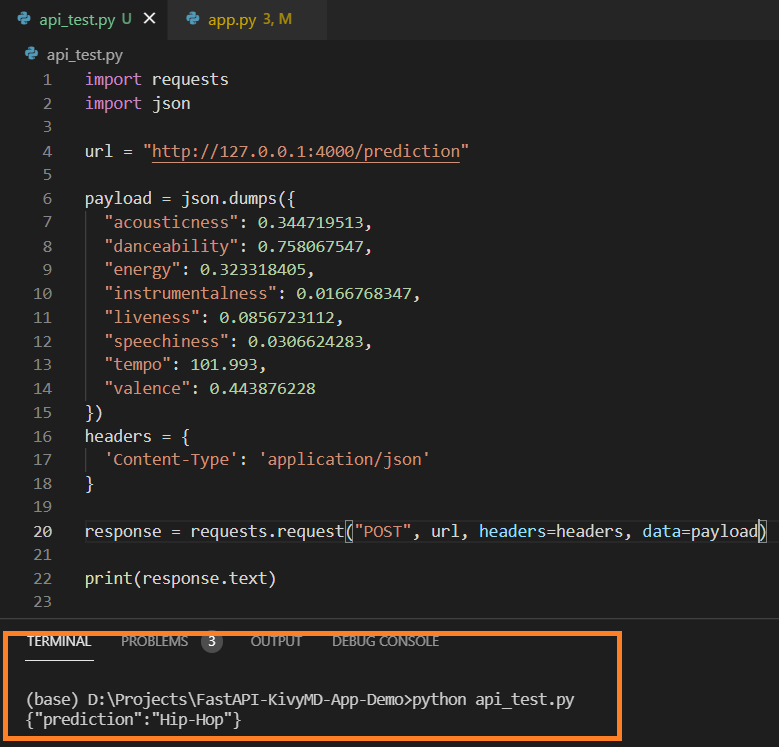
Make a request using the request module
If you don't want to use the VSCode extensions or any API testing software, you can just create a separate python program to call this API. Python request module allows APIs to be called.
import requests
import json

url = "<local-host-url>/prediction"

payload = json.dumps({
  "acousticness": 0.344719513,
  "danceability": 0.758067547,
  "energy": 0.323318405,
  "instrumentalness": 0.0166768347,
  "liveness": 0.0856723112,
  "speechiness": 0.0306624283,
  "weather": 101.993,
  "valence": 0.443876228
})

headers = {
  'Content-Type': 'application/json'
}

response = requests.request("POST", url, headers=headers, data=payload)

print(response.text)
Replace “local-host-url” with your url which you get after executing the API file of the FastAPI model. The output for this is:
¡Viva! You have successfully created an API for your machine learning model using FastAPI.
Implementation in Heroku
Our API is ready to be used by any type of program that makes a call to our API. But you can't run this program all day on your local system, that's practically impossible. Therefore, you must deploy your service on a cloud platform that can run your code and return returns.
Heroku is one of those platforms that offers free hosting. To implement our API in Heroku, we need to create these files:
- Requirements.txt: This file should list all the external modules that you used in your application. For our case, was FastAPI, scikit-learn, uvicorn and some other auxiliary modules.
- runtime.txt: This file specifies the version of Python that Heroku will install on its endpoint.
- Procfile: This file is the interface file between our Python code and the Heroku platform. Note: most of you don't create this file correctly. It is not a text file. This file has no extension. To create such files, you can use GitHub add files or Vs code or cmd on Windows or terminal on Linux. This file would contain the following command for FastAPI:
web: gunicorn -w 4 -k uvicorn.workers.UvicornWorker :app
Here, replace file_name with the name of the Python file where you created the FastAPI code. After this:
- Put all these files (model, python file, requirements.txt, Procfile) in a GitHub repository
- Login to Heroku and create a new app. Connect your GitHub repository
- Click Deploy Branch and your API will be up and running for anyone to use with the link.
Bono: Generation of documents
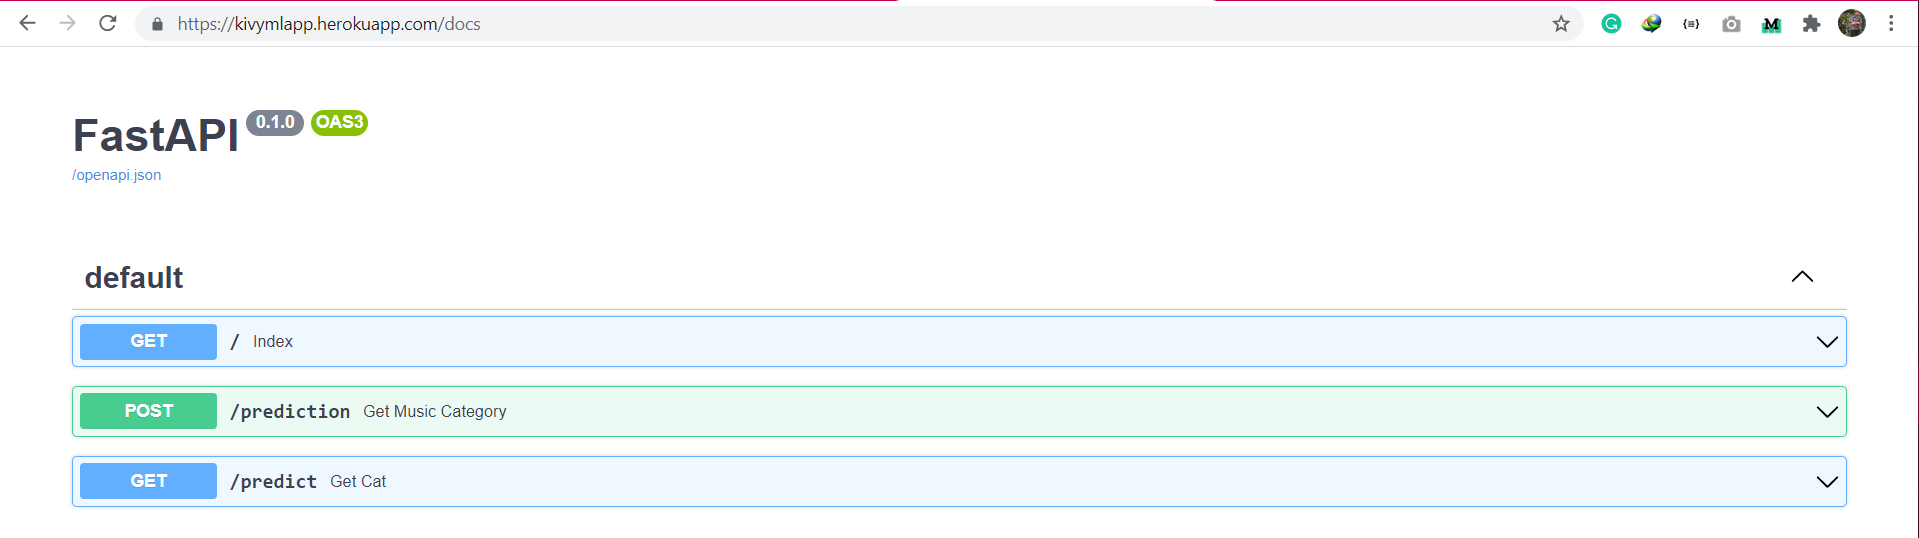
FastAPI has a special feature. Automatically generate documents for created API endpoints. To access these documents, just visit the end point “/ docs” and you will get an attractive graphical user interface created with Swagger and OpenAI. Now that we have implemented the service, The screenshot below is from the Deployed Heroku application. (Link: https://kivymlapp.herokuapp.com/)
Conclution
In this detailed article, the presented FastAPI, its basics, how to create API file for machine learning model, how to test this API and how to implement this API on Heroku platform. We also saw how to access the document endpoint that FastAPI generates automatically.
In the next article, I will show how to use the API created in this article to create an Android music prediction app using Python and we will also convert that file from Python to APK.
Note: you can use this link, Master link to all my articles on the Internet, which updates every time I post a new article to find that article.
if you have any doubt, inquiry or potential opportunity, then you can communicate with me through
1. Linkedin – in / kaustubh-gupta /
2. Twitter – @ Kaustubh1828
3. GitHub – kaustubhgupta


