Target
- Tableau is the gold standard for business analytics and data visualization tools in the industry
- Learn how to create a rounded bar chart and a bar on a bar chart in Tableau
Introduction
Data visualization is a key aspect of any analytics profession. Data visualization communicates a data story in a simplistic and, but nevertheless, aesthetically pleasing and striking.
And there is no better tool than Tableau to do it!! Tableau is one of the most trusted tools in the community. It has been recognized as a Leader in the Gartner Magic Quadrant for Business Intelligence and Analytics Platforms for 8 years in a row. That is incredible!

In this article, let's understand how to create a rounded bar chart and a bar bar chart in Tableau.
For article and homework, make sure you have Tableau installed on your system. I'm using Public Table, that you can download for free. The data we will use is the EE sample superstore dataset.. UU. That is widely used in the Tableau community. Here is the link to descargar the Superstore dataset (but the dataset will be available within Tableau).
New to Tableau? We have the perfect free course to get you started:
Let's get into it!
Create a rounded bar chart in Tableau
Bar charts are a very basic way of representing data. Sometimes you want to do it differently in an attractive way. Rounded bar charts make your dashboard interesting just by adding a few more steps. Let's see how we can do it.
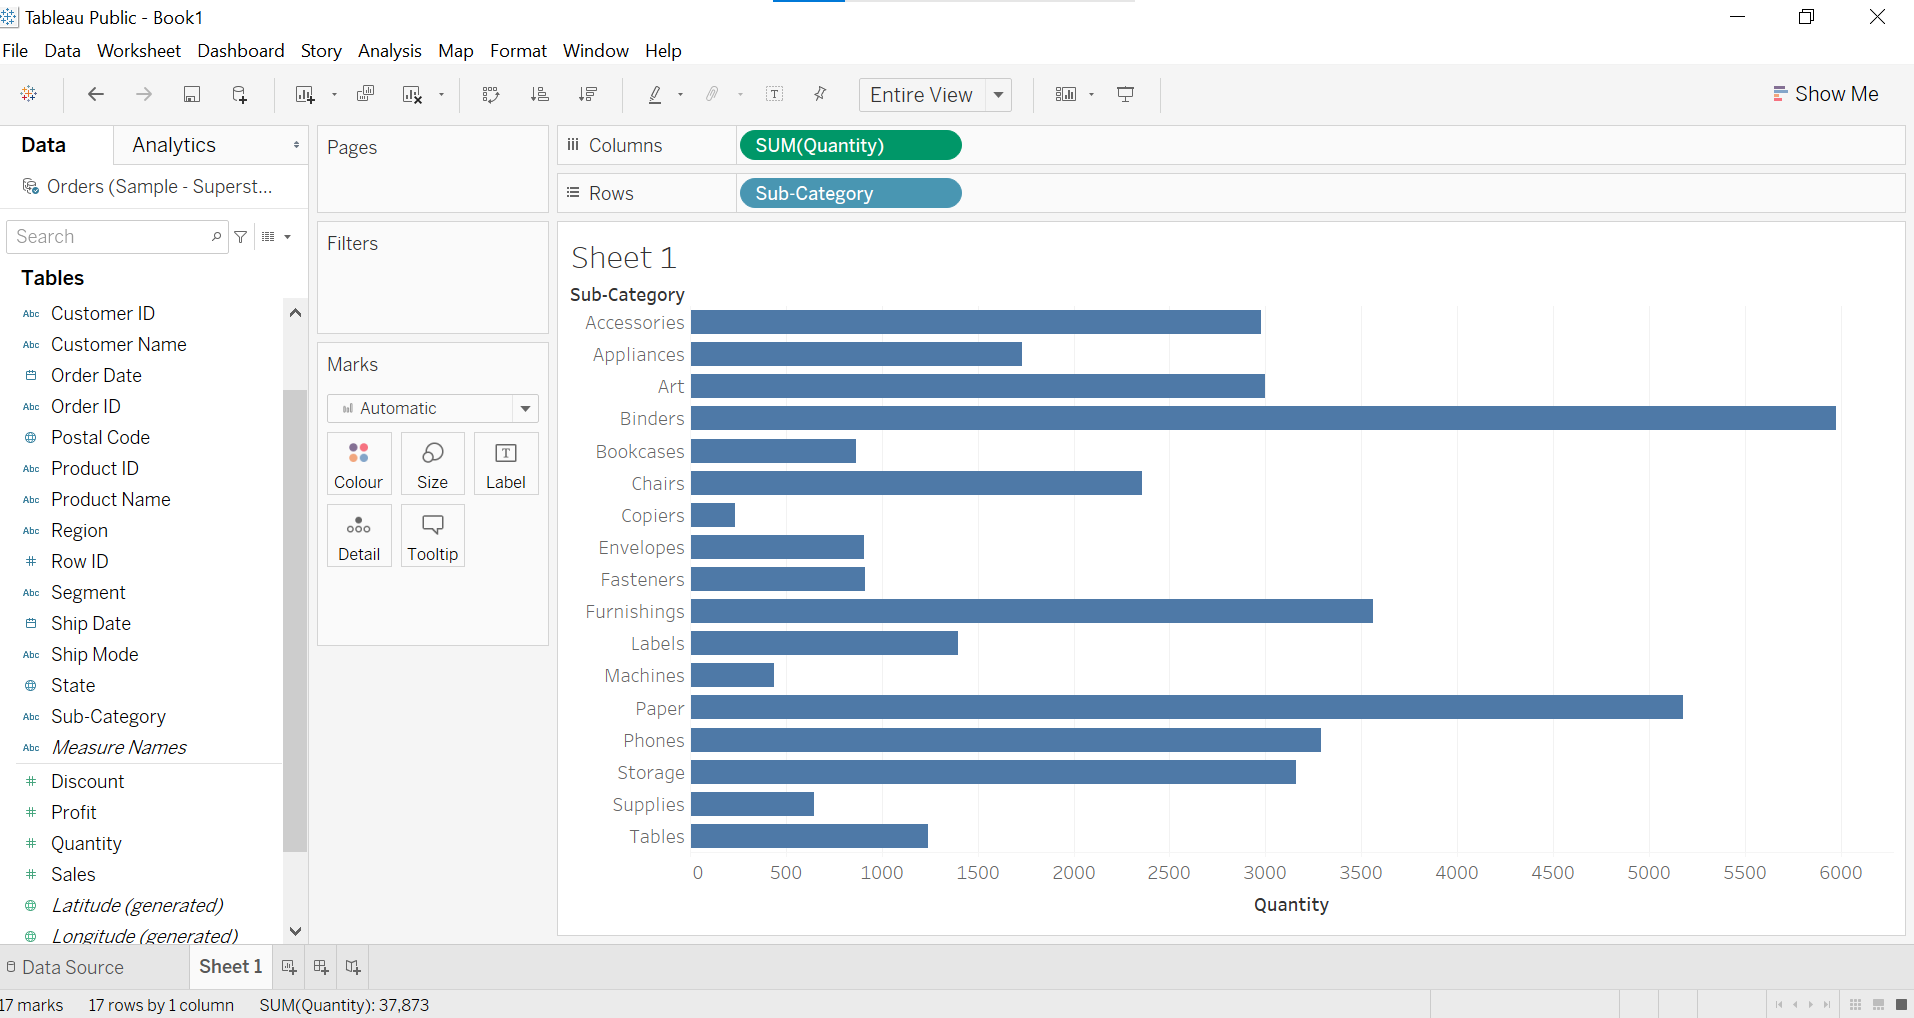
Paso 1
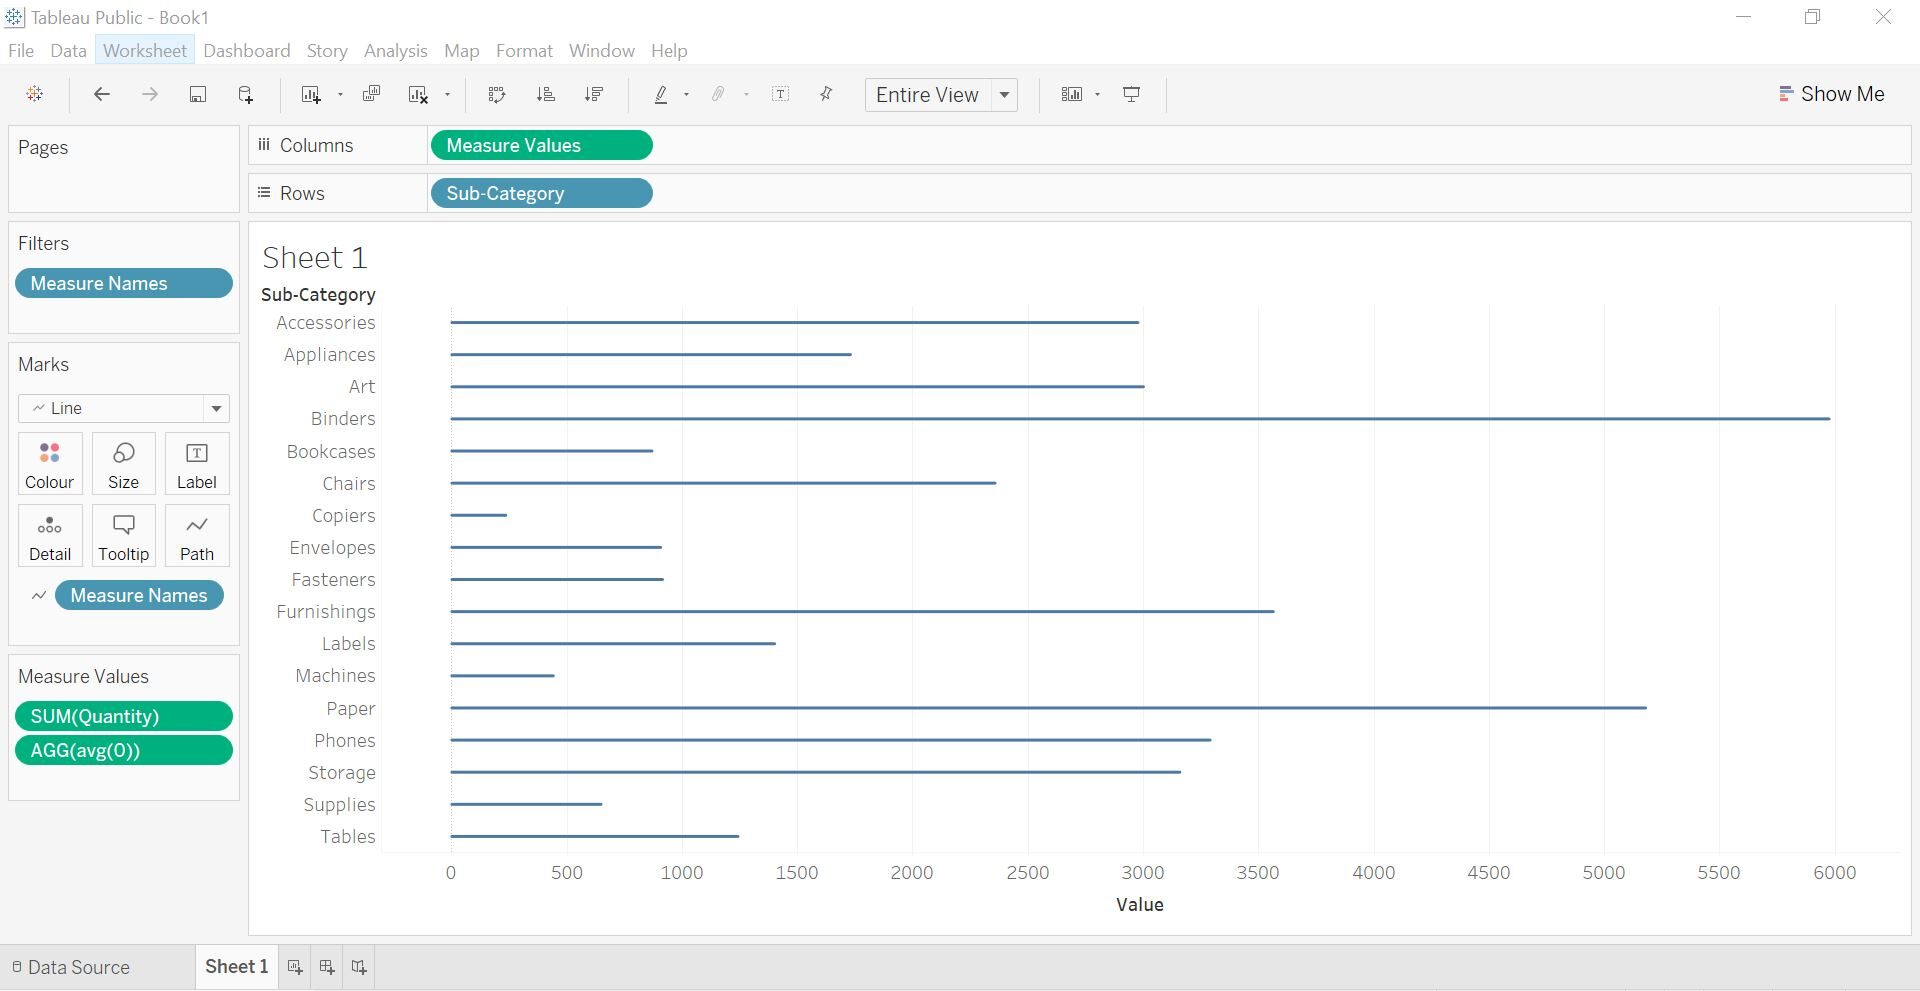
For this visualization, we use Quantity and Subcategory. In the first step, drop quantity on column shelf and subcategory on row shelf by selecting in data pane. As a result, you will get a horizontal bar chart as shown in the following figure.
Paso 2
Now we have to take another dimension with zero values. There are several ways to do it, what i'm doing is double clicking the column shelf and typing Avg (0), and pressing enter. Another way to do this is to create a calculated field called zero that has the value 0. The idea is to obtain an axis combined with zero.
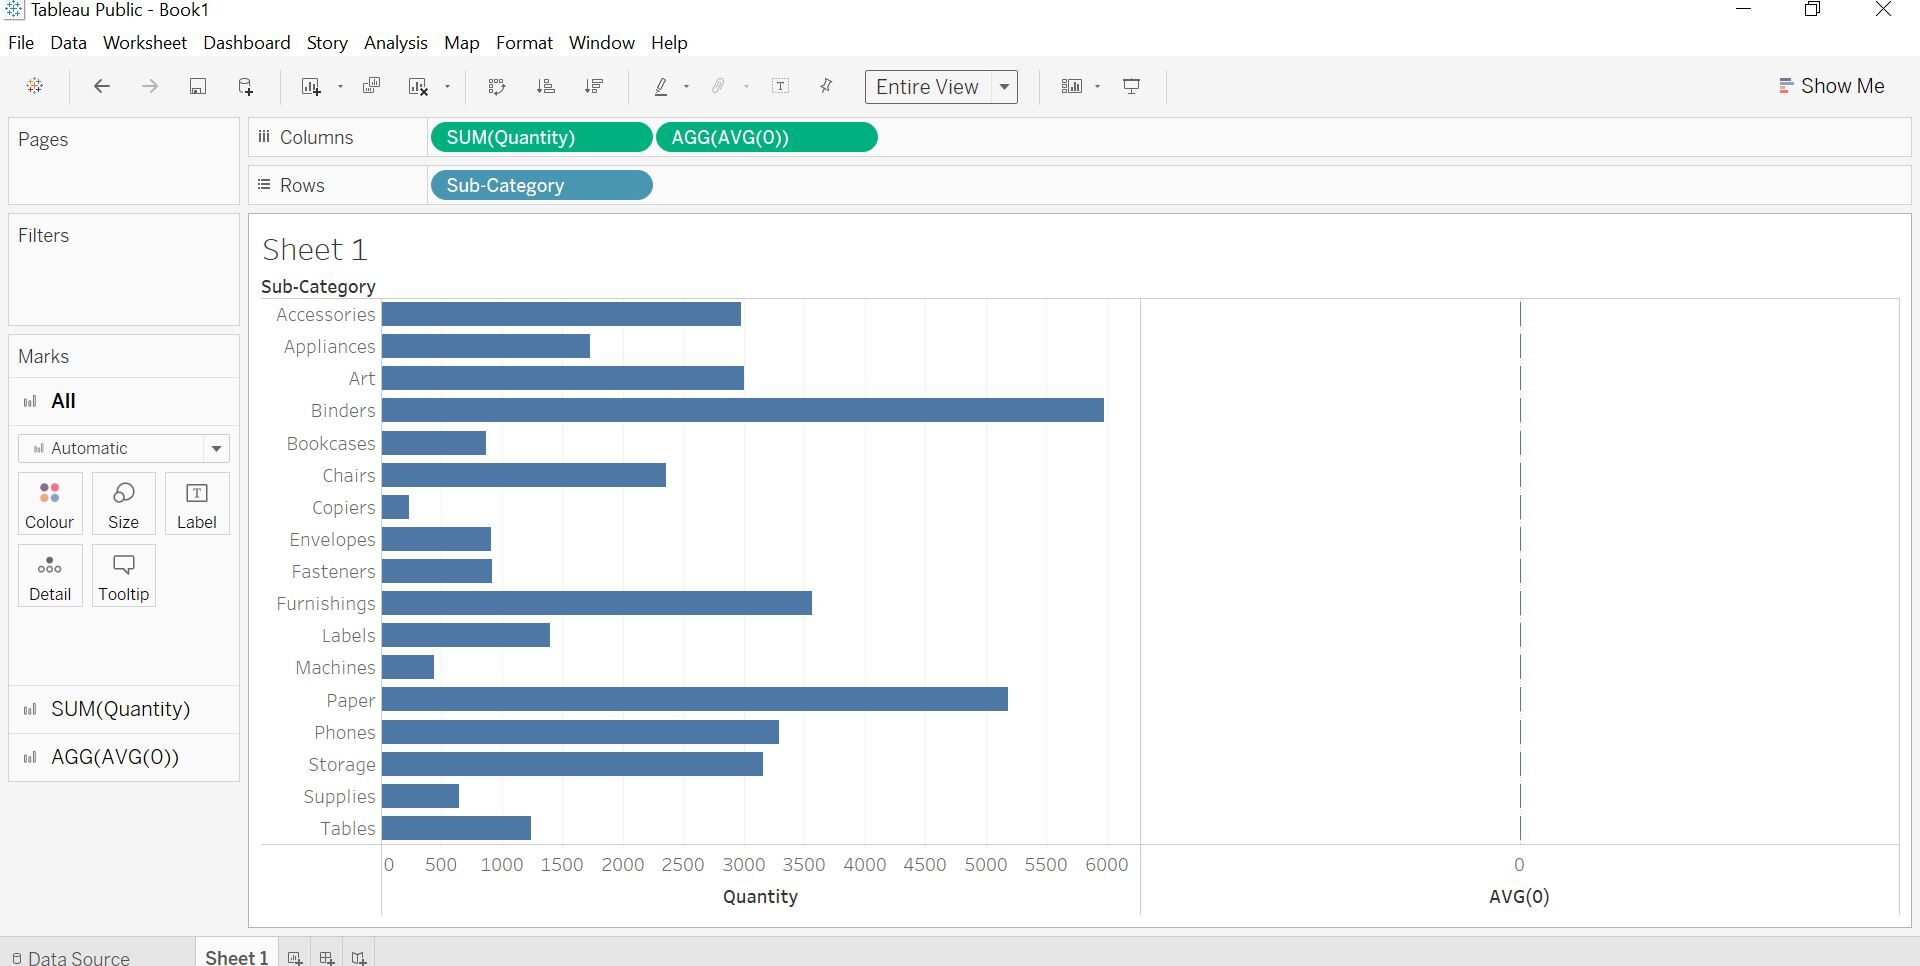
Paso 3
In the next step, combine axis by selecting AGG (AVG (0)) on the column shelf and scroll down the Quantity axis. After that, you will see some changes in the quantity similar to a sheet replaced by Measure Values and Measure Names added in the row shelf as shown in the following image.
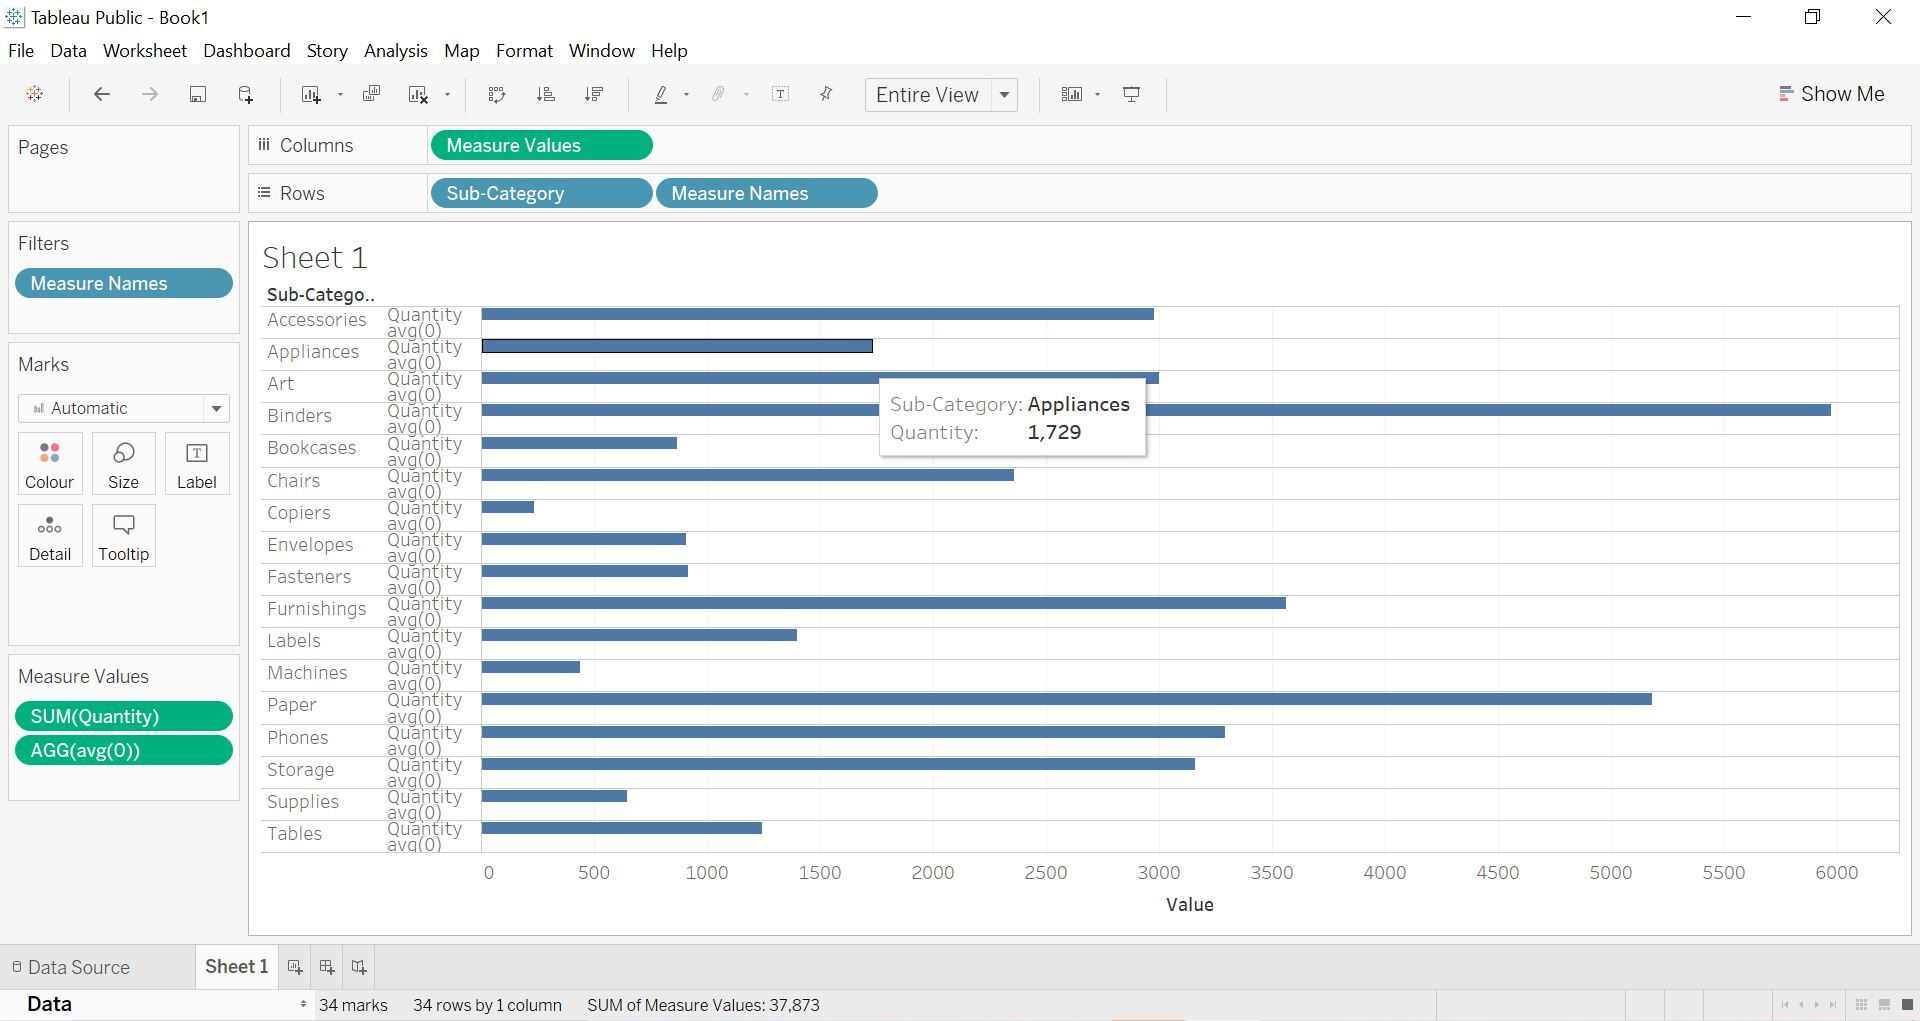
Paso 4
Now let's go ahead and change the branding card from Automatic to Line. Now your sheet will look like this.
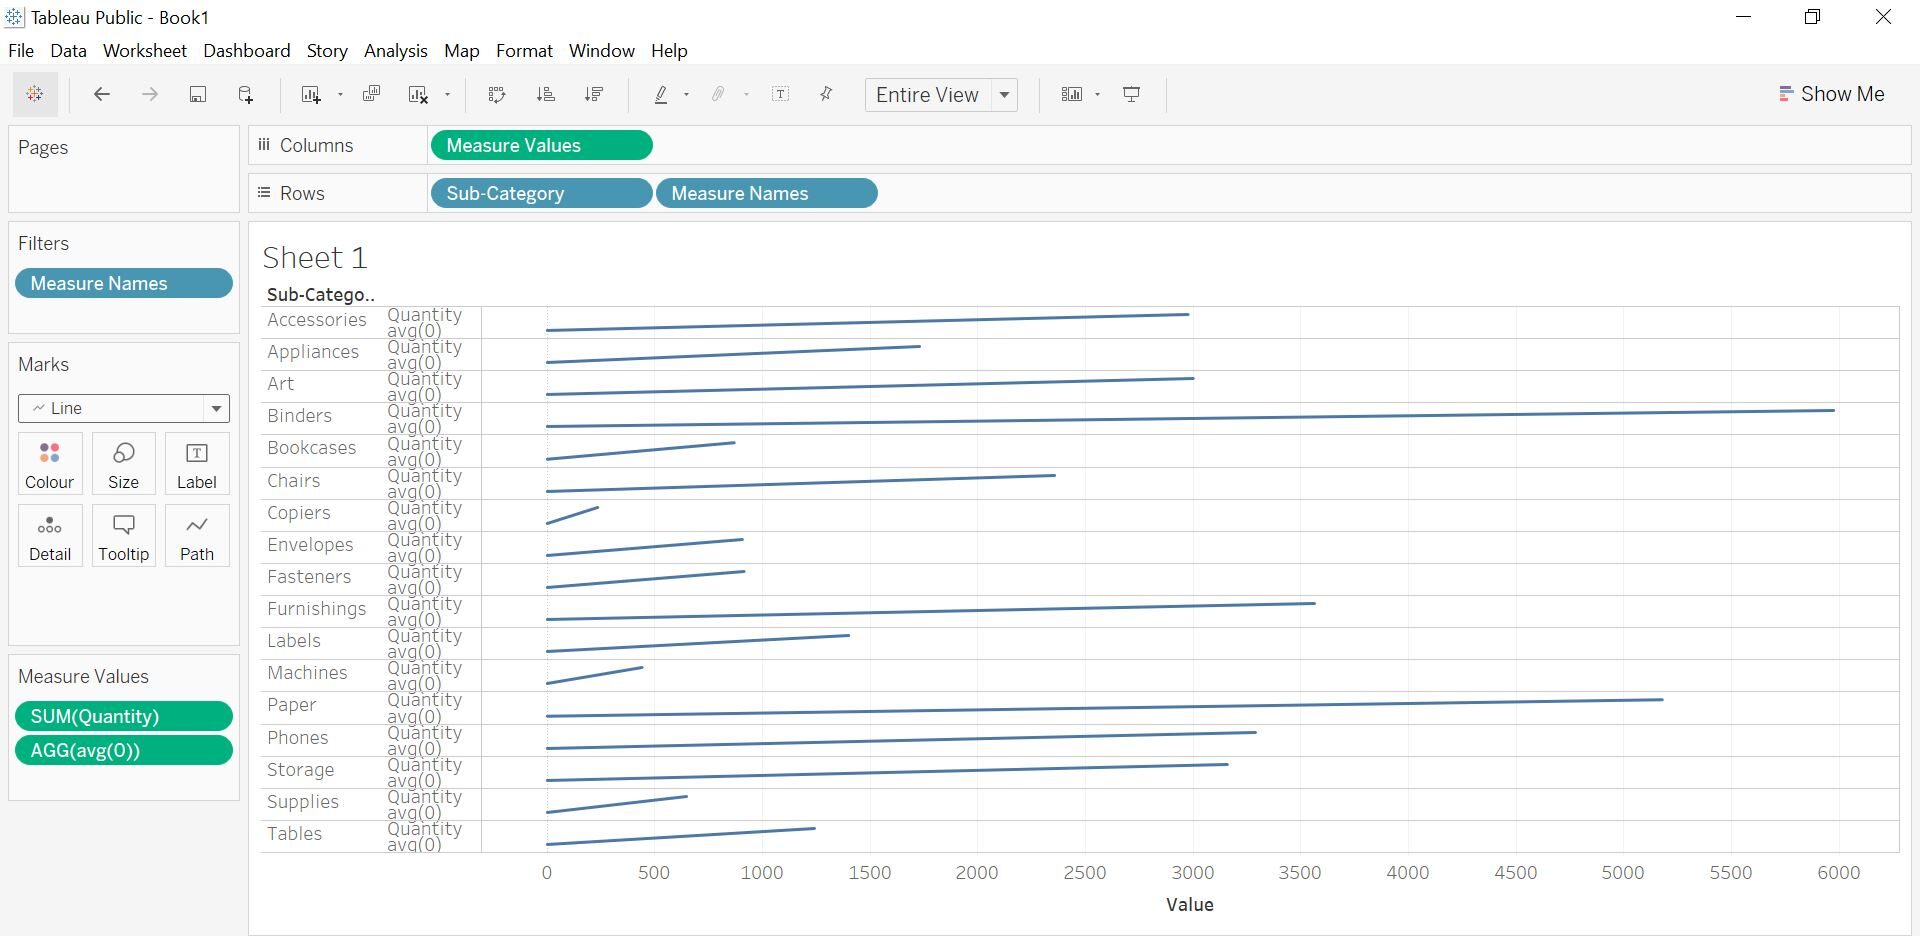
Paso 5
Then, select the Measure Names from the Rows shelf and place them in the Available Path in the Marks panel. After doing this step you will end up with straight lines.
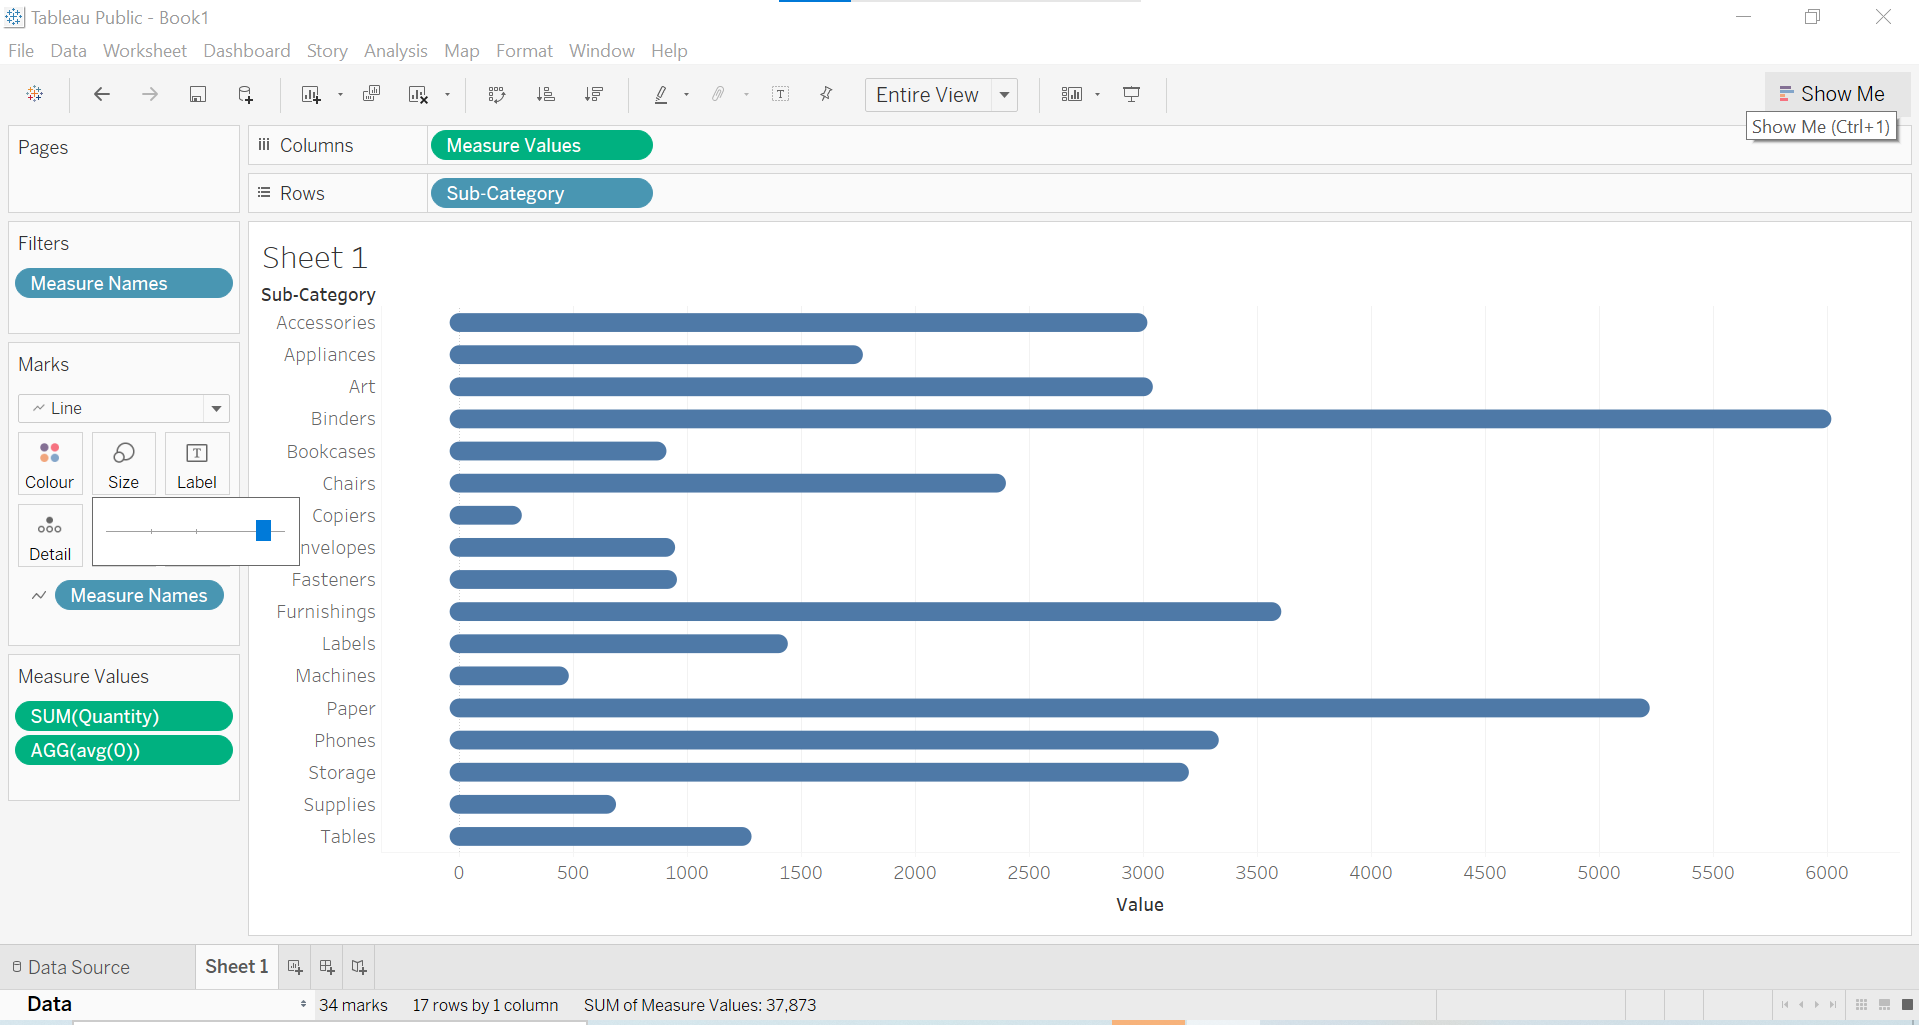
Paso 6
We are almost there, in the last step click on the size and increase the size of the lines as your requirement. As you can see in the image below, we have achieved our goal, we have bar graphs with rounded edges.
Paso 7
For a larger format, we can sort the bars in ascending or descending order according to need. Here we end up with descending rounded bar charts.

Create a bar chart in bars in Tableau
The next visualization we are creating is Bar in a Bar Chart. This visualization is generally used when you have to compare the data. For instance, here we are comparing sales in all regions in 2013 Y 2014 given the Superstore sample data set.
Paso 1
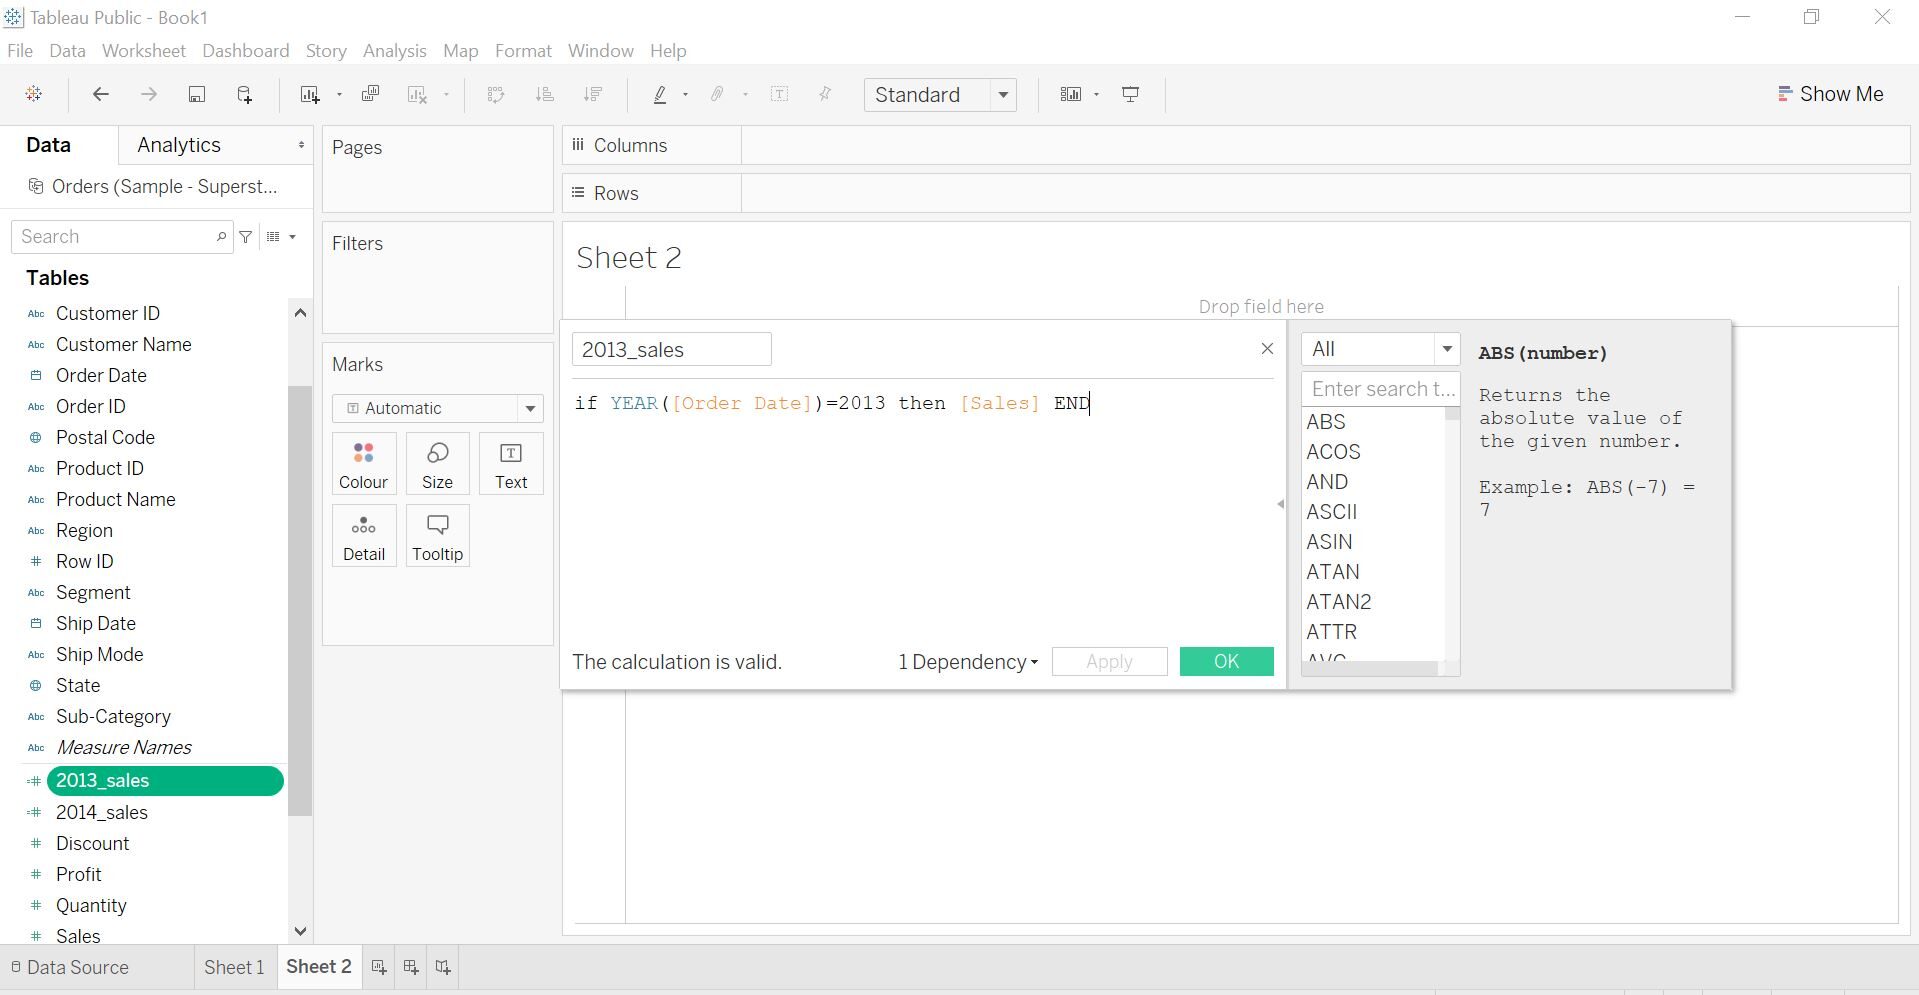
In the data provided we have the Sales field, but for our task, we need two different fields, namely, sales in the year 2013 and in 2014. Therefore, we will create two calculated fields. The first is “2013_sales” as shown in the picture below. similarly, "2014_sales" will be created. Now our data preparation is complete.
Paso 2
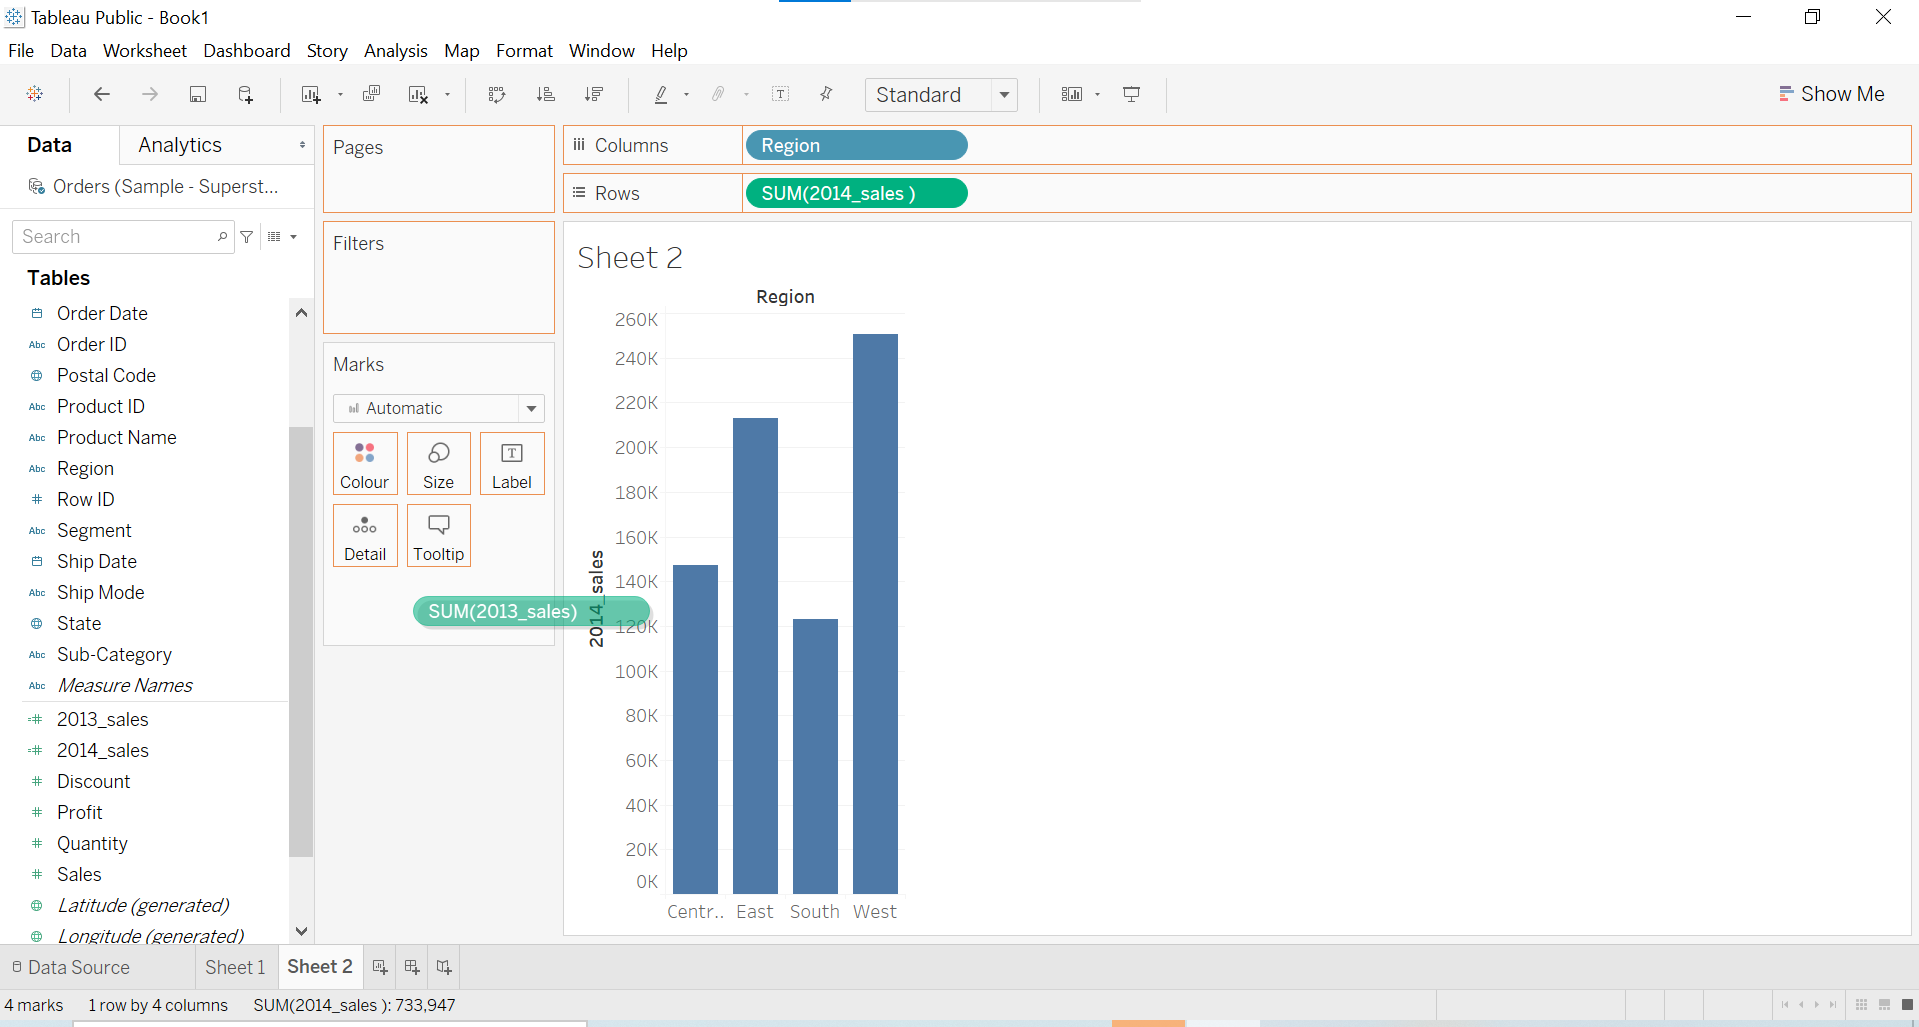
In the next step, grab the Region from the data panel and place it on the Columns shelf. In the same way, select 2014_sales and drop it on the Rows shelf. After that, you will end up having an ordinary bar chart like the following image.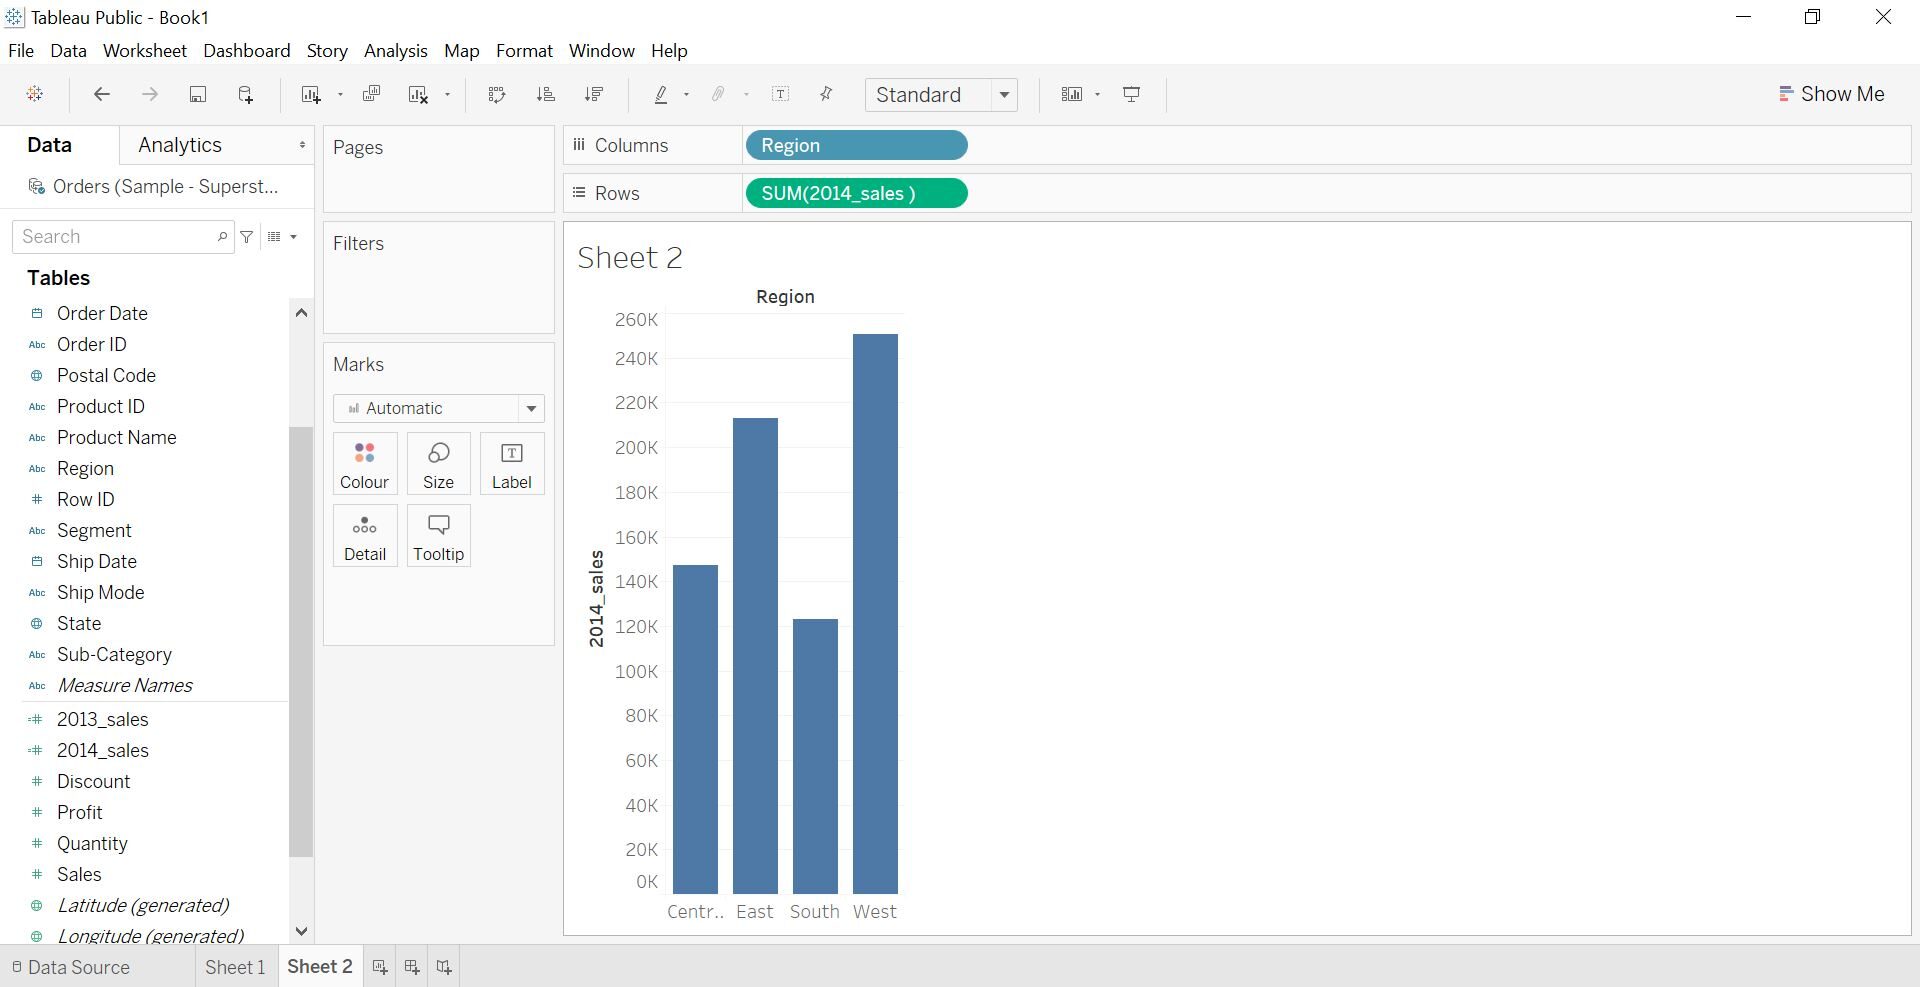
Paso 3
Now select 2013_sales in the data pane and drop it on the axis of 2014_sales to get the combined axis like the chart above.
After that, your worksheet will look like this. Showing sidebars by region for each year's sales. What's more, Measure Names will be added on the Columns shelf and Measure Values on the Rows shelf.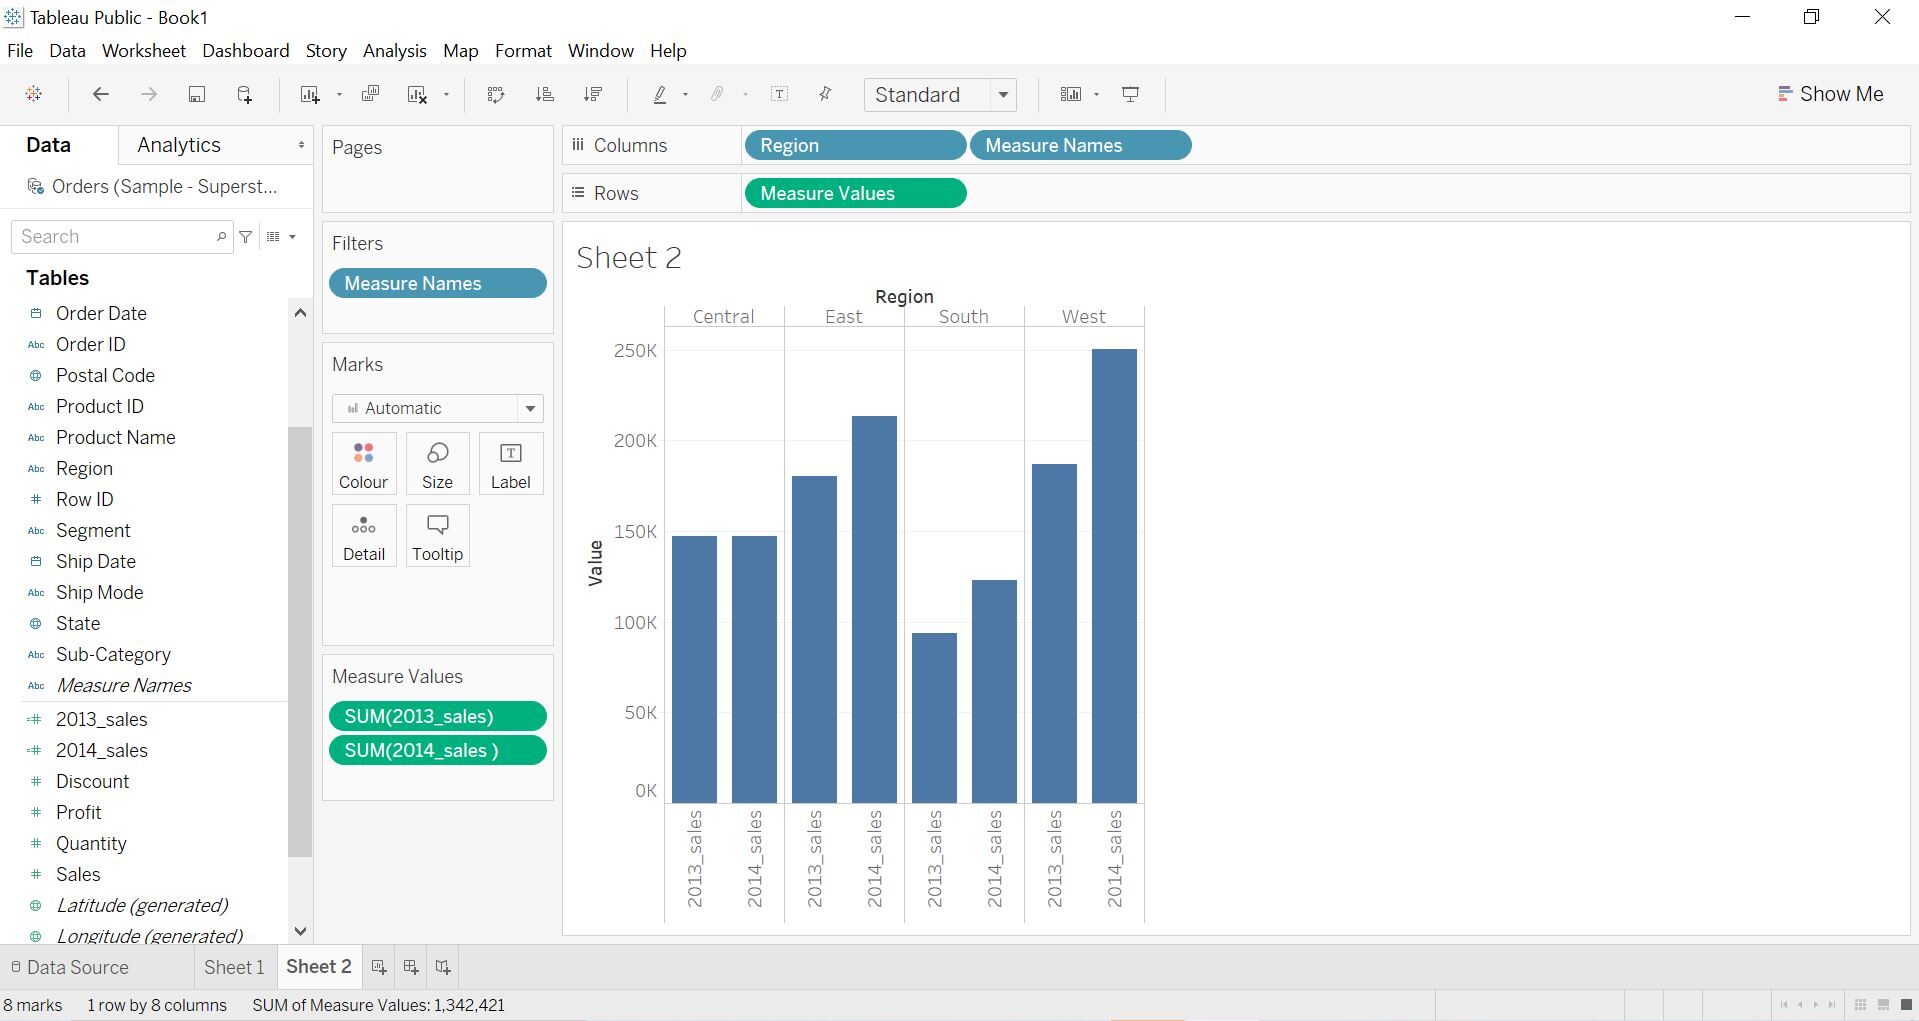
Paso 4
Now, in the future, choose the measurement names from the Column shelf and place them on the color card. You can select the color of your choice by clicking on the color card and then on edit color. As you can see, we have stacked bars, the gray that shows the sales of 2013 and the blue one that shows the sales of 2014.
But we don't want stacked bars, Thus, go to Analysis in the toolbar and turn off the stack marks. Now we have bars one behind the other.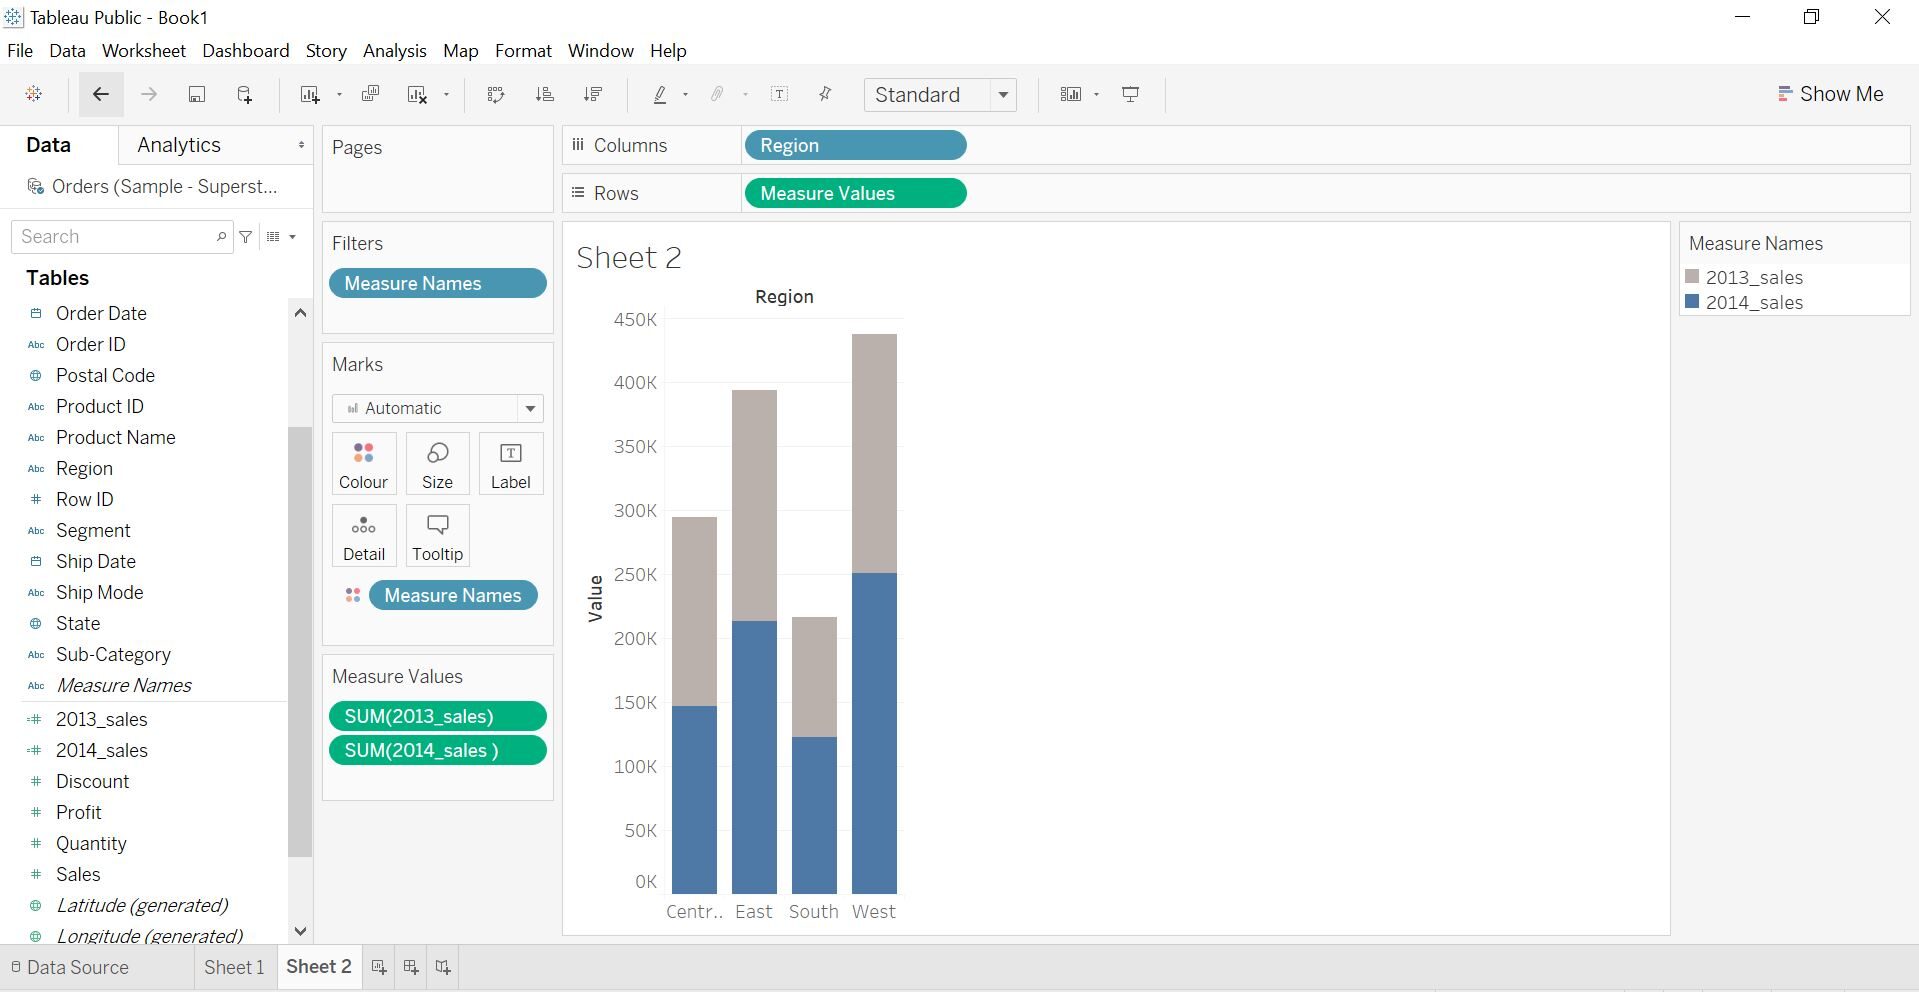
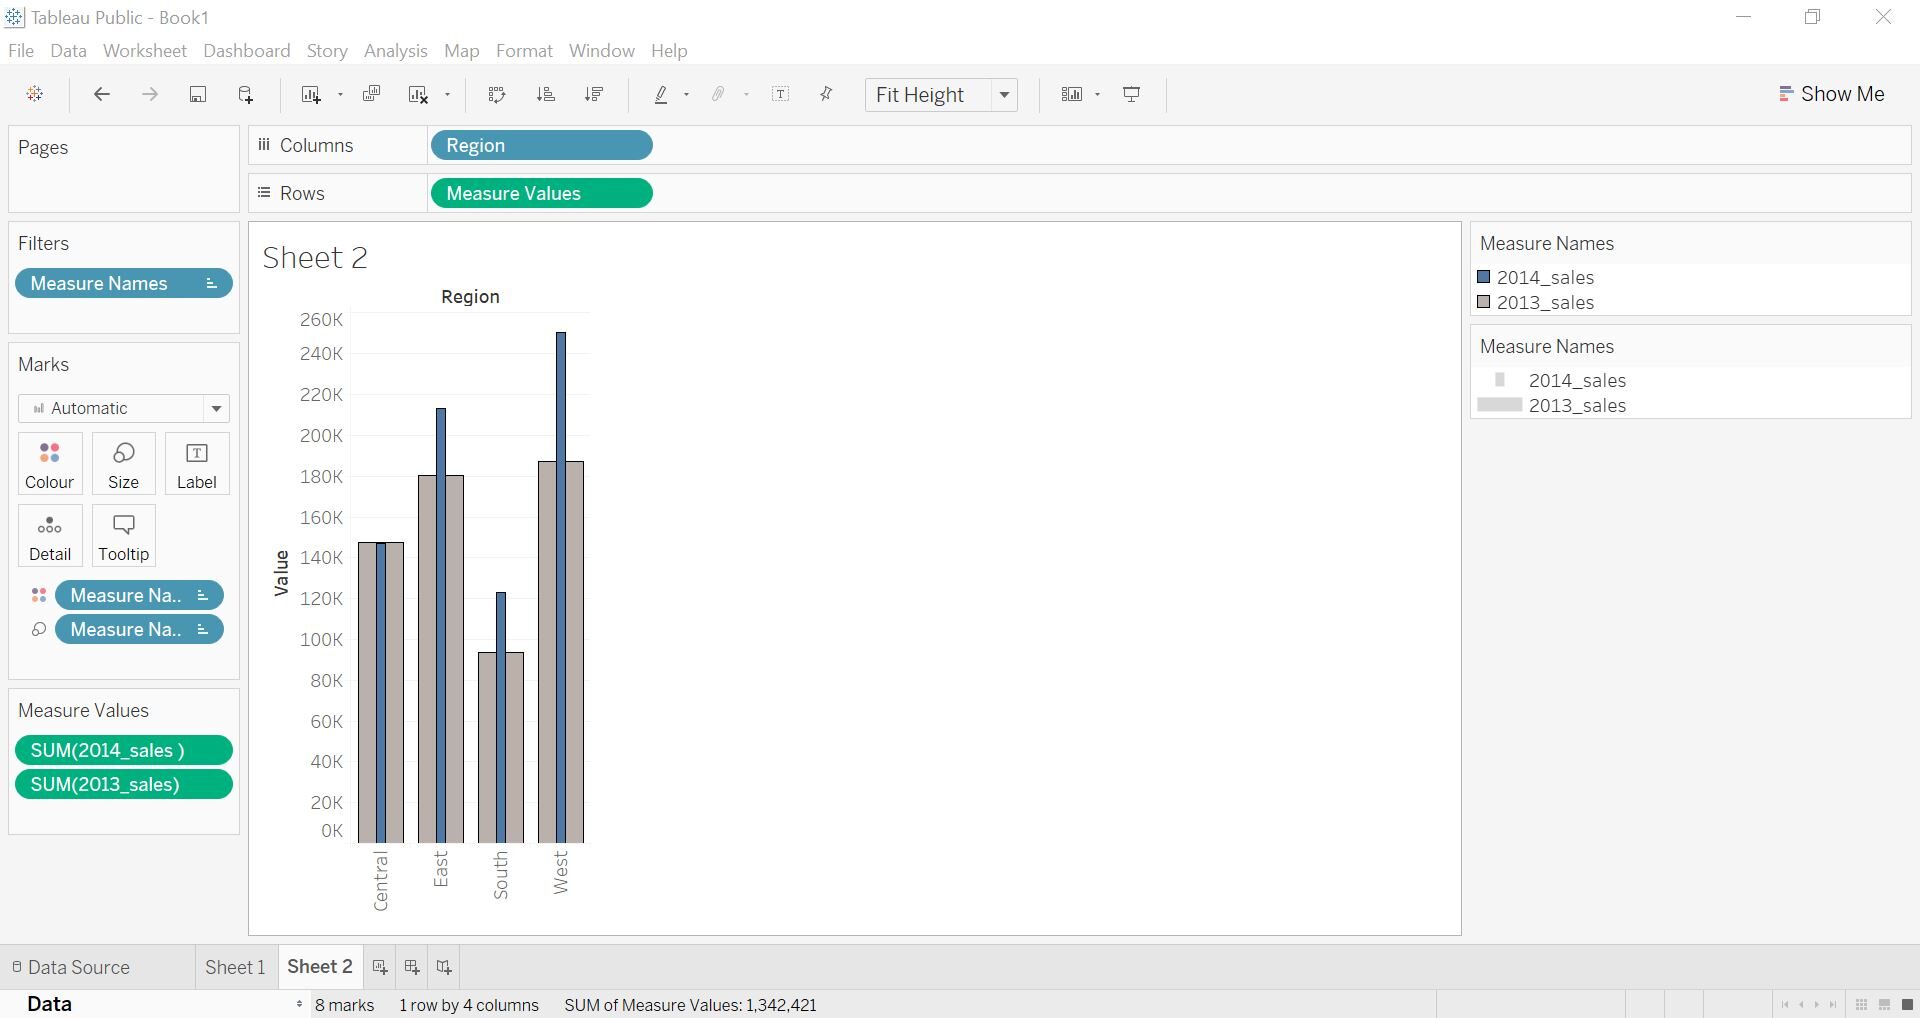
Paso 5
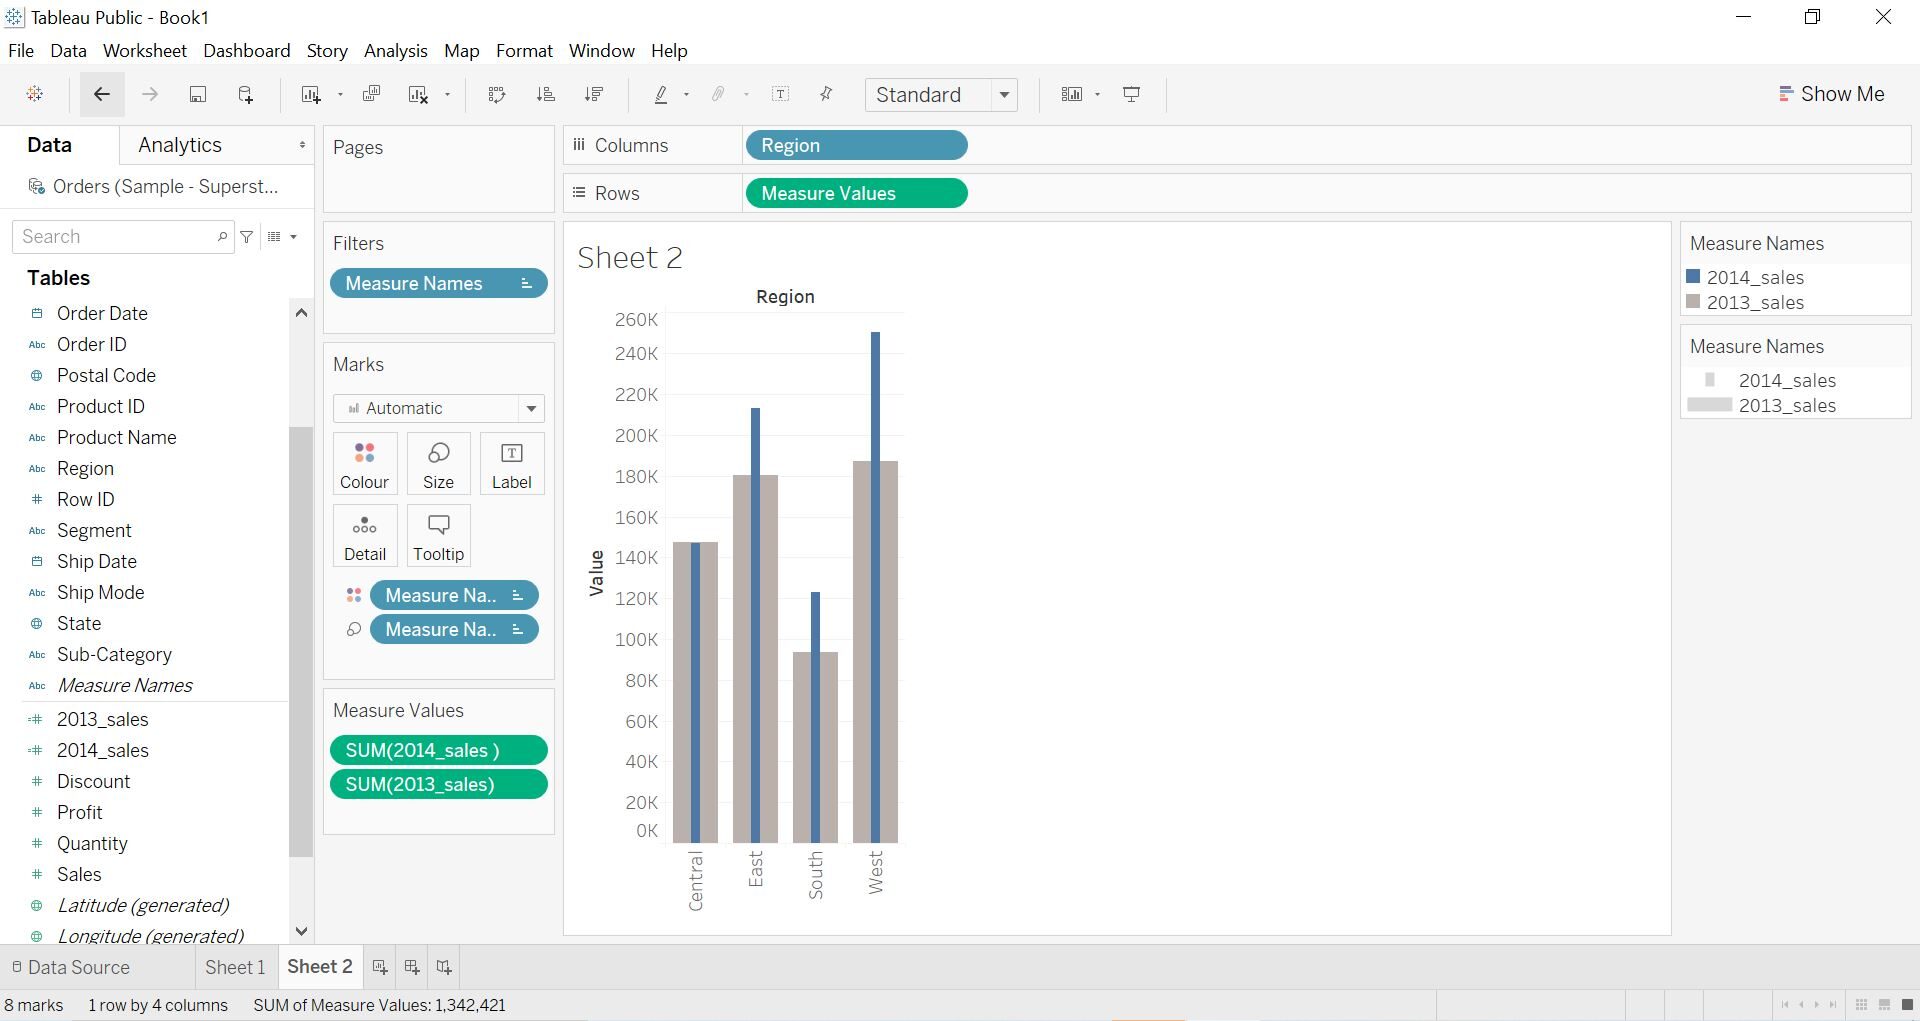
Now that we are almost there, in the last step, choose the Measure Names from the Data Panel and place them on the size card. As shown in the following picture, the wide gray bars represent sales of 2013 and the thin blue bars show sales of 2014. Through this visualization, we can easily compare sales by region in 2013 and in 2014.
Paso 6
You can make more formats, since i added the black border on my bars or you can also remove the grid lines or add the trend lines to make it more informative.
Final notes
The great thing about Tableau is that it has many ways to accomplish a task. To summarize in this article, we learned how to create two different visualizations that are slightly advanced from the basic bar charts. These graphics make our dashboard more informative and effective.
In case you're interested in learning more about visualization and Tableau, I will recommend you to follow our course. Tableau for beginners.


