This article was published as part of the Data Science Blogathon
OpenCV is a library used for computer vision applications. With the help of OpenCV, we can create a huge number of applications that work better in real time. It is mainly used for image and video processing.
You can get more information about OpenCV here (https://opencv.org/)
Along with OpenCV, we will use the MediaPipe library.
MediaPipe
MediaPipe is a framework that is mainly used to create audio, video or any time series data. With the help of the MediaPipe framework, we can build very impressive pipelines for different media processing functions.
Some of the main applications of MediaPipe.
- Multi-hand tracking
- Face detection
- Object detection and tracking
- Objectron: detection and tracking of 3D objects
- AutoFlip: automatic video trimming pipeline, etc.
Modelo de hito de mano
Basically, MediaPipe uses a single shot palm detection model and, once done, performs a precise location of the key point of 21 3D coordinates of the palm in the detected hand region.
MediaPipe pipeline uses multiple models, as a palm detection model that returns a hand oriented bounding box from the full image. The cropped image region is fed to a handheld reference model defined by the palm detector and returns high-fidelity 3D handheld key points.
Now let's implement the hand tracking model.
Install the necessary modules
-> pip instalar opencv-python
-> pip install mediapipe
First, Let's check the operation of the webcam.
import cv2
import time
cap = cv2.VideoCapture(0)
pTime = 0
while True:
    success, img = cap.read()
    imgRGB = cv2.cvtColor(img, cv2.COLOR_BGR2RGB)
    cTime = time.time()
    fps = 1 / (cTime - pTime)
    pTime = cTime
    cv2.putText(img, f'FPS:{int(fps)}', (20, 70), cv2.FONT_HERSHEY_SIMPLEX, 1, (0, 255, 0), 2)
    cv2.imshow("Test", img)
cv2.waitKey(1))
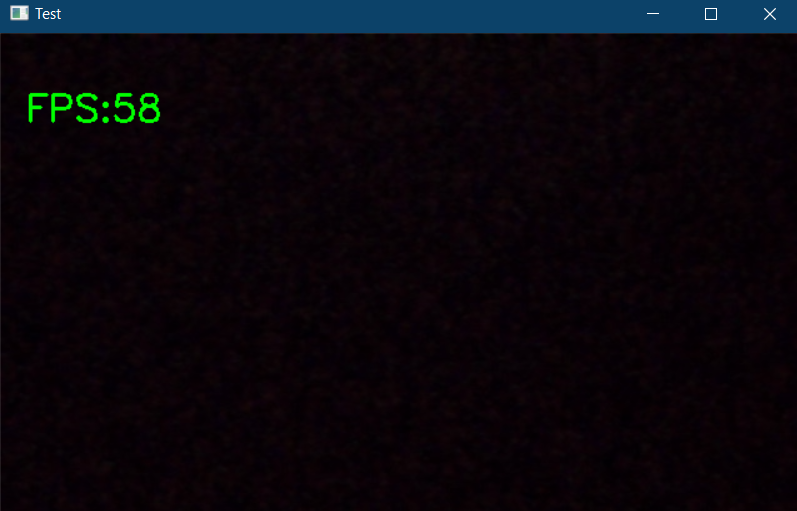
The above code will show a popup if there is a webcam connected to your PC and it also shows the frames per second (fps) in the upper left corner of the output window.
Now let's start the implementation. Import the required modules and initialize the required variables.
import cv2
import mediapipe as mp
import time
cap = cv2.VideoCapture(0)

mpHands = mp.solutions.hands
hands = mpHands.Hands(static_image_mode=False,
                      max_num_hands=2,
                      min_detection_confidence=0.5,
                      min_tracking_confidence=0.5)
mpDraw = mp.solutions.drawing_utils

pTime = 0
cTime = 0
In the above code snippet, we declare an object called “hands” of mp.solutions.hand to detect hands, default, if you look inside the class “Hands()“, The number of hands to detect is set to 2, the minimum detection confidence is set to 0.5 and the minimum tracking confidence is set to 0.5. And we will use mpDraw to draw the key points.
Now let's write a while loop to execute our code.
while True:
    success, img = cap.read()
    imgRGB = cv2.cvtColor(img, cv2.COLOR_BGR2RGB)
    results = hands.process(imgRGB)
    #print(results.multi_hand_landmarks)
    if results.multi_hand_landmarks:
        for handLms in results.multi_hand_landmarks:
            for id, lm in enumerate(handLms.landmark):
                #print(id,lm)
                h, w, c = img.shape
                cx, cy = int(lm.x *w), int(lm.y*h)
                #if id ==0:
                cv2.circle(img, (cx,cy), 3, (255,0,255), cv2.FILLED)

            mpDraw.draw_landmarks(img, handLms, mpHands.HAND_CONNECTIONS)

    cTime = time.time()
    fps = 1/(cTime-pTime)
    pTime = cTime

    cv2.putText(img,str(int(fps)), (10,70), cv2.FONT_HERSHEY_PLAIN, 3, (255,0,255), 3)

    cv2.imshow("Image", img)
    cv2.waitKey(1)
Here, in the above code, we read the webcam frames and convert the image to RGB. Then we detect the hands in the frame with the help of “hands.process () ” function. Once the hands are detected, we will locate the key points and then highlight the points at the key points using cv2.circle, and connect the key points using mpDraw.draw_landmarks.
The complete code is given below
import cv2
import mediapipe as mp
import time
cap = cv2.VideoCapture(0)

mpHands = mp.solutions.hands
hands = mpHands.Hands(static_image_mode=False,
                      max_num_hands=2,
                      min_detection_confidence=0.5,
                      min_tracking_confidence=0.5)
mpDraw = mp.solutions.drawing_utils

pTime = 0
cTime = 0

while True:
    success, img = cap.read()
    imgRGB = cv2.cvtColor(img, cv2.COLOR_BGR2RGB)
    results = hands.process(imgRGB)
    #print(results.multi_hand_landmarks)

    if results.multi_hand_landmarks:
        for handLms in results.multi_hand_landmarks:
            for id, lm in enumerate(handLms.landmark):
                #print(id,lm)
                h, w, c = img.shape
                cx, cy = int(lm.x *w), int(lm.y*h)
                #if id ==0:
                cv2.circle(img, (cx,cy), 3, (255,0,255), cv2.FILLED)

            mpDraw.draw_landmarks(img, handLms, mpHands.HAND_CONNECTIONS)


    cTime = time.time()
    fps = 1/(cTime-pTime)
    pTime = cTime

    cv2.putText(img,str(int(fps)), (10,70), cv2.FONT_HERSHEY_PLAIN, 3, (255,0,255), 3)

    cv2.imshow("Image", img)
    cv2.waitKey(1)
The output is:

Now let's create a hand tracking module, so we can use it in other projects.
Create a new Python file. First, let's create a class called handDetector with two member functions on it, calls findHands Y findPosition.
The function findHands will accept an RGB image and detect the hand in the frame and locate the key points and draw the reference points, the function findPosition will give you the position of the hand along with the identification.
Later, the main function where we initialize our module and also write a while loop to execute the model. Here you can import this configuration or the module to any other related project.
The complete code is given below
import cv2
import mediapipe as mp
import time
class handDetector():
def __init__(self, mode = False, maxHands = 2, detectionCon = 0.5, trackCon = 0.5):
self.mode = mode
self.maxHands = maxHands
self.detectionCon = detectionCon
self.trackCon = trackCon
self.mpHands = mp.solutions.hands
self.hands = self.mpHands.Hands(self.mode, self.maxHands, self.detectionCon, self.trackCon)
self.mpDraw = mp.solutions.drawing_utils
def findHands(self,img, draw = True):
imgRGB = cv2.cvtColor(img, cv2.COLOR_BGR2RGB)
self.results = self.hands.process(imgRGB)
# print(results.multi_hand_landmarks)
if self.results.multi_hand_landmarks:
for handLms in self.results.multi_hand_landmarks:
if draw:
self.mpDraw.draw_landmarks(img, handLms, self.mpHands.HAND_CONNECTIONS)
return img
def findPosition(self, img, handNo = 0, draw = True):
lmlist = []
if self.results.multi_hand_landmarks:
myHand = self.results.multi_hand_landmarks[handNo]
for id, lm in enumerate(myHand.landmark):
h, w, c = img.shape
cx, cy = int(lm.x * w), int(lm.y * h)
lmlist.append([id, cx, cy])
if draw:
cv2.circle(img, (cx, cy), 3, (255, 0, 255), cv2.FILLED)
return lmlist
def main():
pTime = 0
cTime = 0
cap = cv2.VideoCapture(0)
detector = handDetector()
while True:
success, img = cap.read()
img = detector.findHands(img)
lmlist = detector.findPosition(img)
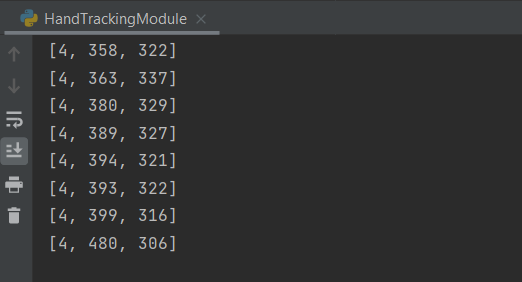
if len(lmlist) != 0:
print(lmlist[4])
cTime = time.time()
fps = 1 / (cTime - pTime)
pTime = cTime
cv2.putText(img, str(int(fps)), (10, 70), cv2.FONT_HERSHEY_PLAIN, 3, (255, 0, 255), 3)
cv2.imshow("Image", img)
cv2.waitKey(1)
if __name__ == "__main__":
main()
The output will be the same as shown above along with the tracked hand positions.
The full code is also available here.
Reference:
https://www.youtube.com/watch?v=NZde8Xt78Iw
https://google.github.io/mediapipe/
Me LinkedIn
Thanks.
The media shown in this article is not the property of DataPeaker and is used at the author's discretion.


