For each recruitment, companies run ads online, references and check them manually.
Companies usually send thousands of resumes for each publication.
When companies collect resumes through online ads, classify them according to your requirements.
After collecting the resumes, companies close ads and online application portals.
Later, send the collected resumes to the recruitment team.
It becomes very difficult for the hiring teams to read the resume and select the resume based on the requirement, no problem if there are one or two resumes, but it is very difficult to review the resumes of 1000 and select the best.
To solve this problem, Today in this article we will read and review the curriculum using machine learning with Python so that we can complete work days in a few minutes.
2. What is the evaluation of the curriculum vitae?
Choosing the right people for the job is the biggest responsibility of all companies, because choosing the right group of people can accelerate business growth exponentially.
We will analyze here an example of a company of this type, what we know as IT department. We know that the IT department is not keeping up with the growing markets.
Due to many large projects with large companies, your team doesn't have time to read resumes and choose the best resume based on your requirements.
To solve these kinds of problems, the company always chooses a third party whose job it is to make the resume as per the requirement. These companies are known as the Hiring Service Organization. This is the information summary screen.
The job of selecting the best talents, assignments, online coding contests, among many others, also known as resume screen.
Lack of time, large companies do not have enough time to open resumes, so they have to resort to the help of any other company. So they have to pay money. Which is a very serious problem.
To solve this problem, the company wants to start the resume screen work on its own using a machine learning algorithm.
3. Resume Screening Using Machine Learning
In this section, we will see the step-by-step implementation of Resume screening using python.
3.1 Data used
We have publicly available data from Kaggle. You can download the data using the following link.
https://www.kaggle.com/gauravduttakiit/resume-dataset
3.2 Exploratory data analysis
Let's take a quick look at the data we have.
resumeDataSet.head()
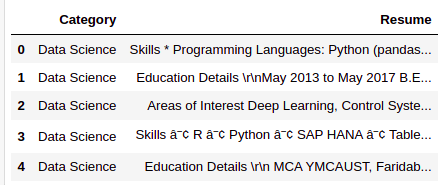
There are only two columns that we have in the data. Below is the definition of each column.
Category: Type of work for which the curriculum vitae is adapted.
Resume: Candidate CV
resumeDataSet.shape
Production:
(962, 2)
There is 962 observations we have in the data. Each observation represents the complete details of each candidate, for what we have 962 resumes for selection.
Let's see what different categories we have in the data.
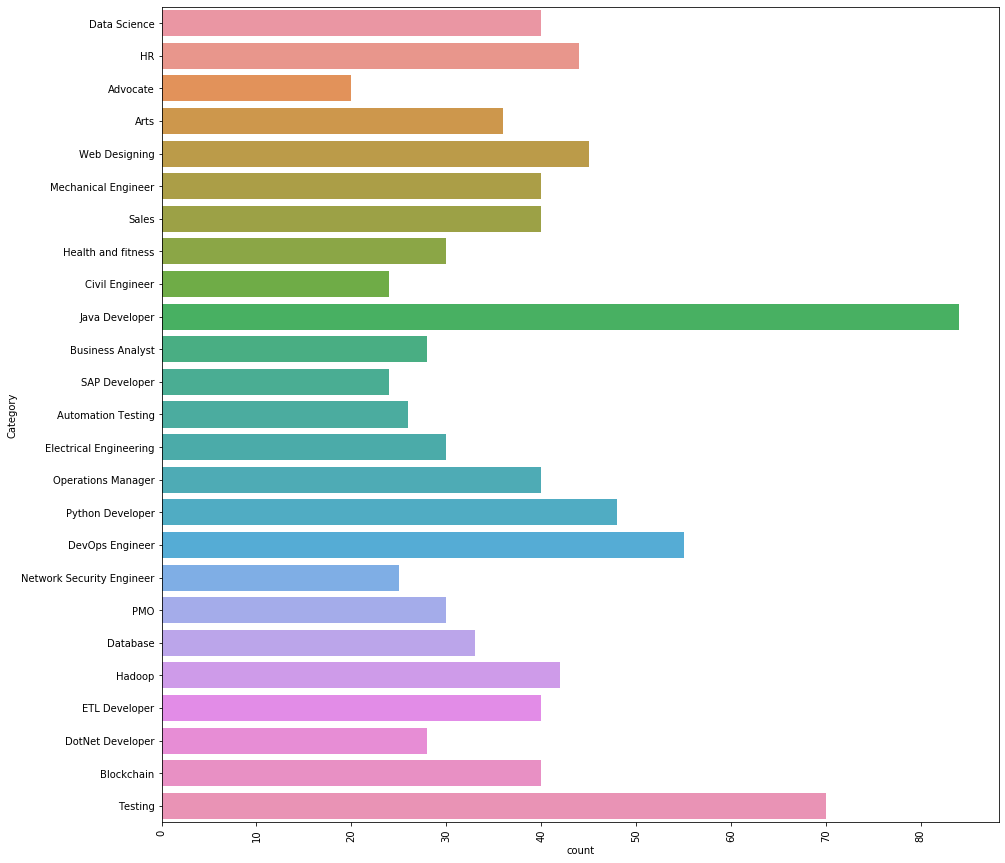
There is 25 different categories we have in the data. The 3 Main job categories we have in the data are as follows.
Java developer, Testing y DevOps Engineer.
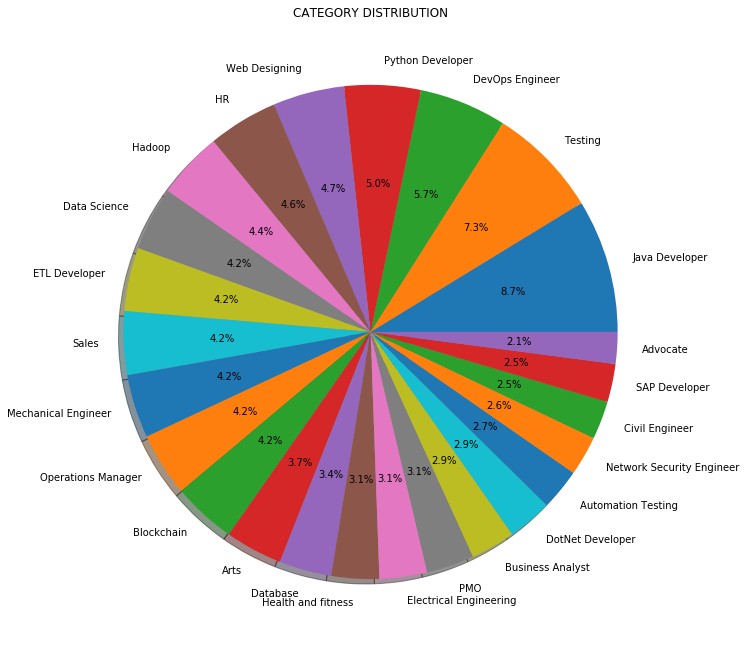
Instead of count or frequency, We can also visualize the distribution of work categories in percentage as shown below:
3.3 Data preprocessing
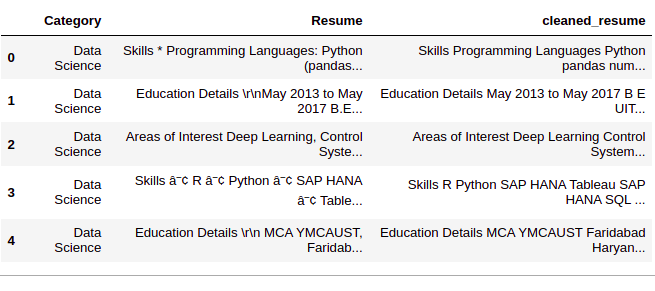
Paso 1: Clear column ‘Resume’
In this step, we remove any unnecessary information from resumes like URL, hashtags and special characters.
def cleanResume(resumeText):
    resumeText = re.sub('httpS+s*', ' ', resumeText)  # remove URLs
    resumeText = re.sub('RT|cc', ' ', resumeText)  # remove RT and cc
    resumeText = re.sub('#S+', '', resumeText)  # remove hashtags
    resumeText = re.sub('@S+', '  ', resumeText)  # remove mentions
    resumeText = re.sub('[%s]' % re.escape("""!"#$%&'()*+,-./:;<=>[email protected][]^_`{|}~"""), ' ', resumeText)  # remove punctuations
    resumeText = re.sub(r'[^x00-x7f]',r' ', resumeText)
    resumeText = re.sub('s+', ' ', resumeText)  # remove extra whitespace
    return resumeText
resumeDataSet['cleaned_resume'] = resumeDataSet.Resume.apply(lambda x: cleanResume(x))
Paso 2: 'Category encoding’
Now, we will code the column ‘Category’ usando LabelEncoding. Although the column ‘Category’ are ‘Nominal’ data, we are using LabelEncong because the column ‘Category’ is our 'target' column. Al realizar LabelEncoding, each category will become a class and we will create a multiclass classification model.
var_mod = ['Category']
le = LabelEncoder()
for i in var_mod:
    resumeDataSet[i] = le.fit_transform(resumeDataSet[i])
Paso 3: column preprocessing 'clean_resume’
Here we will preprocess and convert the column ‘clean_resume’ in vectors. There are many ways of doing it, as ‘Bag of words’, ‘Tf-Idf’, ‘Word2Vec’ and a combination of these methods.
We will use the 'Tf-Idf method’ to obtain the vectors in this approach.
requiredText = resumeDataSet['cleaned_resume'].values
requiredTarget = resumeDataSet['Category'].values
word_vectorizer = TfidfVectorizer(
    sublinear_tf=True,
    stop_words="english",
    max_features=1500)
word_vectorizer.fit(requiredText)
WordFeatures = word_vectorizer.transform(requiredText)
We have 'WordFeatures’ as vectors and 'requiredTarget’ and target after this step.
3.4 Model building
We will use the ‘One vs Rest method’ with 'KNeighborsClassifier’ to build this multiclass classification model.
we will use 80% de datos para trainingTraining is a systematic process designed to improve skills, physical knowledge or abilities. It is applied in various areas, like sport, Education and professional development. An effective training program includes goal planning, regular practice and evaluation of progress. Adaptation to individual needs and motivation are key factors in achieving successful and sustainable results in any discipline.... Y 20% data for validation. Let's divide the data now into training and test set.
X_train,X_test,y_train,y_test = train_test_split(WordFeatures,requiredTarget,random_state=0, test_size=0.2)
print(X_train.shape)
print(X_test.shape)
Production:
(769, 1500)
(193, 1500)
As we now have test and training data, let's build the model.
clf = OneVsRestClassifier(KNeighborsClassifier())
clf.fit(X_train, y_train)
prediction = clf.predict(X_test)
3.5 Results
Let's see the results we have.
print('Accuracy of KNeighbors Classifier on training set: {:.2f}'.format(clf.score(X_train, y_train)))
print('Accuracy of KNeighbors Classifier on test set: {:.2f}'.format(clf.score(X_test, y_test)))
Production:
Accuracy of KNeighbors Classifier on training set: 0.99
Accuracy of KNeighbors Classifier on test set: 0.99
We can see that the results are amazing. We can classify each category of a given resume with a 99% precision.
We can also check the detailed classification report for each class or category.
print(metrics.classification_report(y_test, prediction))
Production:
              precision    recall  f1-score   support

           0       1.00      1.00      1.00         3
           1       1.00      1.00      1.00         3
           2       1.00      0.80      0.89         5
           3       1.00      1.00      1.00         9
           4       1.00      1.00      1.00         6
           5       0.83      1.00      0.91         5
           6       1.00      1.00      1.00         9
           7       1.00      1.00      1.00         7
           8       1.00      0.91      0.95        11
           9       1.00      1.00      1.00         9
          10       1.00      1.00      1.00         8
          11       0.90      1.00      0.95         9
          12       1.00      1.00      1.00         5
          13       1.00      1.00      1.00         9
          14       1.00      1.00      1.00         7
          15       1.00      1.00      1.00        19
          16       1.00      1.00      1.00         3
          17       1.00      1.00      1.00         4
          18       1.00      1.00      1.00         5
          19       1.00      1.00      1.00         6
          20       1.00      1.00      1.00        11
          21       1.00      1.00      1.00         4
          22       1.00      1.00      1.00        13
          23       1.00      1.00      1.00        15
          24       1.00      1.00      1.00         8

    accuracy                           0.99       193
   macro avg       0.99      0.99      0.99       193
weighted avg       0.99      0.99      0.99       193
Where, 0, 1, 2…. are the job categories. We get the actual tags from the tag encoder we use.
the.classes_
Production:
['Advocate', 'Arts', 'Automation Testing', 'Blockchain','Business Analyst', 'Civil Engineer', 'Data Science', 'Database','DevOps Engineer', 'DotNet Developer', 'ETL Developer','Electrical Engineering', 'HR', 'Hadoop', 'Health and fitness','Java Developer', 'Mechanical Engineer','Network Security Engineer', 'Operations Manager', 'PMO','Python Developer', 'SAP Developer', 'Sales', 'Testing','Web Designing']
Here ‘Lawyer’ It's the class 0, 'Art’ It's the class 1, and so on …
4. Code
Here you can see the complete implementation ....
#Loading Libraries
import warnings
warnings.filterwarnings('ignore')
import numpy as np
import pandas as pd
import matplotlib.pyplot as plt
import seaborn as sns
from matplotlib.gridspec import GridSpec
import re
from sklearn.preprocessing import LabelEncoder
from sklearn.model_selection import train_test_split
from sklearn.feature_extraction.text import TfidfVectorizer
from scipy.sparse import hstack
from sklearn.multiclass import OneVsRestClassifier
from sklearn.neighbors import KNeighborsClassifier
from sklearn import metrics
#Loading Data
resumeDataSet = pd.read_csv('../input/ResumeScreeningDataSet.csv' ,encoding='utf-8')
#EDA
plt.figure(figsize=(15,15))
plt.xticks(rotation=90)
sns.countplot(y ="Category", data=resumeDataSet)
plt.savefig('../output/jobcategory_details.png')
#Pie-chart
targetCounts = resumeDataSet['Category'].value_counts().reset_index()['Category']
targetLabels  = resumeDataSet['Category'].value_counts().reset_index()['index']
# Make square figures and axes
plt.figure(1, figsize=(25,25))
the_grid = GridSpec(2, 2)
plt.subplot(the_grid[0, 1], aspect=1, title="CATEGORY DISTRIBUTION")
source_pie = plt.pie(targetCounts, labels=targetLabels, autopct="%1.1f%%", shadow=True, )
plt.savefig('../output/category_dist.png')
#Data Preprocessing
def cleanResume(resumeText):
    resumeText = re.sub('httpS+s*', ' ', resumeText)  # remove URLs
    resumeText = re.sub('RT|cc', ' ', resumeText)  # remove RT and cc
    resumeText = re.sub('#S+', '', resumeText)  # remove hashtags
    resumeText = re.sub('@S+', '  ', resumeText)  # remove mentions
    resumeText = re.sub('[%s]' % re.escape("""!"#$%&'()*+,-./:;<=>[email protected][]^_`{|}~"""), ' ', resumeText)  # remove punctuations
    resumeText = re.sub(r'[^x00-x7f]',r' ', resumeText)
    resumeText = re.sub('s+', ' ', resumeText)  # remove extra whitespace
    return resumeText
resumeDataSet['cleaned_resume'] = resumeDataSet.Resume.apply(lambda x: cleanResume(x))
var_mod = ['Category']
le = LabelEncoder()
for i in var_mod:
    resumeDataSet[i] = le.fit_transform(resumeDataSet[i])
requiredText = resumeDataSet['cleaned_resume'].values
requiredTarget = resumeDataSet['Category'].values
word_vectorizer = TfidfVectorizer(
    sublinear_tf=True,
    stop_words="english",
    max_features=1500)
word_vectorizer.fit(requiredText)
WordFeatures = word_vectorizer.transform(requiredText)
#Model Building
X_train,X_test,y_train,y_test = train_test_split(WordFeatures,requiredTarget,random_state=0, test_size=0.2)
print(X_train.shape)
print(X_test.shape)
clf = OneVsRestClassifier(KNeighborsClassifier())
clf.fit(X_train, y_train)
prediction = clf.predict(X_test)
#Results
print('Accuracy of KNeighbors Classifier on training set: {:.2f}'.format(clf.score(X_train, y_train)))
print('Accuracy of KNeighbors Classifier on test set: {:.2f}'.format(clf.score(X_test, y_test)))
print("n Classification report for classifier %s:n%sn" % (clf, metrics.classification_report(y_test, prediction)))
5. Conclution
In this article, We learned how machine learning and natural language processing can be applied to improve our daily lives through the example of CV detection. We just sorted almost 1000 resumes in a few minutes in their respective categories with a 99% precision.
Reach out in the comment section if you have any questions.
The media shown in this article is not the property of DataPeaker and is used at the author's discretion.


