Today's will be a post that is quick and easy to do but that is very useful if we do not want to lose our work or that of our colleagues. To avoid these losses of information and avoid having to redo our work, we must make use of source code control. Even when we work alone!
Next we will see how to add Git to Sublime following a few simple steps. But first, I leave a small list of requirements to achieve today's goal.
Requirements:
Prepared? We started!
Git installation
First, we will have to have Git installed on our computer. Obvious, but not bad to remember. To do this, just go to the git web portal and download the latest version for the operating system we are using at the moment.
If you are installing Git on Windows, be sure to check “Use Git from the Windows command prompt“. For everything else, leave default settings.
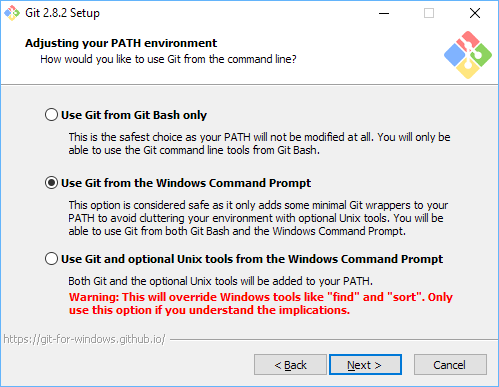
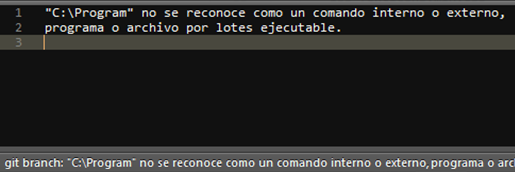
By default, Git installs on “C: Git program files“and the path is added”C: Git cmd program files“to variableIn statistics and mathematics, a "variable" is a symbol that represents a value that can change or vary. There are different types of variables, and qualitative, that describe non-numerical characteristics, and quantitative, representing numerical quantities. Variables are fundamental in experiments and studies, since they allow the analysis of relationships and patterns between different elements, facilitating the understanding of complex phenomena.... de entorno Path (without quotation marks). When we try to use Sublime's Git, since the path added to Path contains spaces, command will fail.
To avoid this, I recommend installing Git on C: , leaving the installation folder like this: C: Git
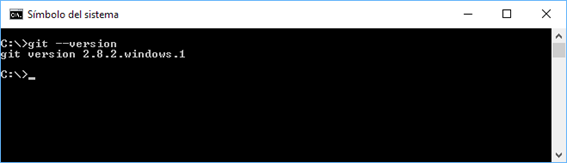
To check that everything has gone correctly, just open the command line and run the following:
git --version
If everything went well, the current version of Git installed will be displayed.
Git Installation for Sublime
To install the Git plugin for Sublime, just add it from the Packet control. If you don't have it installed, open the Sublime console by pressing Ctrl + Shift + C or from the menu View> Show console. Once the console is open we paste the Python code that we will find on the page itself. Package Control Installation according to our version of Sublime.
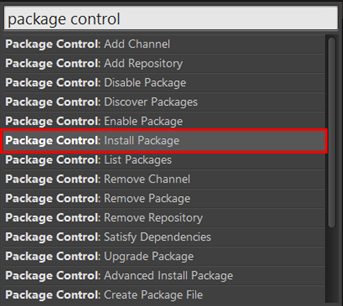
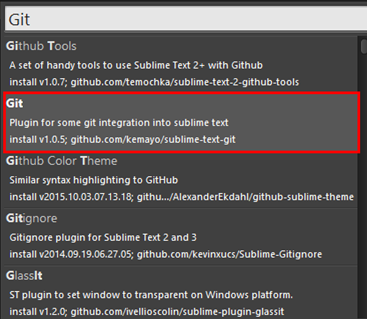
Once the Packet control, we are going to install (now yes), el plugin Git to Sublime. To do this, we start by opening our command palette (Ctrl + Shift + P in Linux / Windows, Command + Shift + P in OS X) and we select “Package Control: Install Package”. It will take a few seconds.
When available plugins load, we will write “git” in the search engine and select the plugin that we want to install. In my case, is the plugin developed by @kemayo.
With this we could already use Sublime Git without depending on the console, something that speeds up the work a bit.
To find out the available commands, just open the Sublime command palette and filter by “Git” O, maybe the most recommended, we can consult the wiki of the project. Then, we would see what this complement really enables us to do, which for me is quite useful.
GitGutter installation
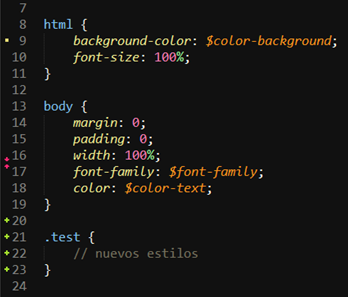
GitGutter is a plugin that shows a small icon next to the line number that indicates if it has been modified, removed or if it's a new one.
To install it we must repeat the same steps that we follow to install the Git plugin:
- Open the command palette: Ctrl + Shift + P
- Look for the GitGutter plugin. Install it.
Once installed, when we edit a project that is under source code control we will see something equivalent to the next image:
If you want to know more about the functionality of this plugin, visit the project page at GitGutter.
And here the post today, I hope it has been useful.


