
Writing today's article was a fascinating experience for me and it would be for the readers of this blog as well.. What is so different? Two things: first, the article is about something I always wanted to do since I was 5 years; Secondly, this topic / tools / algorithm are also new to me. I am by no means a master of image processing, but the usefulness of this field just blew my mind.
Imagine, if you can create an app to automatically tag a photo like the one from Facebook, or create your own facial recognition password for your laptop. In this article, I will pick up a very simple but interesting application of image processing. We will use Python to do image processing. In the next articles, I'll address more complex image processing examples. This is the problem I will work on in this article:
Problem Statement
Guess what this picture is?
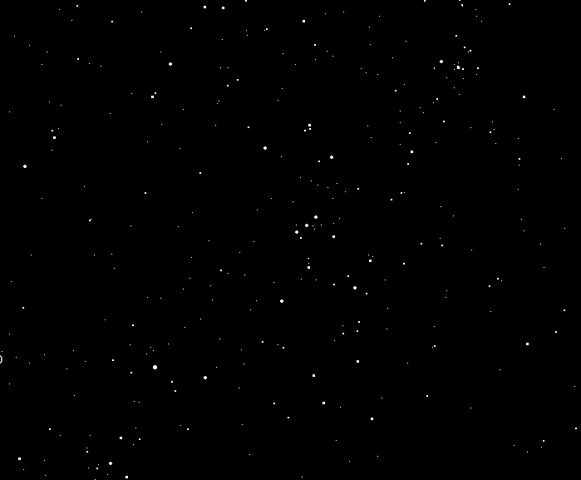
You're right, is a typical image of an open sky. I took this photo from last night to last night in Bangalore from my terrace. At that moment, I had no idea this can be such an exciting and rewarding exercise. When i was a kid, I used to spend hours counting these stars, but almost always failed to go beyond 50-60. I wanted to complete this exercise with the help of my machine. I had no idea this was possible until last Sunday, and today I have completed this long pending task using python.
Let us begin
Paso 1: import required library
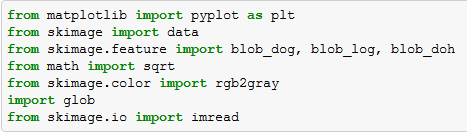
The Skimage package allows us to process images using Python. The language is extremely simple to understand but performs some of the most complicated tasks. Here are some libraries you need to import to get started,
Paso 2: Import the image
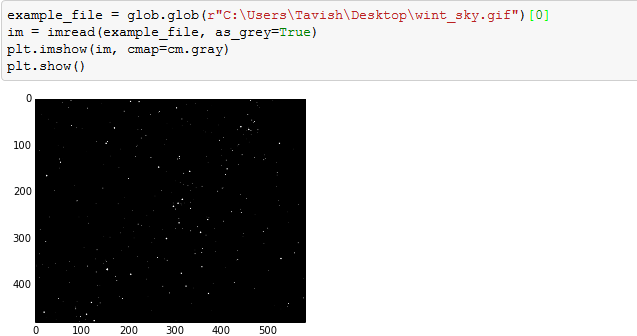
Once we have all the libraries in place, we need to import our image file to Python. Below is the code you can use to import the image file. Note that the image is imported in grayscale, which basically means that each pixel has a shade of gray. And each pixel essentially becomes a cell in an array. In this case, the image is a matrix of 480 * 581 cells (or a picture of 480 * 581 pixels).
Paso 3: Find the number of stars
Now comes the critical part where our main work is done using a few commands. These few commands come out to find continuous objects in the image. Blobs_log gives three outputs for each found object. The first two are the coordinates and the third is the area of the object. The radius of each blob / object can be estimated using this column (object area).
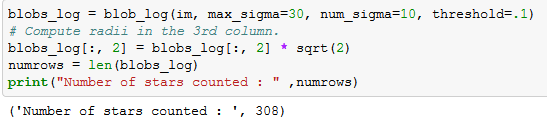
As we can see, the algorithm has estimated 308 visible stars. Let's now see how accurate these readings are.
Paso 4: Validated if we capture all the stars
The number 308 it's still coming out of a black box. Let's see if we have correctly detected all the stars. For it, I'm circling every estimated position of the stars. And the look at the image if we are missing a star.
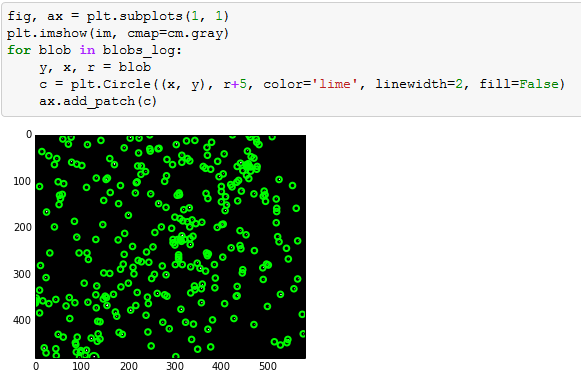
Here is the complete code:
from matplotlib import pyplot as plt
from skimage import data
from skimage.feature import blob_dog, blob_log, blob_doh
from math import sqrt
from skimage.color import rgb2gray
import glob
from skimage.io import imread
example_file = glob.glob(r"C:UsersTavishDesktopwint_sky.gif")[0]
im = imread(example_file, as_grey=True)
plt.imshow(im, cmap=cm.gray)
plt.show()
blobs_log = blob_log(im, max_sigma=30, num_sigma=10, threshold=.1)
# Compute radii in the 3rd column.
blobs_log[:, 2] = blobs_log[:, 2] * sqrt(2)
numrows = len(blobs_log)
print("Number of stars counted : " ,numrows)
fig, ax = plt.subplots(1, 1)
plt.imshow(im, cmap=cm.gray)
for blob in blobs_log:
    Y, x, r = blob
    c = plt.Circle((x, Y), r+5, color="lime", linewidth=2, fill=False)
    ax.add_patch(c)
Final notes
Image processing is fascinating!! I started my journey with Python image processing no more than 5 days. For the benefit of the community, I will encourage you to share any suggestion or best practice in this forum. This exercise may not have any practical application, but similar analyzes can be performed for purity estimates. For instance, in the glass industry we need the amount of silica particles in the glass at a microscopic level. When capturing the frames in a video, you can use this simple code to do many things. For instance, traffic estimation through CCTV images. This code can be easily adapted to achieve the same.
Was the article helpful to you? If you have done similar work in Python image processing, share them with us. Let us know your thoughts on this item in the box below..





