This article was published as part of the Data Science Blogathon
Introduction
Machine Learning is a field of technology that is developed with immense skills and applications in the automation of tasks, where no human intervention or explicit programming is needed.
The power of machine learning is so great that we can see that its applications are trending almost everywhere in our daily lives.. ML ha resuelto muchos problemas que existían antes y ha hecho que las empresas en el mundo progresen en gran measureThe "measure" it is a fundamental concept in various disciplines, which refers to the process of quantifying characteristics or magnitudes of objects, phenomena or situations. In mathematics, Used to determine lengths, Areas and volumes, while in social sciences it can refer to the evaluation of qualitative and quantitative variables. Measurement accuracy is crucial to obtain reliable and valid results in any research or practical application.....
Today, we will analyze one of those practical problems and create a solution (model) on our own using ML.
What's so exciting about this?
Good, we will implement our model built using Flask and Heroku applications. At the end, we will have fully functioning web applications in our hands.
Why is it important to implement your model?
Machine learning models generally aim to be a solution to an existing problem or problems. And at some point in your life, you must have thought how would your model be a solution and how would people use this? In fact, people can't use their notebooks and code directly, and that's where you need to implement your model.
You can implement your model, as an API or a web service. Here we are using the Flask micro-framework. Flask defines a set of restrictions for the web application to send and receive data.
Attention price prediction system
We are about to implement an ML model for the prediction and analysis of car sales prices. This type of system is useful for many people.
Imagine a situation where you have an old car and you want to sell it. Of course, you can approach an agent for this and find the market price, but later you will have to pay pocket money for their service when selling your car. But, What if you can find out the sale price of your car without the intervention of an agent? Or if you are an agent, this will definitely make your job easier. Yes, this system has already learned about the previous sales prices for years of various cars.
Then, to be clear, This implemented web application will provide you with the approximate selling price of your car according to the type of fuel, years of service, the price of the showroom, the number of previous owners, the kilometers traveled, if you are a distributor / individual and finally if the type of transmission is manual / automatic. And that's a brownie point.
Any type of modification can also be incorporated later in this application. It is only possible to later make a facility to meet buyers. This is a good idea for a great project that you can try. You can implement this as an application like OLA or any ecommerce application. Machine Learning applications don't end here. In the same way, there are endless possibilities you can explore. But for the moment, let me help you create the model for car price prediction and its implementation process.
Import dataset
The dataset is attached in the GitHub folder. Check here
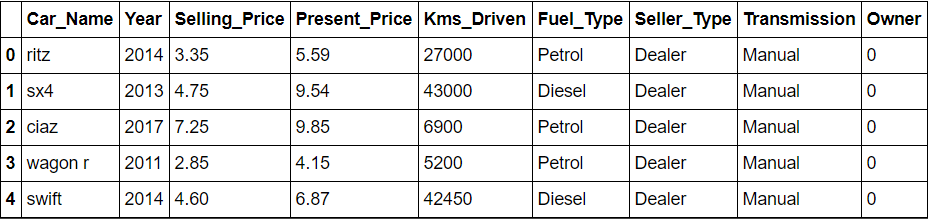
The data consists of 300 rows and 9 columns. Since our goal is to find the selling price, the target attribute and is also the selling price, the remaining characteristics are taken for analysis and predictions.
import numpy as np
import pandas as pd
data = pd.read_csv(r'C:UsersSURABHIOneDriveDocumentsprojectsdatasetscar.csv')
data.head()
Function engineering
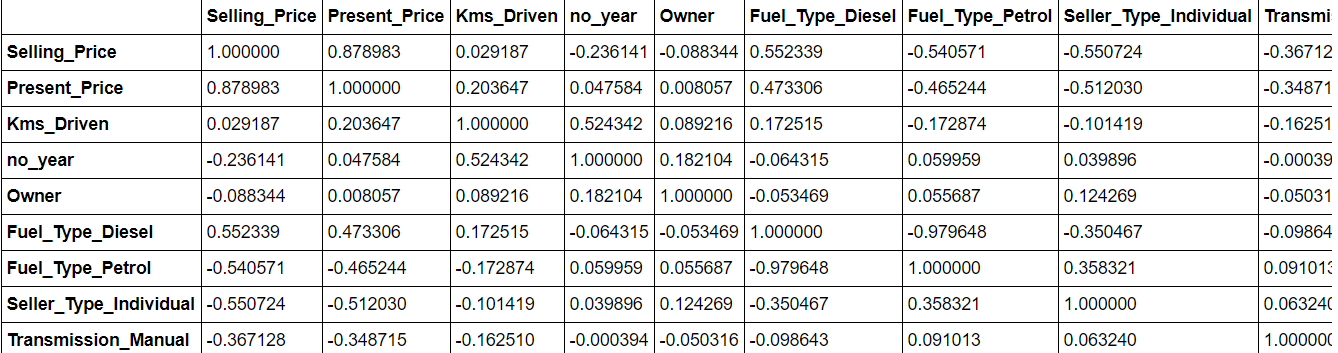
The data. corr () it will give you an idea of the correlation between all the attributes in the dataset. More correlated features can be removed, as they can cause an excessive fit of the model.
data = data.drop(['Car_Name'], axis=1)
data['current_year'] = 2020 data['no_year'] = data['current_year'] - data['Year']
data = data.drop(['Year','current_year'],axis = 1)
data = pd.get_dummies(data,drop_first=True)
data = data[['Selling_Price','Present_Price','Kms_Driven','no_year','Owner','Fuel_Type_Diesel','Fuel_Type_Petrol',
'Seller_Type_Individual','Transmission_Manual']]
data

data.corr()
Then, dividimos los datos en conjuntos de trainingTraining is a systematic process designed to improve skills, physical knowledge or abilities. It is applied in various areas, like sport, Education and professional development. An effective training program includes goal planning, regular practice and evaluation of progress. Adaptation to individual needs and motivation are key factors in achieving successful and sustainable results in any discipline.... and test.
x = data.iloc[:,1:]
y = data.iloc[:,0]
Discover the importance of functions to eliminate unwanted functions
The extratressregressor library allows you to see the importance of features and, Thus, remove the less important characteristics of the data. It is always recommended to remove the unnecessary function because they can definitely produce better accuracy scores.
from sklearn.ensemble import ExtreesRegressor
model = ExtraTreesRegressor()
model.fit(x,Y)

model.feature_importances_

Hyperparameter optimization
This is done to obtain the optimal values for use in our model, this can also to some extent
help to get good results in prediction
n_estimators = [int(x) for x in np.linspace(start = 100, stop = 1200,num = 12)]
max_features = ['auto','sqrt']
max_depth = [int(x) for x in np.linspace(5,30,num = 6)]
min_samples_split = [2,5,10,15,100]
min_samples_leaf  = [1,2,5,10]
grid = {'n_estimators': n_estimators,
        'max_features': max_features,
        'max_depth': max_depth,
        'min_samples_split': min_samples_split,
       'min_samples_leaf': min_samples_leaf}
print(grid)
# Production
{'n_estimators': [100, 200, 300, 400, 500, 600, 700, 800, 900, 1000, 1100, 1200],
'max_features': ['auto', 'sqrt'],
'max_depth': [5, 10, 15, 20, 25, 30],
'min_samples_split': [2, 5, 10, 15, 100],
'min_samples_leaf': [1, 2, 5, 10]}
Split train test
from sklearn.model_selection import train_test_split    #importing train test split module
x_train, x_test,y_train,y_test = train_test_split(x,Y,random_state=0,test_size=0.2)
Training the model
We have used the random forest regressor to predict selling prices as this is a regression problem and that random forest uses multiple decision trees and has shown good results for my model.
from sklearn.ensemble import RandomForestRegressor model = RandomForestRegressor()
hyp = RandomizedSearchCV(estimator = model,
                        param_distributions=grid,
                        n_iter=10,
                       scoring= 'neg_mean_squared_error'
                        cv=5,verbose = 2,
                        random_state = 42,n_jobs = 1)
hyp.fit(x_train,y_train)

hyp is a model created using the optimal hyperparameters obtained through random search cross-validation
Production
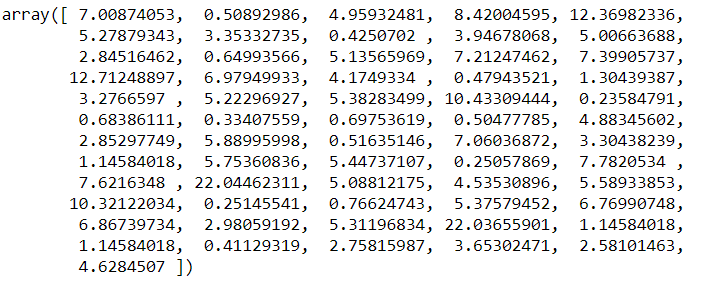
Now we finally use the model to predict the test data set.
y_pred = hyp.predict(x_test)
y_pred
To use the Flask framework for deployment, all this model needs to be packaged and imported into Python file to create web applications. Therefore, we dump our model in the pickle file using the given code.
import pickle
file = open("file.pkl", "wb") # opening a new file in write mode
pickle.dump(hyp, file) # dumping created model into a pickle file
Complete code
https://github.com/SurabhiSuresh22/Car-Price-Prediction/blob/master/car_project.ipynb
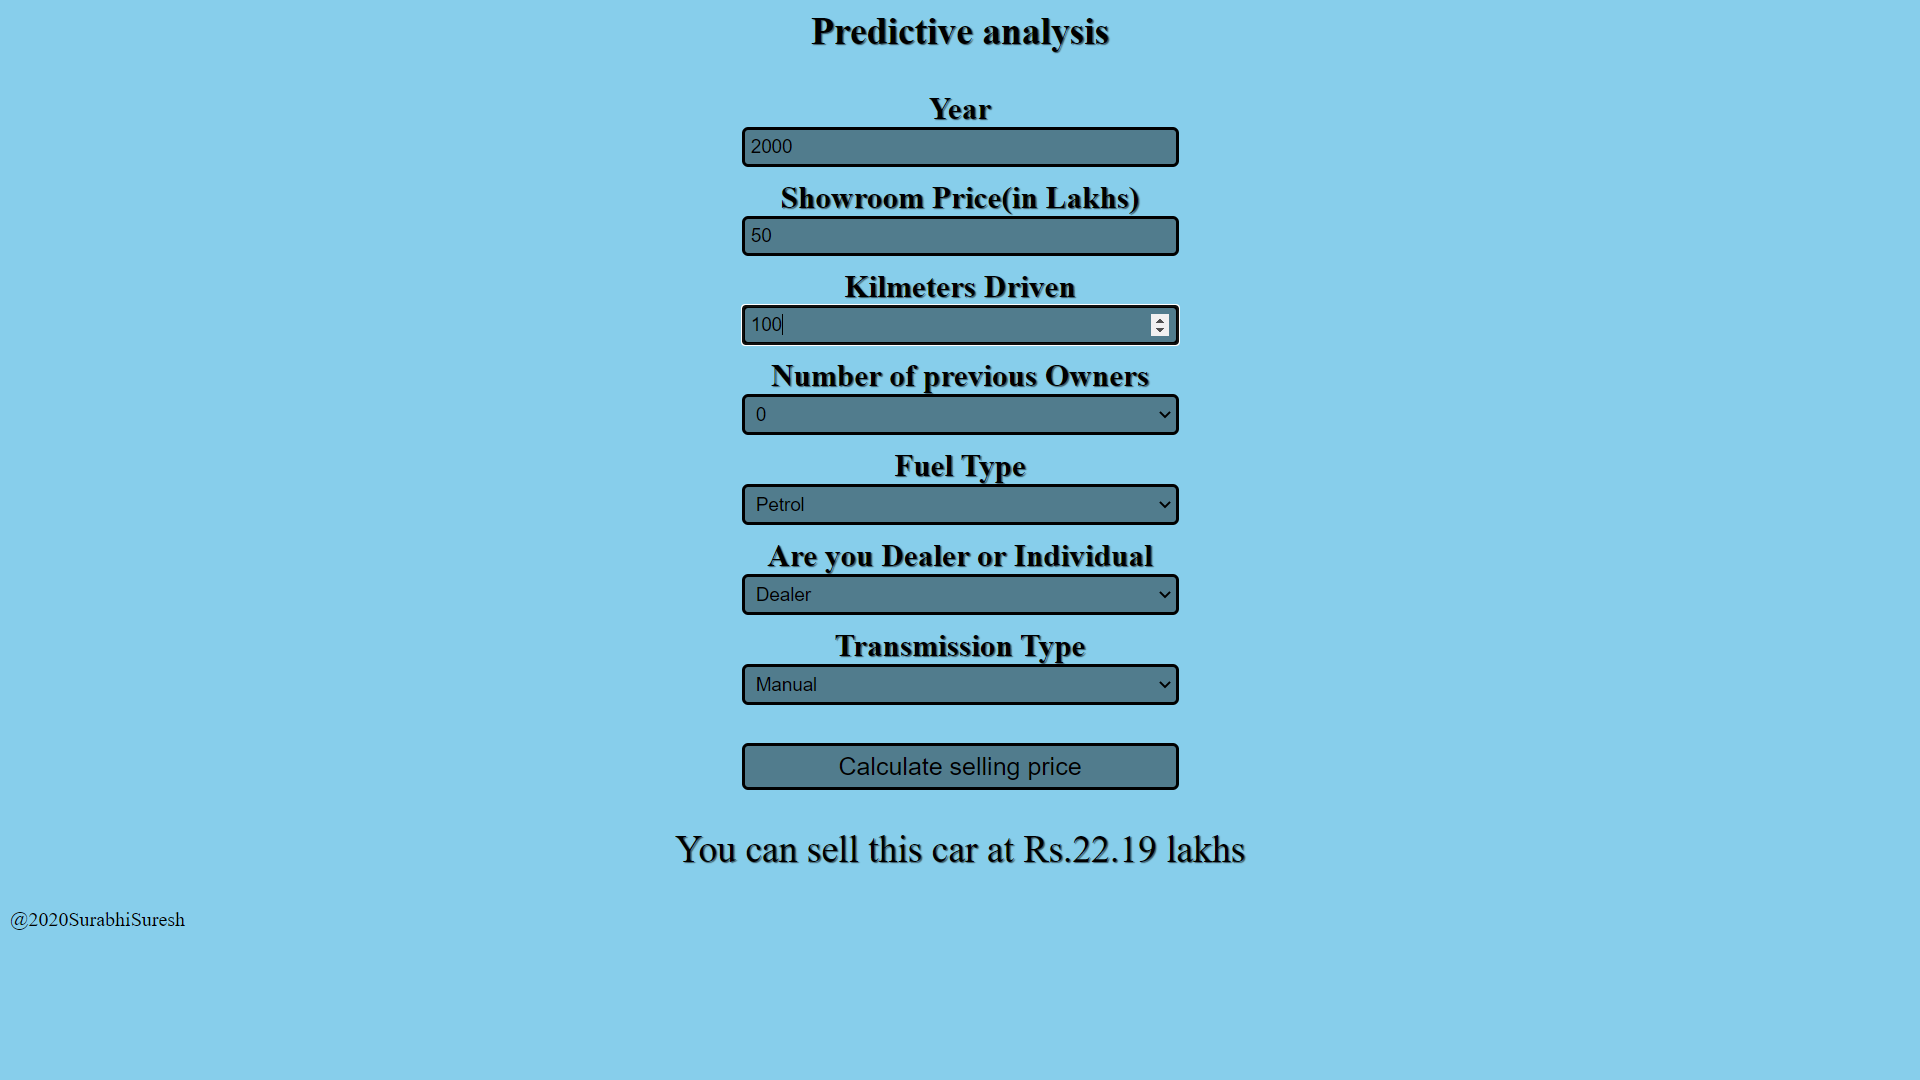
Flask frame
What we need is a web application that contains a form to take the user input and return the predictions of the model. Then, we will develop a simple web application for this. The interface is done using simple HTML and CSS. I advise you to review the basics of web development to understand the meaning of the code written for the interface. It would also be great if I knew the frame of the flask. Cross is video if you are new to FLASK.
Let me explain you, briefly, what I have coded using FLASK.
Then, let's start the code by importing all required libraries used here.
from flask import Flask, render_template, request
import pickle
import requests
import numpy as np
How do you know, we have to import the saved model here to make predictions from the data provided by the user. So we are importing the saved model
model = pickle.load(open("model.pkl", "rb"))
Now let's go to the code to create the actual flask application.
app = Flask(_name_)
@app.route("/") # this will direct  us to the home page when we click our web app link
def home():
      return render_template("home.html")  # home page
@app.route("/predict", methods = ["POST"]) # this works when the user click the prediction button
def predict():
      year = int(request.form["year"]) # taking year input from the user
      tot_year = 2020 - year
      present_price = float(request.form["present_price"]) #taking the present prize
      fuel_type = request.form["fuel_type"] # type of fuel of car
      # if loop for assigning numerical values
      if fuel_type == "Petrol":
            fuel_P = 1
            fuel_D = 0
      else:
            fuel_P = 0
            fuel_D = 1
      kms_driven = int(request.form["kms_driven"]) # total driven kilometers of the car
      transmission = request.form["transmission"] # transmission type
      # assigning numerical values
      if transmisson == "Manuel":
            transmission_manual = 1
      else:
            transmission_manual = 0
      seller_type = request.form["seller_type"] # seller type
      if seller_type == "Individual":
             seller_individual = 1
      else:
             seller_individual = 0
      owner = int(request.form["owner"])  # number of owners
      values = [[
        present_price,
        kms_driven,
        owner,
        tot_year,
        fuel_D,
        fuel_P,
        seller_individual,
        transmission_manual
      ]]
      # created a list of all the user inputed values, then using it for prediction
      prediction = model.predict(values)
      prediction = round(prediction[0],2)
      # returning the predicted value inorder to display in the front end web application
      return render_template("home.html", pred = "Car price is {} Lakh".format(float(prediction)))
if _name_ == "_main_":
     app.run(debug = True)
Implementation with Heroku
All you need to do is connect your GitHub repository containing all the files needed for the project with Heroku. For all those who do not know what Heroku is, Heroku is a platform that allows developers to create, run and operate cloud applications.
This is the link to the web application that I have created using the Heroku platform. Then, we have seen the process of building and implementing a machine learning model. You can also do it, learn more and feel free to try new things and develop them.
https://car-price-analysis-app.herokuapp.com/
Conclution
Then, we have seen the process of building and implementing a machine learning model. You can also do it, learn more and feel free to try new things and develop them. Feel free to connect with me on linked in.
Thanks
The media shown in this article is not the property of DataPeaker and is used at the author's discretion.


