This article was published as part of the Data Science Blogathon.
Overview
- understand GPUs in deep learning.
- Starting with the prerequisites for installing TensorFlow -GPU.
- GPU environment setup and configuration.
- Testing and verifying the GPU installation
“The graphics have done
a big shift towards machine learning, which in itself is about understanding
data”
_ Jefferson Han, Founder and Chief Scientist of Perceptive Pixel
Source: Google images
Understand GPUs in deep learning
CPUs can retrieve data at a faster rate, but they cannot process more data at the same time, since the CPU has to do many iterations in main memory to perform a simple task. Secondly, the GPU comes with its own VRAM memory (Video RAM) dedicated, Thus, makes fewer calls to main memory, so it's fast
CPU runs jobs sequentially and has fewer cores, but GPUs come with hundreds of smaller cores that work in parallel, which makes the GPU a highly parallel architecture, which improves performance.
Starting with the prerequisites for installing TensorFlow – GPU
The Tensorflow GPU can only work if you have a CUDA-enabled graphics card. All newer NVidia graphics cards from the last three to four years have enabled CUDA.
But nevertheless, let's pause and check if your graphics card is CUDA enabled, since "Making incorrect assumptions causes pain and suffering to all", dijo Jennifer young.
To check the graphics card details. Open the run window from the Start menu and run Control / name Microsoft.DeviceManager. Graphics card will show up under Display adapters
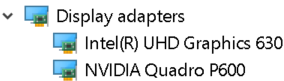
Each machine will be equipped with integrated graphics cards that are placed on the same chip as the CPU and rely on system memory to handle graphics., whereas a discrete graphics card is a separate unit from the CPU and has high graphics processing performance.
GPU capabilities are provided by discrete graphics cards. Therefore, make sure your machine has both integrated graphics and discrete graphics card installed.
The compute capabilities of each Cuda-enabled Nvidia graphics card are listed on the Nvidia website. Only if discrete graphics card is available in this list, can support TensorFlow GPU.
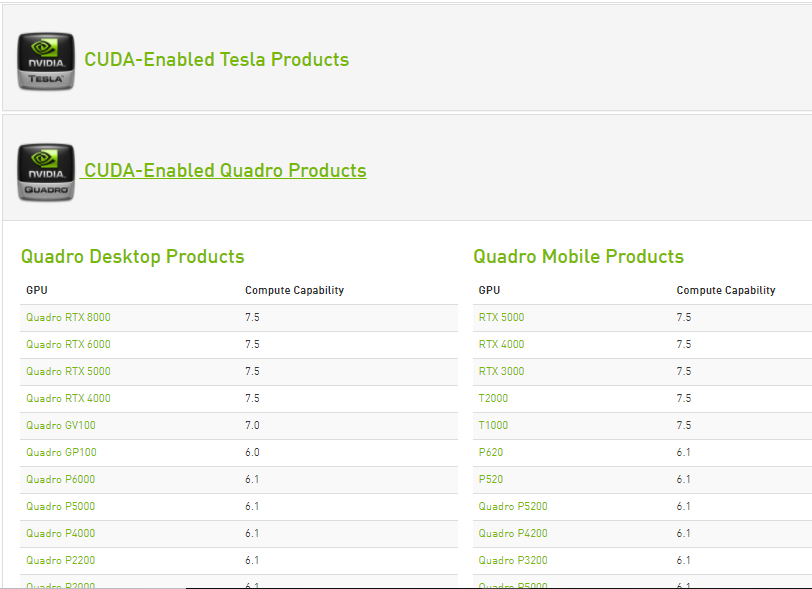
Source: https://developer.nvidia.com/cuda-gpus
Once it is known that the discrete graphics card can support the TensorFlow GPU. Get started with the installation
To ensure that none of the above NVidia settings or settings will not affect the installation, uninstall all NVidia software and graphics drivers (optional step).
Prerequisite facilities required
Paso 1: Visual Studio installation 2017
Microsoft Visual Studio is a Microsoft integrated development environment used to develop computer programs, as well as websites, Web applications, web services and mobile applications.
The CUDA Toolkit includes Visual Studio and NSight IDE project templates (which you can use from Visual Studio). We need to install the VC toolkit ++ 2017 (CUDA is not yet compatible with the latest version of Visual Studio).
- Visual Studio can be downloaded from Microsoft's Visual Studio official website. Download the software by selecting the workload ‘Desktop development with c ++’ and install it.
- Cuda toolkit during installation, install the necessary libraries and then check the versions of Visual Studio available on the system and then install the Visual Studio integrations. Therefore, having a Visual Studio installed on the system is a mandatory step to follow.
Paso 2: Download and install the NVIDIA driver
Nvidia driver is the software driver for Nvidia Graphics GPU installed on the PC. It is a program used to communicate from the Windows PC operating system to the device. This software is necessary in most cases for the hardware device to function properly.
To download, Navigate to the Nvidia.com download page and provide all the graphics card and system details in the drop-down menus. Click search and we will provide you with the download link.
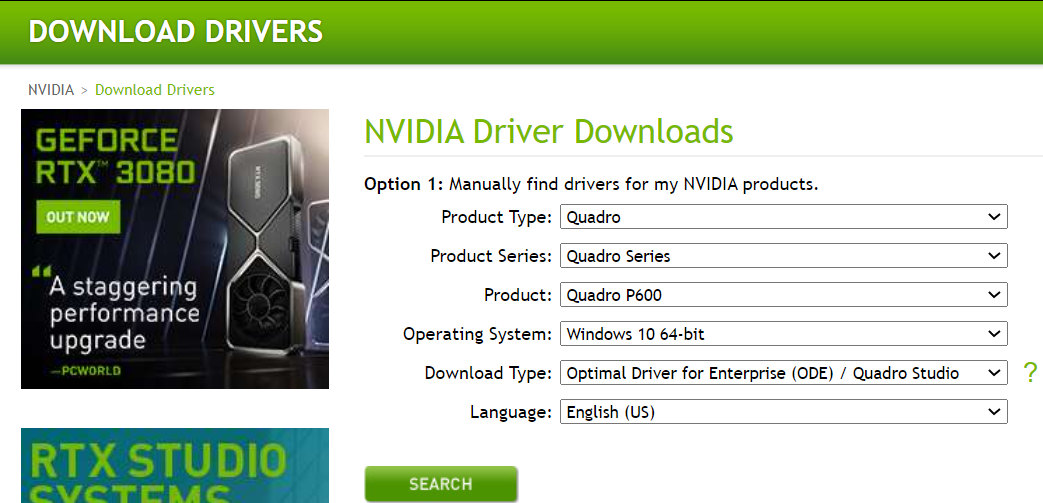
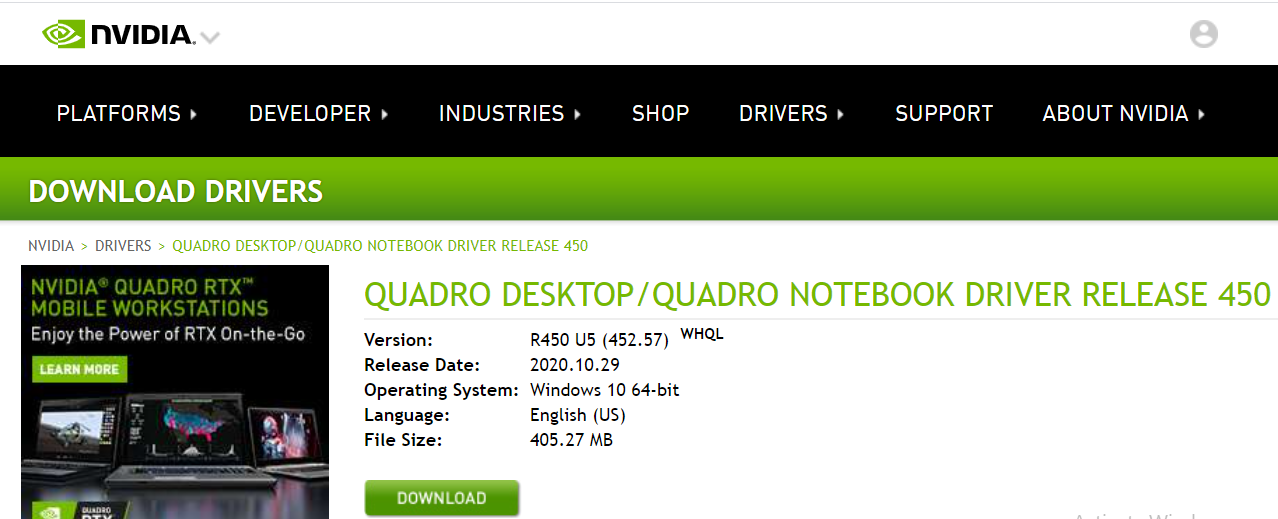
Install the drivers downloaded from Nvidia
once installed, we should get a folder NVidia GPU computing toolkit in the program files of drive C that contains the subfolder CUDA inside.
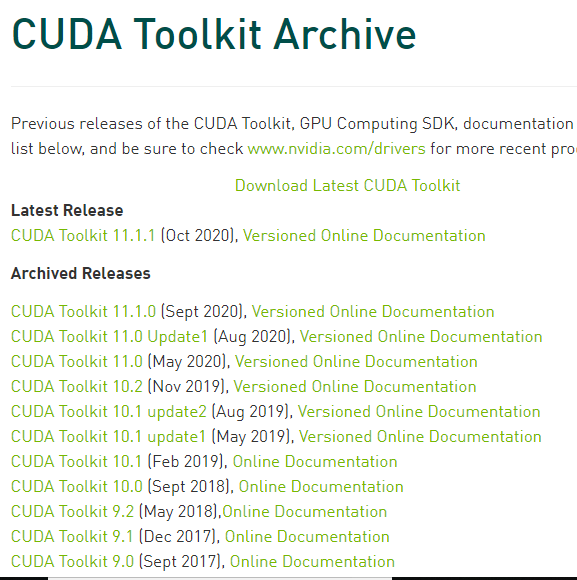
Paso 3: Cuda Toolkit
The Nvidia CUDA Toolkit provides a development environment for creating high-performance GPU-accelerated applications. With the CUDA Toolkit, can develop, optimize and deploy your applications on GPU-accelerated embedded systems, desktop workstations, enterprise data centers, cloud-based platforms and HPC supercomputers. Toolkit includes GPU accelerated libraries, debugging and optimization tools, a C compiler / C ++ and a runtime library to build and deploy your application on all major architectures, including x86, Arm y POWER.
There are several versions of CUDA that are compatible with Tensorflow. We can find the current version of Cuda compatible with TensorFlow, on the TensorFlow GPU support webpage.
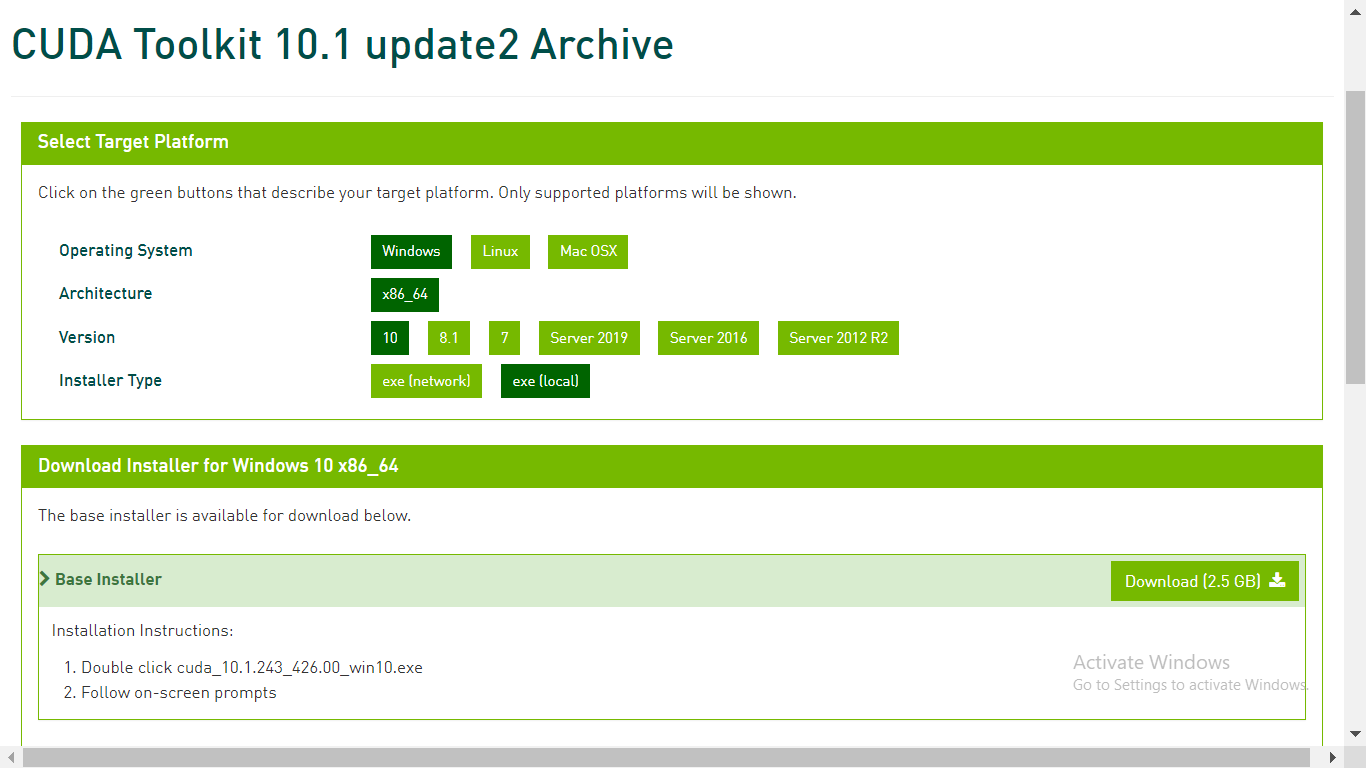
In the CUDA toolkit file on developer.nvidia.com, download the required CUDA toolkit
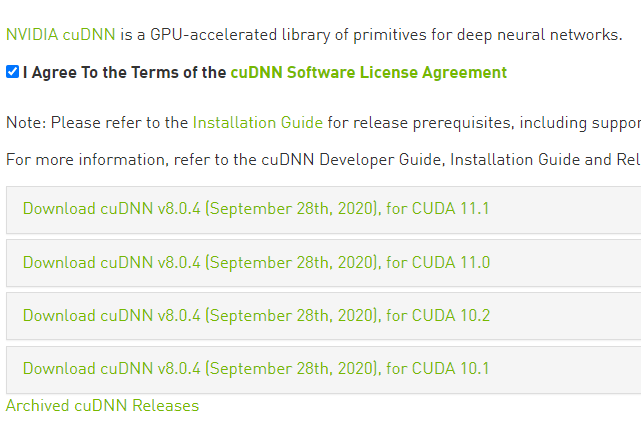
Paso 4: Download cuDNN
cuDNN is a library with a set of optimized low-level primitives to increase the processing speed of deep neural networks (DNN) on CUDA-compatible GPUs.
Go to the cuDNN download web page at developer.nvidia.com and download the version of cuDNN that is compatible with the version of CUDA.
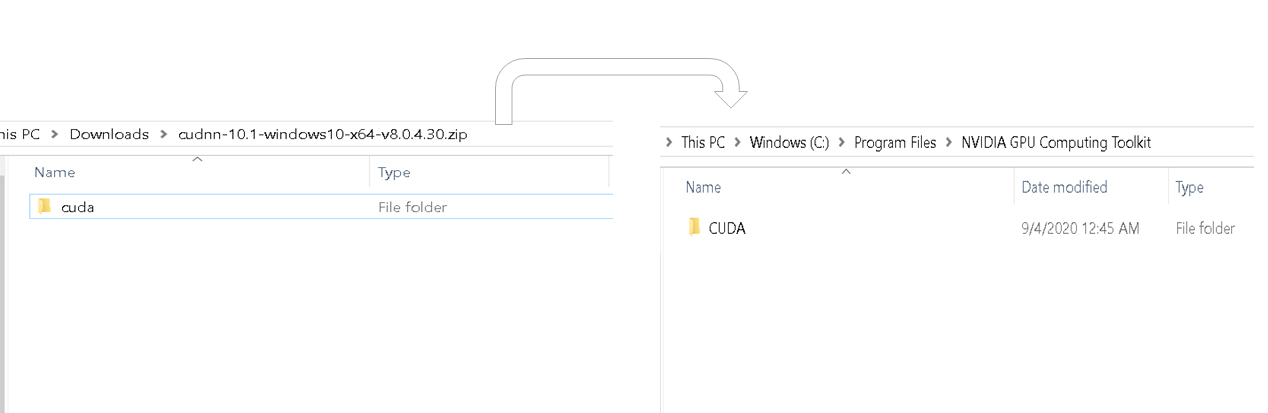
Once the download is complete, extract the downloaded folder. The downloaded folder should contain the CUDA folder and this CUDA folder should match in content with the CUDA folder in the NVidia GPU Calculation Toolkit Program Files folder. Please refer to the picture below.
Copy cudnn64_88.dll from the bin of the last extracted folder and paste it into the similar bin folder inside the Cuda folder of the Nvidia GPU Computing Toolkit.
Copy the cudnn.h file from the include subfolder of the last extracted folder and paste it into the similar bin folder within the Cuda folder of the Nvidia GPU computing toolkit.
Copy the cudnn.lib file from lib> X64 folder subfolder of the last extracted folder and paste it into the similar bin folder inside the Cuda folder of the Nvidia GPU Computing Toolkit.
We have now completed the download and installation of Cuda for GPU. Let's set up the environment.
GPU environment setup and configuration
Anaconda is a Python distribution that helps to set up a virtual environment. Assuming anaconda is already installed, let's start with creating a virtual environment.
Paso 1: Create an environment variable
Create a virtual environment from the command prompt using the command – conda create -n [env_name] python = [python_version]
Tensor flow only supports some versions of Python. Choose a version of Python that supports tensor while creating an environment.
Then, activate the virtual environment using the command – Activate [env_name].
Within the virtual environment created, install the latest version of the tensor flow GPU using the command – pip install – ignore-installed –upgrade TensorFlow-GPU
Once we're done with the tensor flow GPU installation, check if your machine has basic python packages like pandas, numpy, jupyter y Hard. if they don't exist, install them.
Install ipykernel via command – pip install ipykernel
Let's set the display name and bind the kernel to the virtual environment variable using the command – python –m ipykernel install –user –name [env_name] –Display-name "any name".
Paso 2: set python kernel to jupyter.
Open jupyter notebook and from menu bar click kernel and change kernel to environment variable we just set
Test and verify the GPU installation.
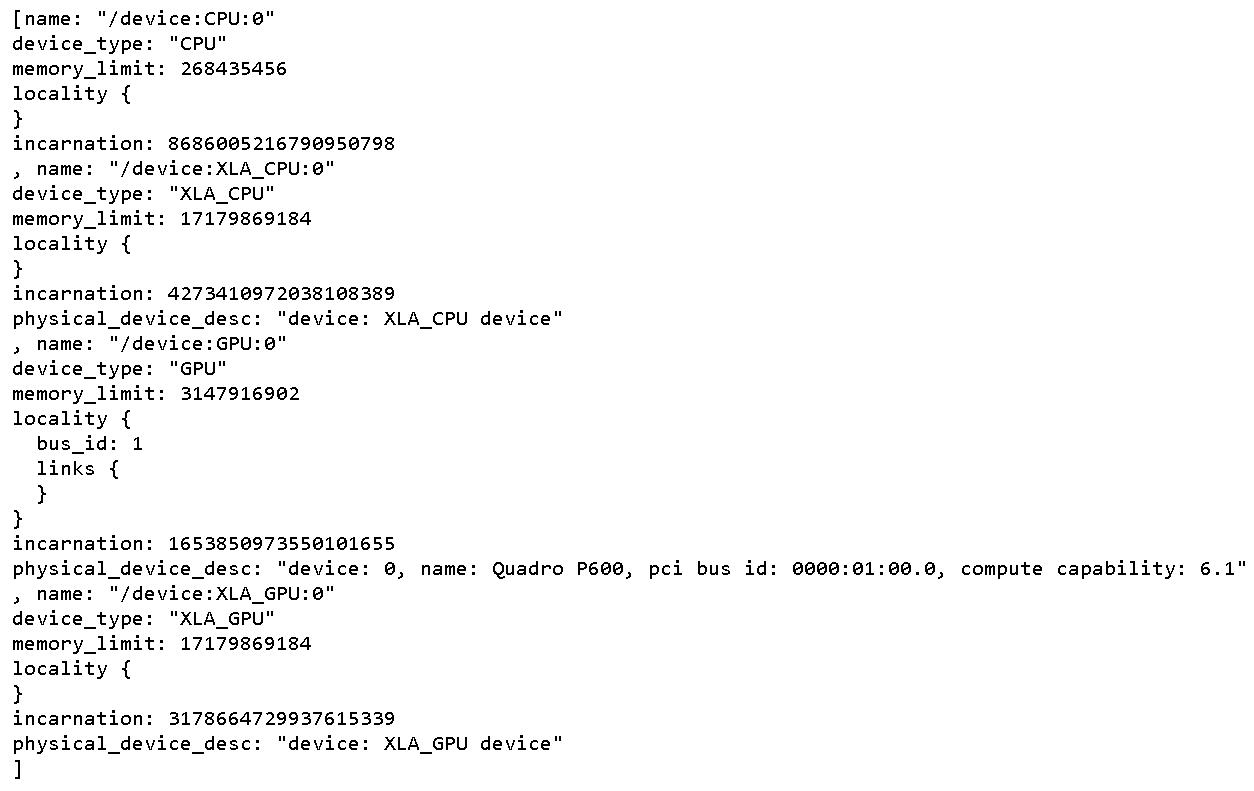
To check all physical GPU devices available for TensorFlow. Run the following code
From tensorflow.python.client import device_lib
print(device_lib.list_local_devices())
This prints all the devices available for Tensorflow
To check if CUDA is enabled for TensorFlow, run the following code
Import tensorflow as tf
print(tf.test.is_built_with_cuda())
The output will be a boolean value that returns true if TensorFlow is compiled with CUDA
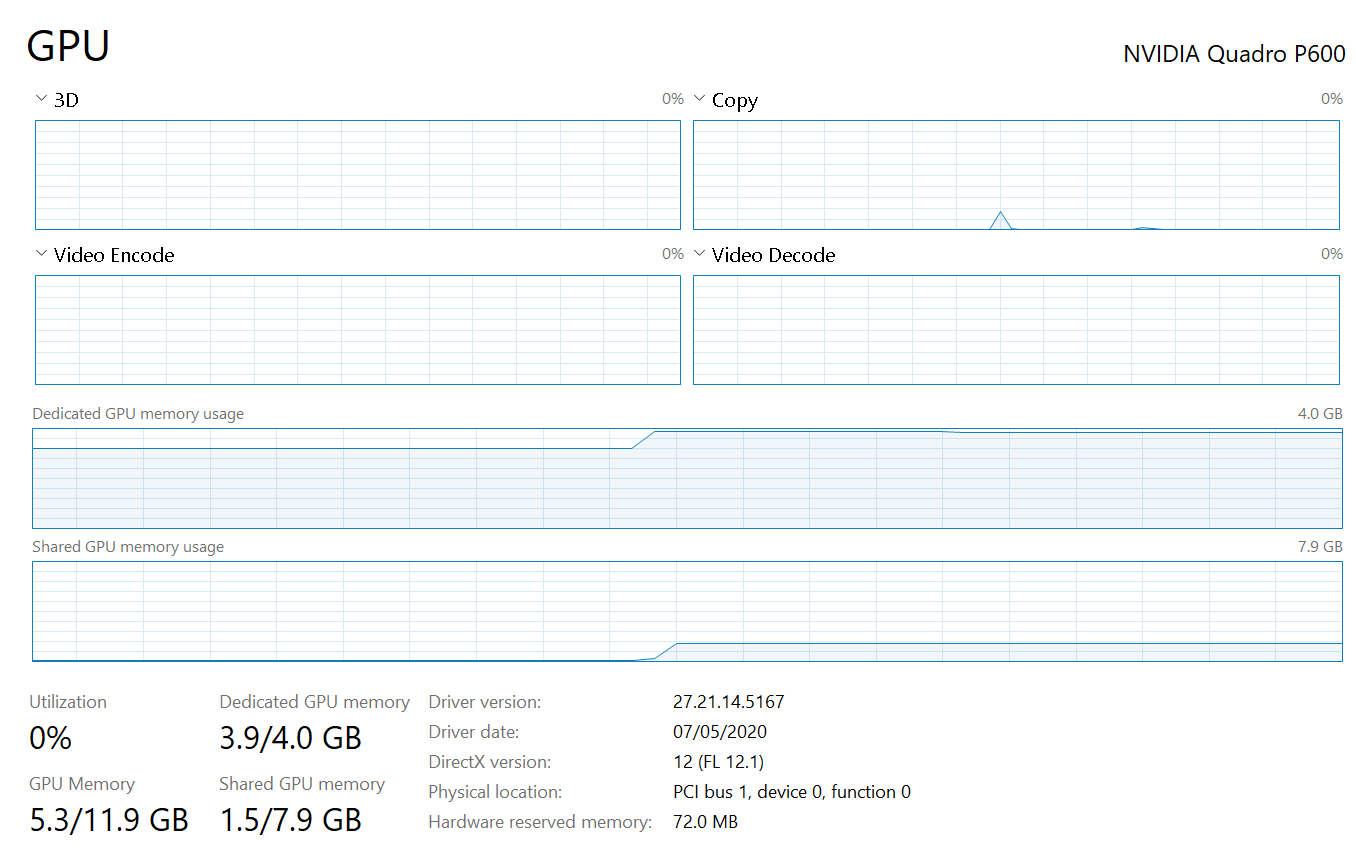
To find out if the GPU wakes up during runtime, start the execution of any complex neural network.
The task manager shows the utilization of the GPU and the memory occupied for the execution of the Tensorflow program.
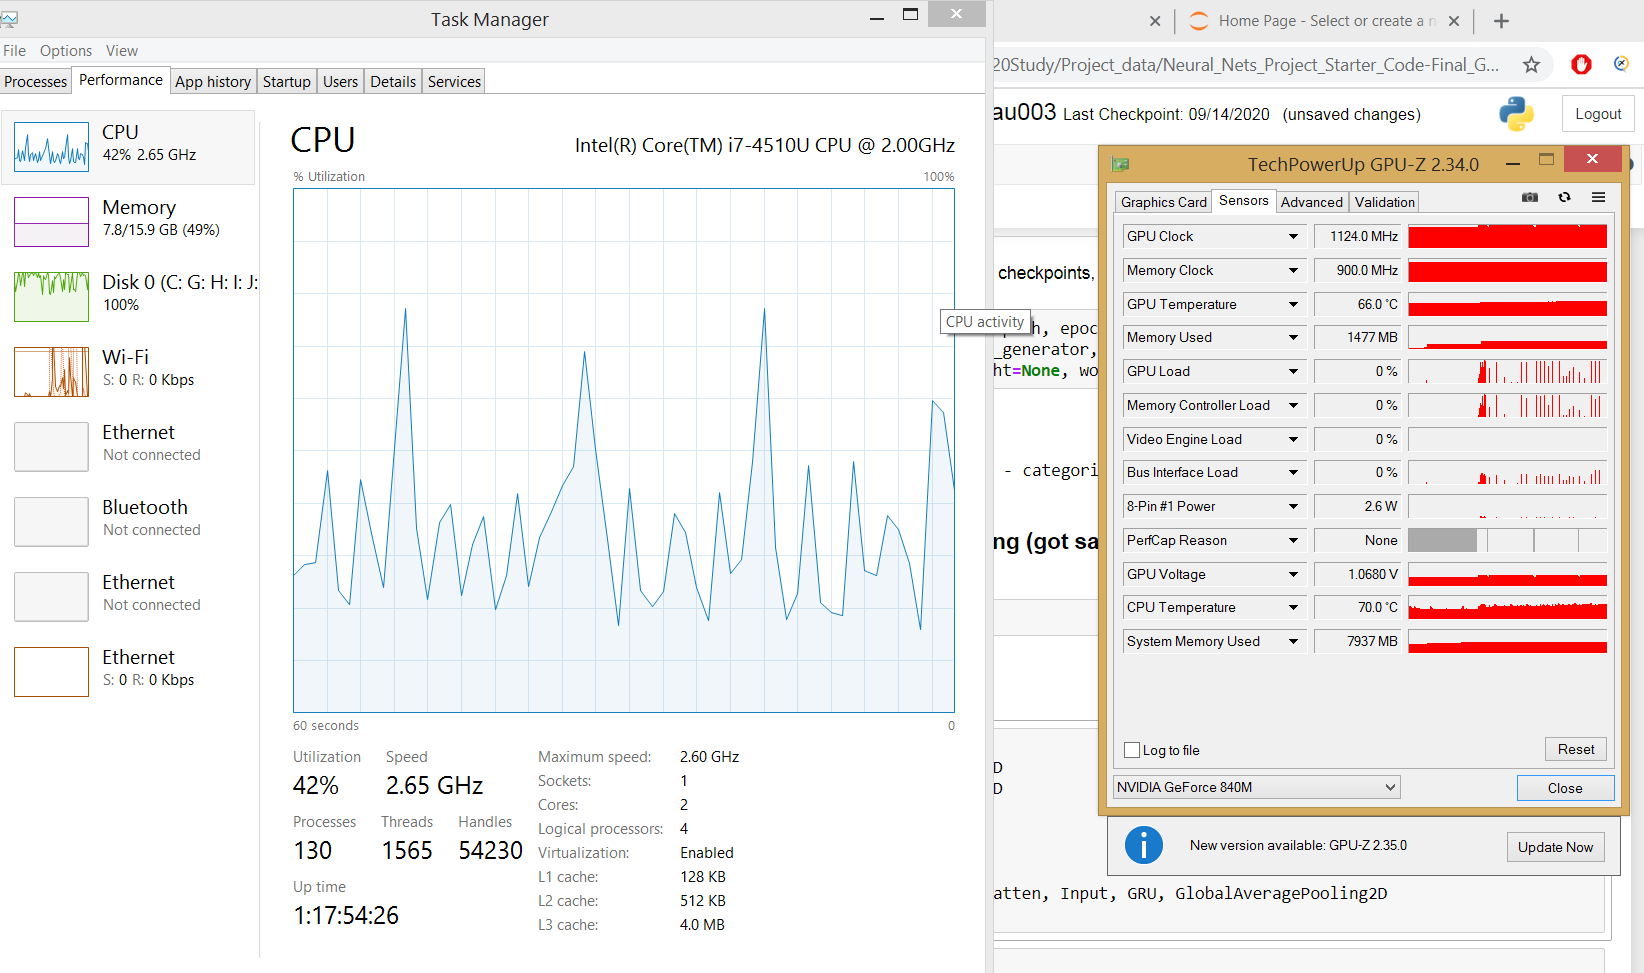
if the process tab of the task manager does not show GPU utilization, which is a scenario for machines running on Windows operating system 8.1, use third party tools like GPUZ to observe GPU utilization
Now the complete GPU installation and configuration is completed.
Conclution
-
- There are many free GPU cloud computing platforms that could speed up our GPU calculations in deep neural networks. So give them a try if your machine doesn't contain a dedicated GPU.
- All the above installation steps depend on each other, so we must follow the same sequence as mentioned above.
- There is no way we can debug why our machine cannot consume dedicated GPU, so don't miss any of the steps.


