You have 15 minutes? Good, You now have everything you need to be able to integrate Microsoft's cognitive image recognition service into your Sharepoint libraries and start auto-tagging your images according to their content for free and without the need for code..
How? Once again the key is in the FLOW
Currently the workflow creation and automation service Microsoft Flow Not only does it have a wide range of connections to manage items in Sharepoint libraries and lists, it also has multiple connectors for Microsoft's Cognitive Services, including service Computer Vision API.
This service that has a free version up to 5000 requests / my, will allow us to extract the data from the image and among its applications we have the ability to know keywords or “labels” that provide us with relevant information about it, and then save them as metadata associated with said image in Sharepoint.
STEPS TO FOLLOW:
- Configure a Sharepoint library where to store the images
- Configure the Azure Computer Vision API resource
- Configure a flow that is launched when a new image is stored and sends its content to our image recognition API
-
ADDITIONAL CHARACTERISTICS
FIRST STEP: SETTING UP OUR LIBRARY
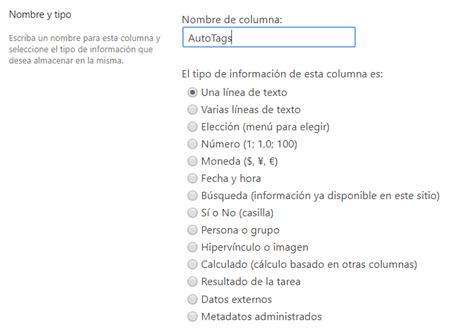
In order to use the image recognition capabilities we will first have to establish where these will be stored and what will be the field where we add the labeling, for this we will use a Sharepoint library and create a column that we will call AutoTags.
SECOND STEP: CONFIGURE OUR COGNITIVE VISION API SERVICE
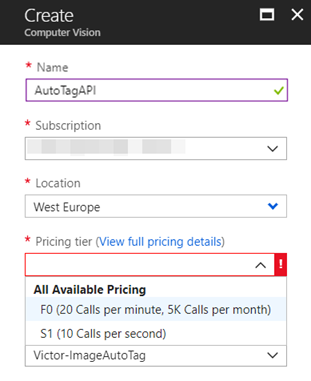
To register the cognitive image recognition service, just go to the Azure portal and add a new resource indicating its name, the subscription where you will stay, the deployment location and the resource group to which it will belong.

Before selecting where we will implement this service, it is necessary to verify that it is available in that region.
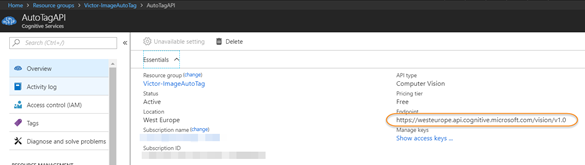
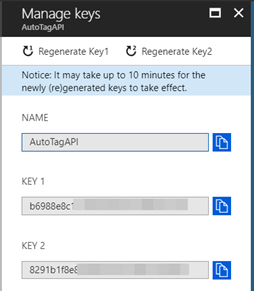
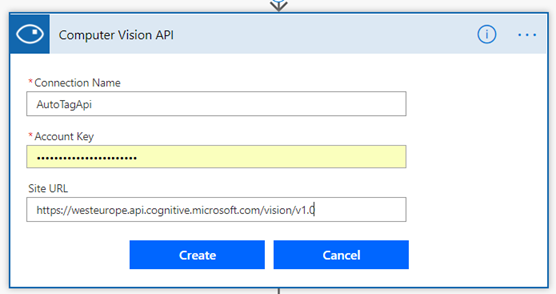
Once the service is registered, we will need to point the name of the connection to the API, the Account Key and the end point to access this service.
THIRD STEP: SET THE FLOW
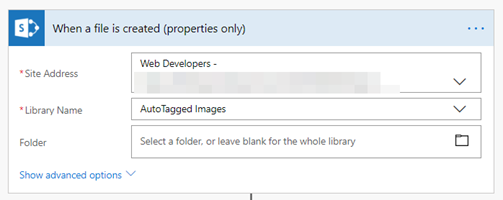
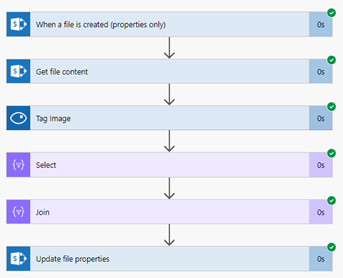
We access Flow and create a new flow that will be launched when a new file is created in a selected Sharepoint site and library:
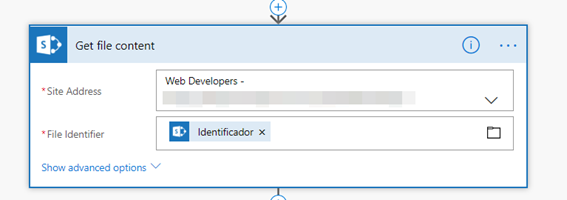
Once this is done, We will retrieve the data of the image that has just been stored in the Sharepoint to send it to our image recognition API.
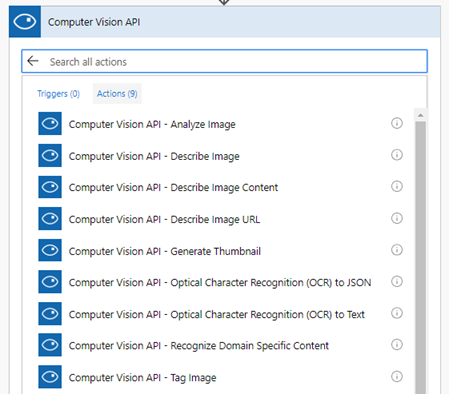
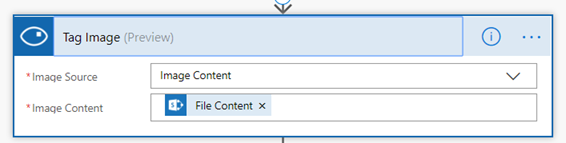
At this point we will connect the Flow to our API with the capacity Label Image indicating the parametersThe "parameters" are variables or criteria that are used to define, measure or evaluate a phenomenon or system. In various fields such as statistics, Computer Science and Scientific Research, Parameters are critical to establishing norms and standards that guide data analysis and interpretation. Their proper selection and handling are crucial to obtain accurate and relevant results in any study or project.... which we pointed out in the previous step.
Then we will indicate that the shipment will be directly the content and not from the url and we will indicate that this is the output of the previous step.
Now it will only be necessary to adapt the JSONJSON, o JavaScript Object Notation, It is a lightweight data exchange format that is easy for humans to read and write, and easy for machines to analyze and generate. It is commonly used in web applications to send and receive information between a server and a client. Its structure is based on key-value pairs, making it versatile and widely adopted in software development.. of the result to an array of comma-separated characters, for this we will use the Select and Join functions.
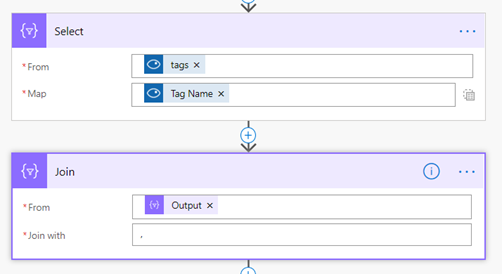
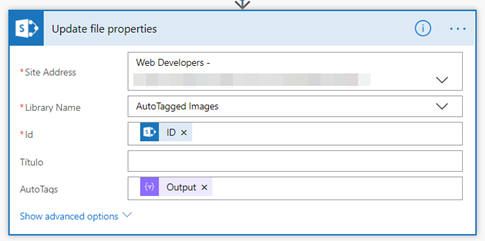
Finally, we will just have to add this label array to the column we created in step 1 for the image we are dealing with.
AND READY!
We save the Flow and proceed to run it to check its operation:
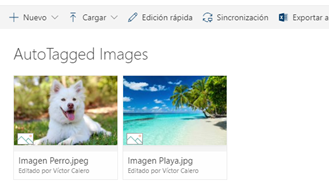
Once the images are uploaded, we check that the Flow runs correctly.
We can see the JSON that our image recognition service returns.

And finally the result in the AutoTags column

PASO 4: THIS IS NOT EVERYTHING, THERE IS MUCH MORE
As we have seen, the multiple abilities that this cognitive service has, added to the ease of connection with other applications thanks to Microsoft Flow, they allow us to play with multiple settings like adding tags only when they pass a specific success percentage, generating another stream that reads this tagged field and matches other metadata for more efficient tagging or even concatenates API requests to get more data from the photo, as the description.
We add the function to Flow describe the picture
(This flow is an example, in this case the Describe Image function also includes the labels as output, so it should not be concatenated with the Image Label function) pointing to a new multiline column that we have created in our library earlier.
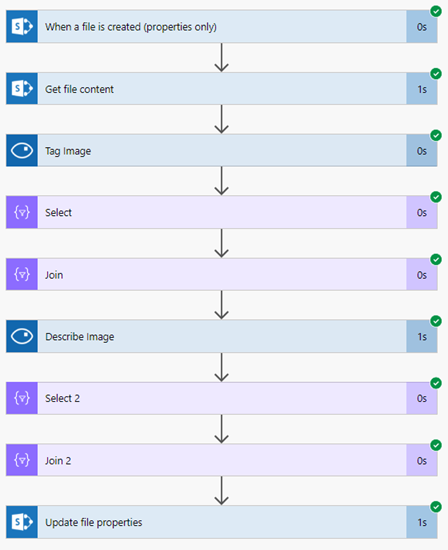
Now our images are self-labeled and also obtain a description in a fully automated way in our Sharepoint including the recognition of famous characters and brands, as in this case Keanu Reeves.


Disclaimer: For the elaboration of this tutorial, no animals related to Keanu Reeves or his alter ego John Wick have been abused.


